This documentation describes a release under development. Documentation for the latest release, 3.6.2, can be found here.
IMAP - Gmail - Setup Account
Mitto uses OAuth 2.0 to gain access to the contents of your Gmail account. This requires the creation of an “app” that will act on your behalf in the Google Cloud Console. Once the app has been created, the credentials associated with the app are used to authenticate Mitto to Gmail when your IMAP job(s) run.
This page will walk you through the steps necessary to create your app within GCP. At a high level, those steps are:
Create a project
Enable the Gmail API
Configure a OAuth consent
Create credentials for the app
Note
You only need to create one “app” within Google Cloud, regardless of the number of IMAP jobs you wish to create. In general, you’ll need one app per Gmail address that you wish to work with.
Create a GCP Project
Login to Google Cloud Console using the Gmail ID you wish to use with your IMAP by navigating to this link:
https://console.cloud.google.com/
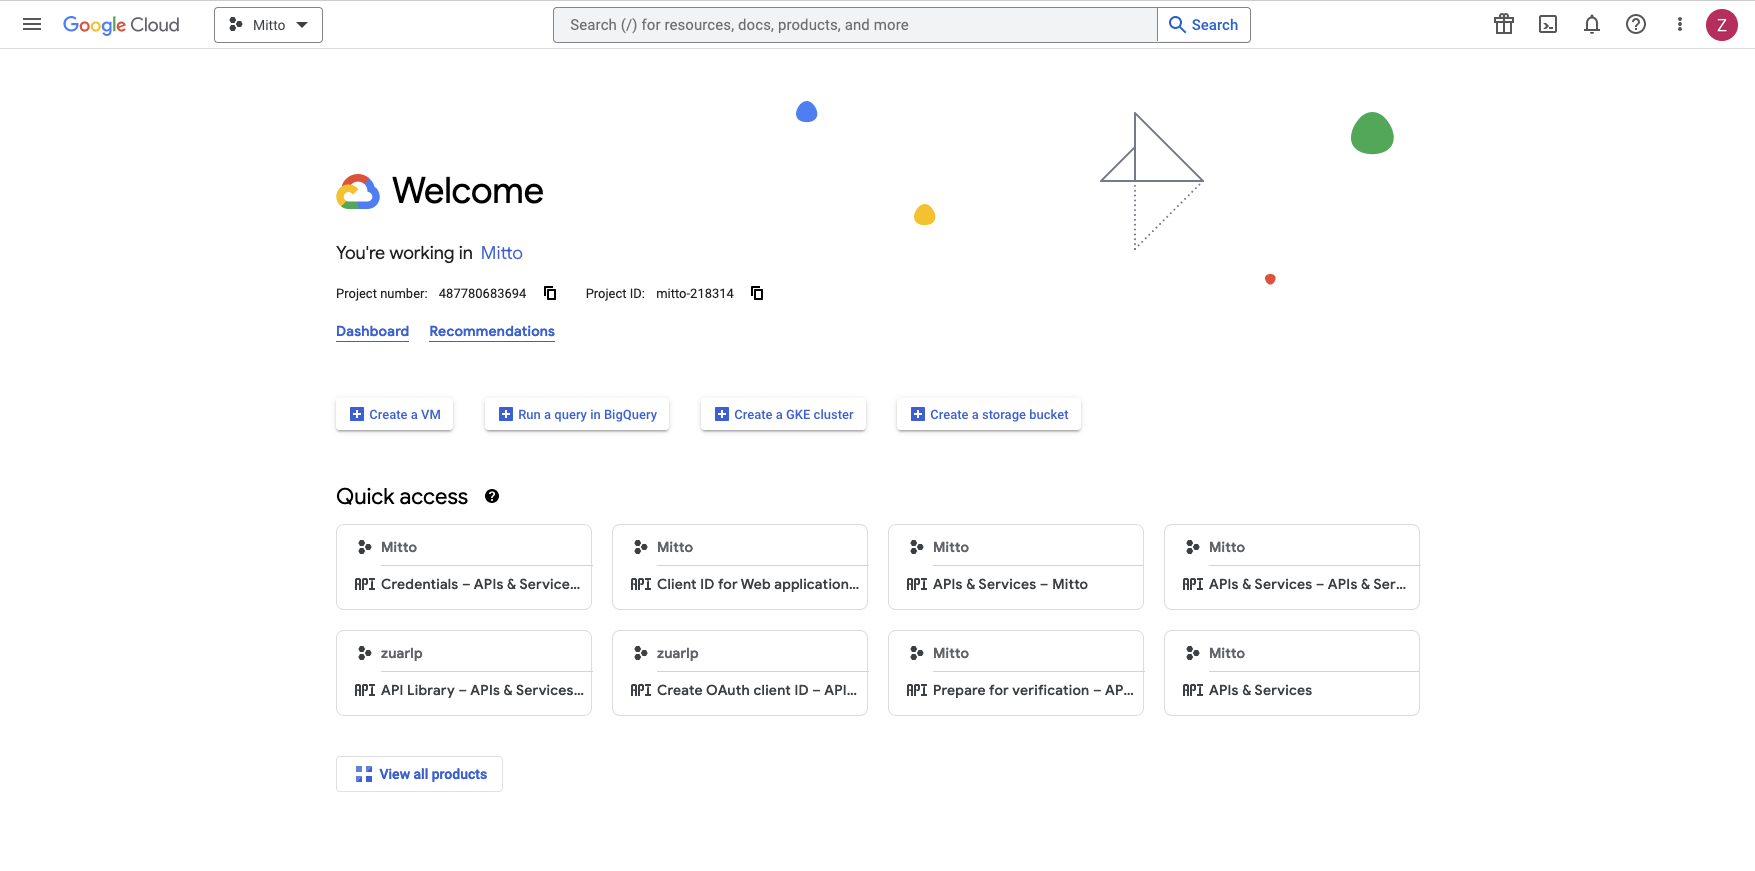
After login, the main GCP dashboard will appear. Your contents will differ from those shown below.
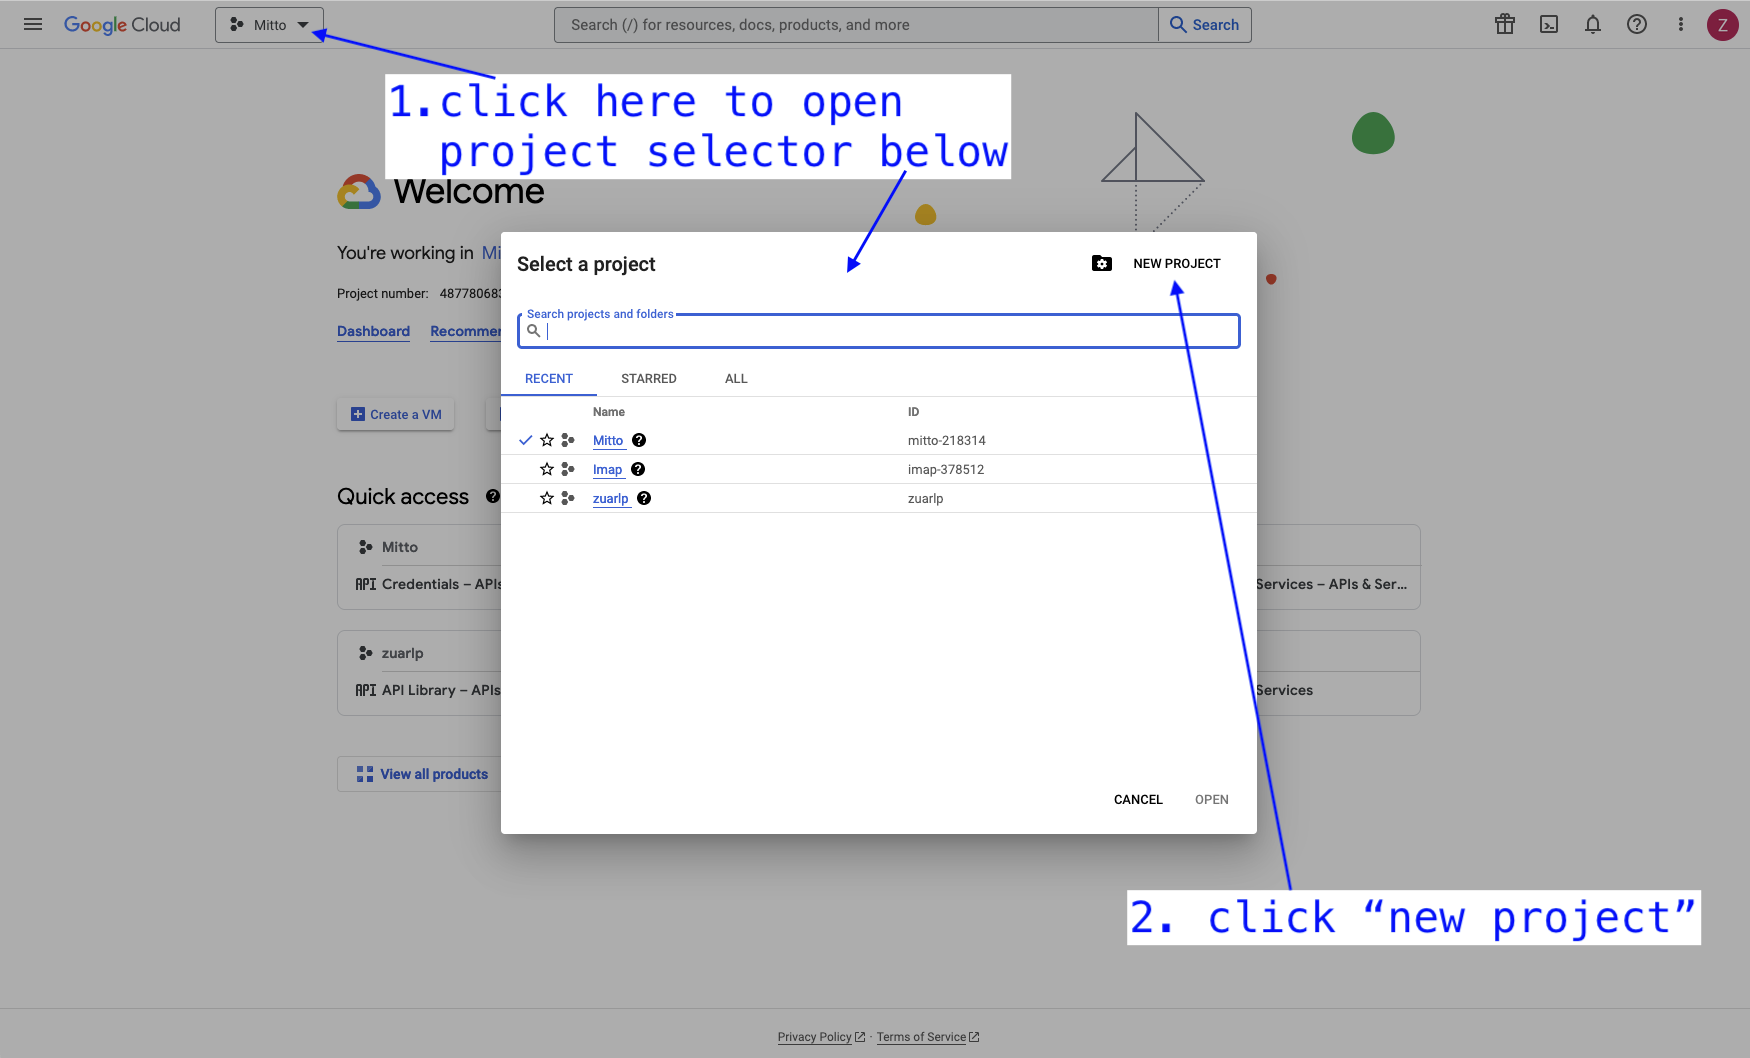
Start creating a project
Click the pulldown at the top left of the page.
A “Select a project” popup will appear
Click “NEW PROJECT” in the top right of the popup
Finish creating your project.
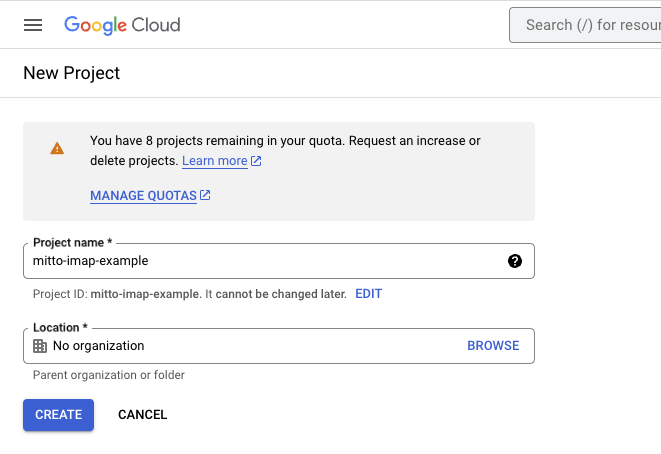
In the “New Project” popup that appears
Enter a project name, we’ll use “mitto-imap-example” in this example.
Click “CREATE”
A notification popup will appear stating that the project is being created. It may take a few minutes for the project to be created.
Make the new project active by choosing it from the project pulldown at the top left of the page.
Enable Gmail API
Enable the Gmail API for the project. From the hamburger icon at the top left of the page, follow “API & Services –> Library” to open the Library page.

Find “Gmail” in the list of APIs and click the icon.
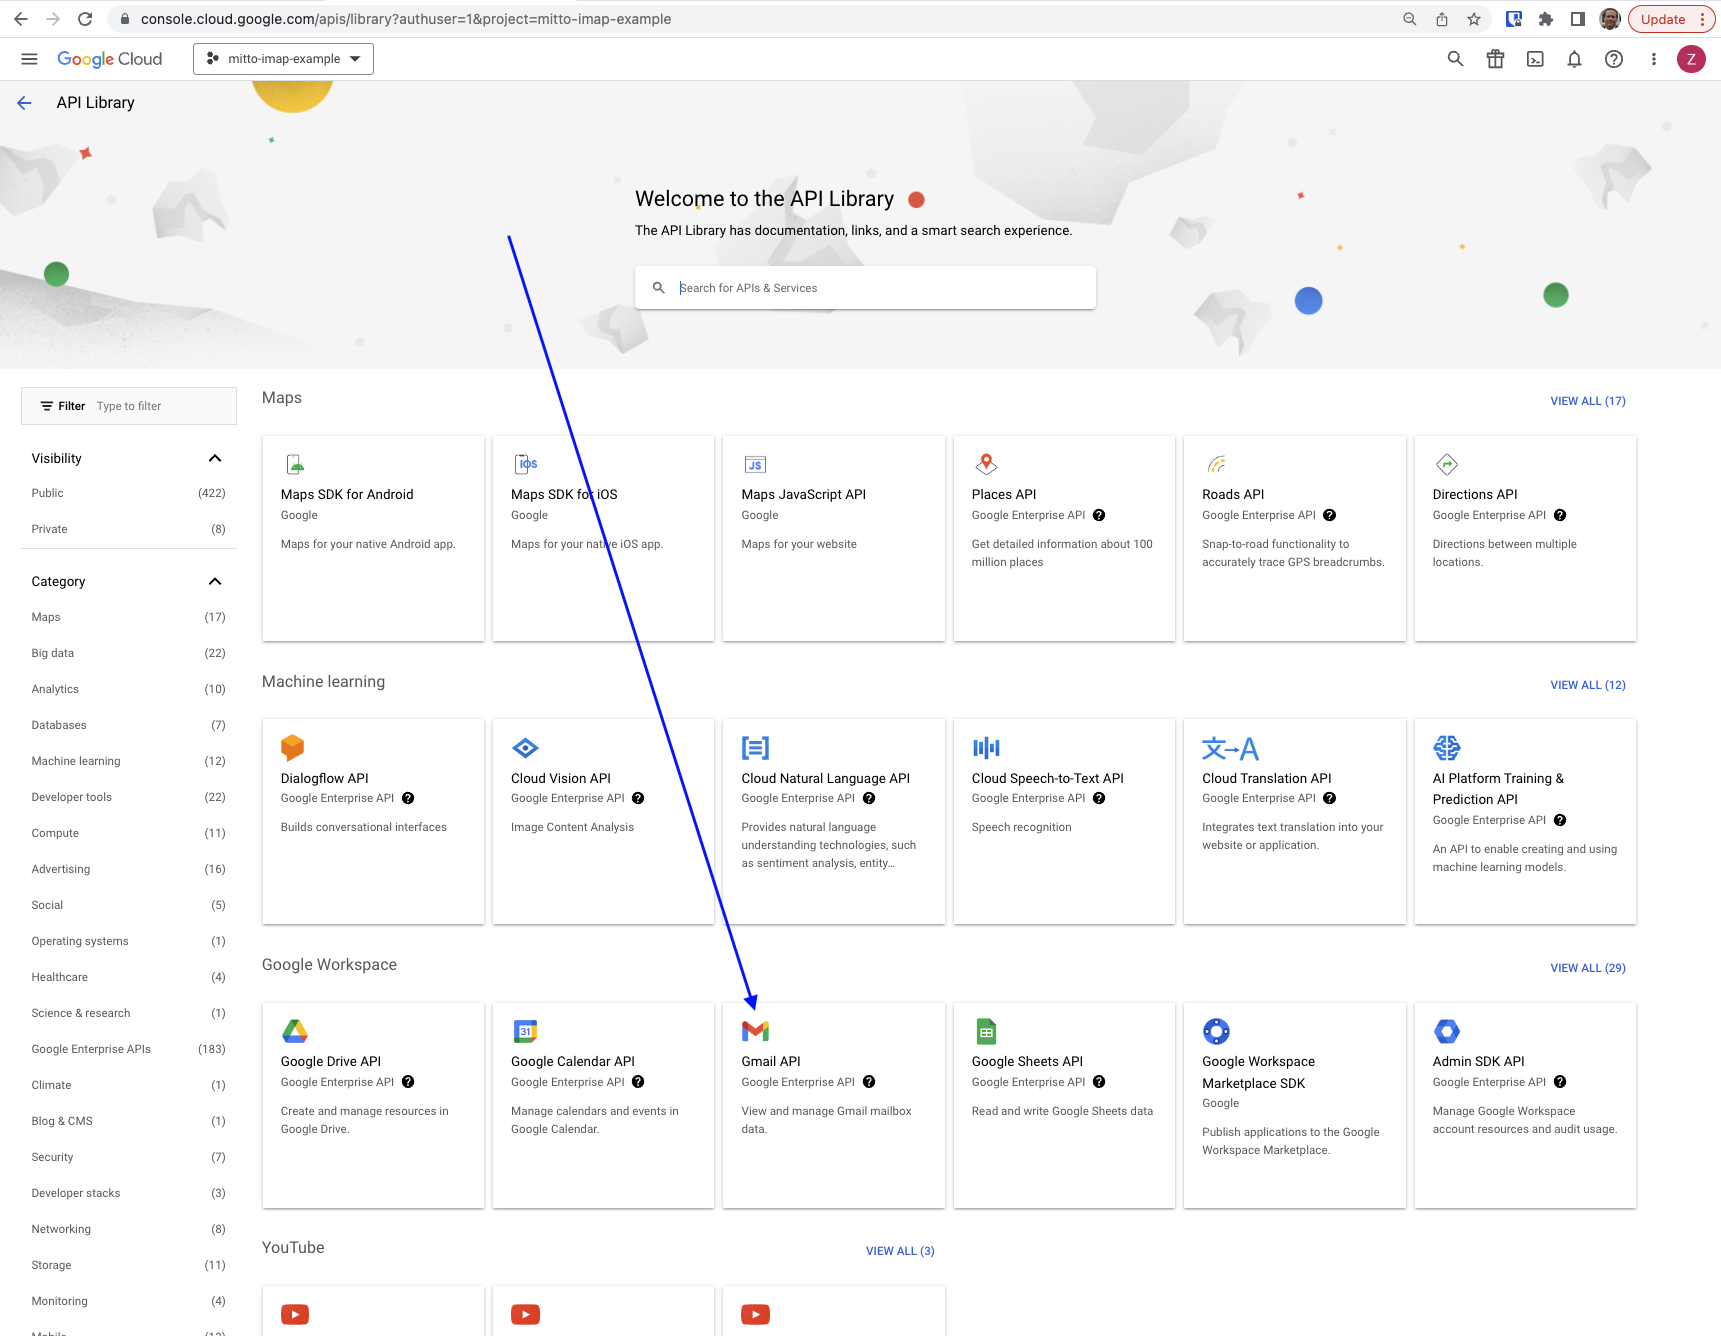
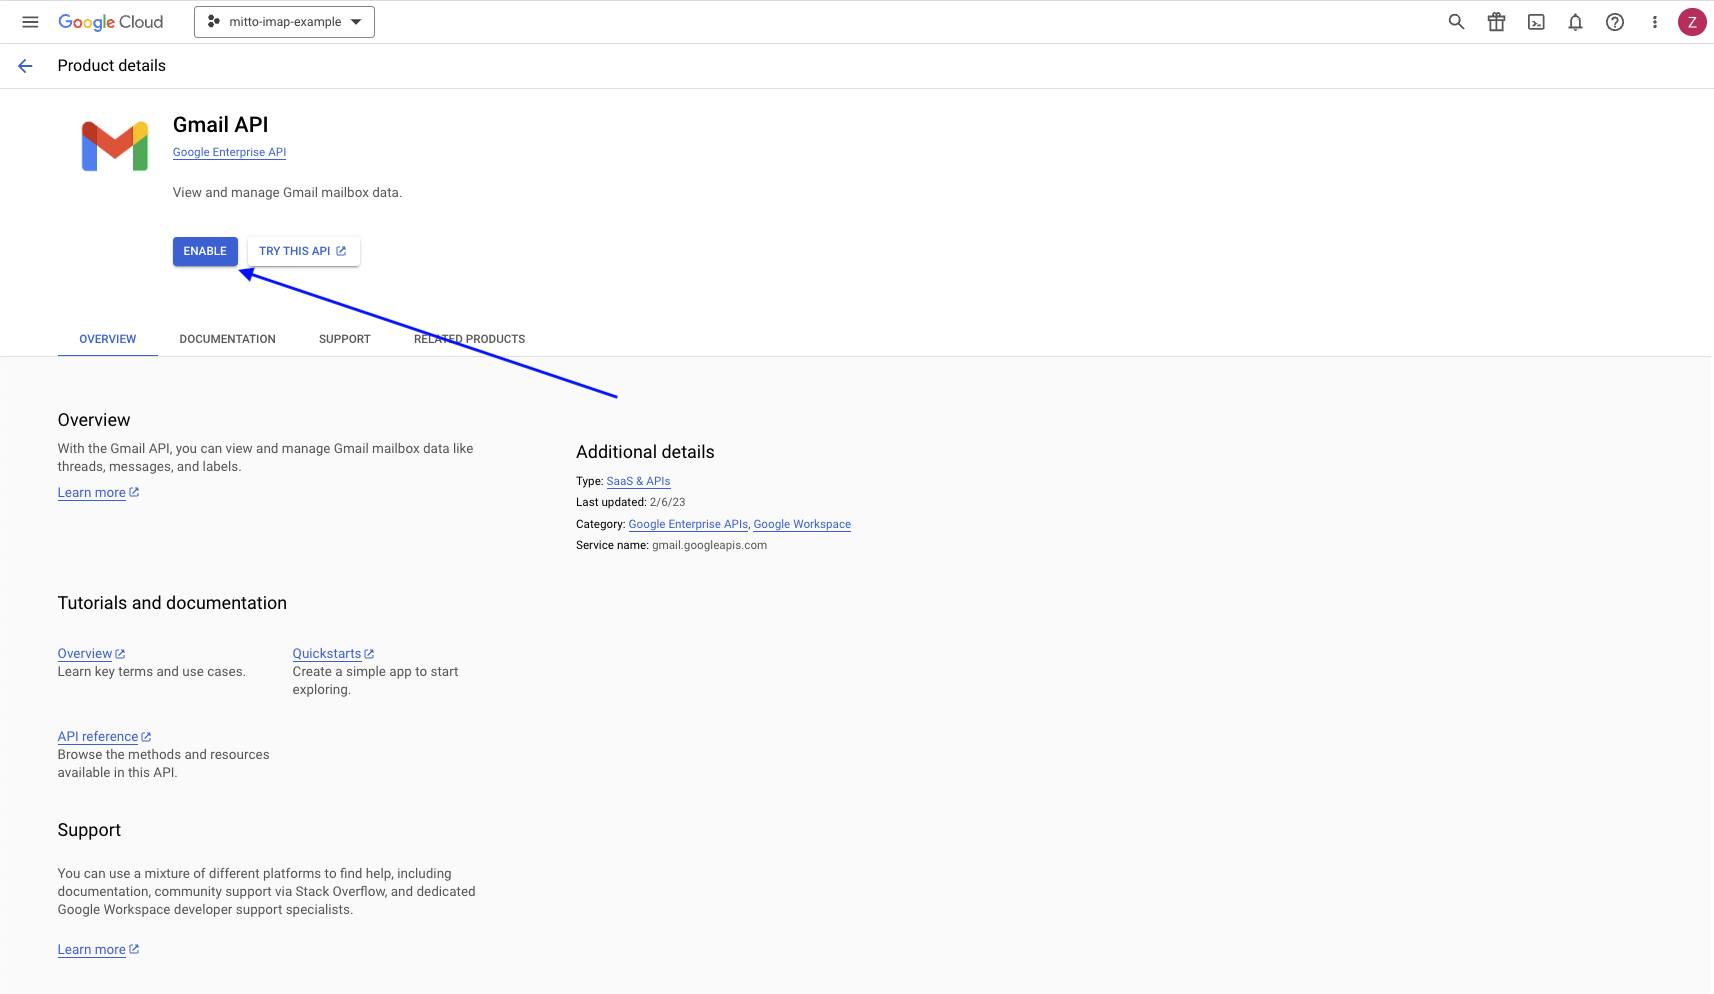
On the Gmail API page, click “ENABLE”.
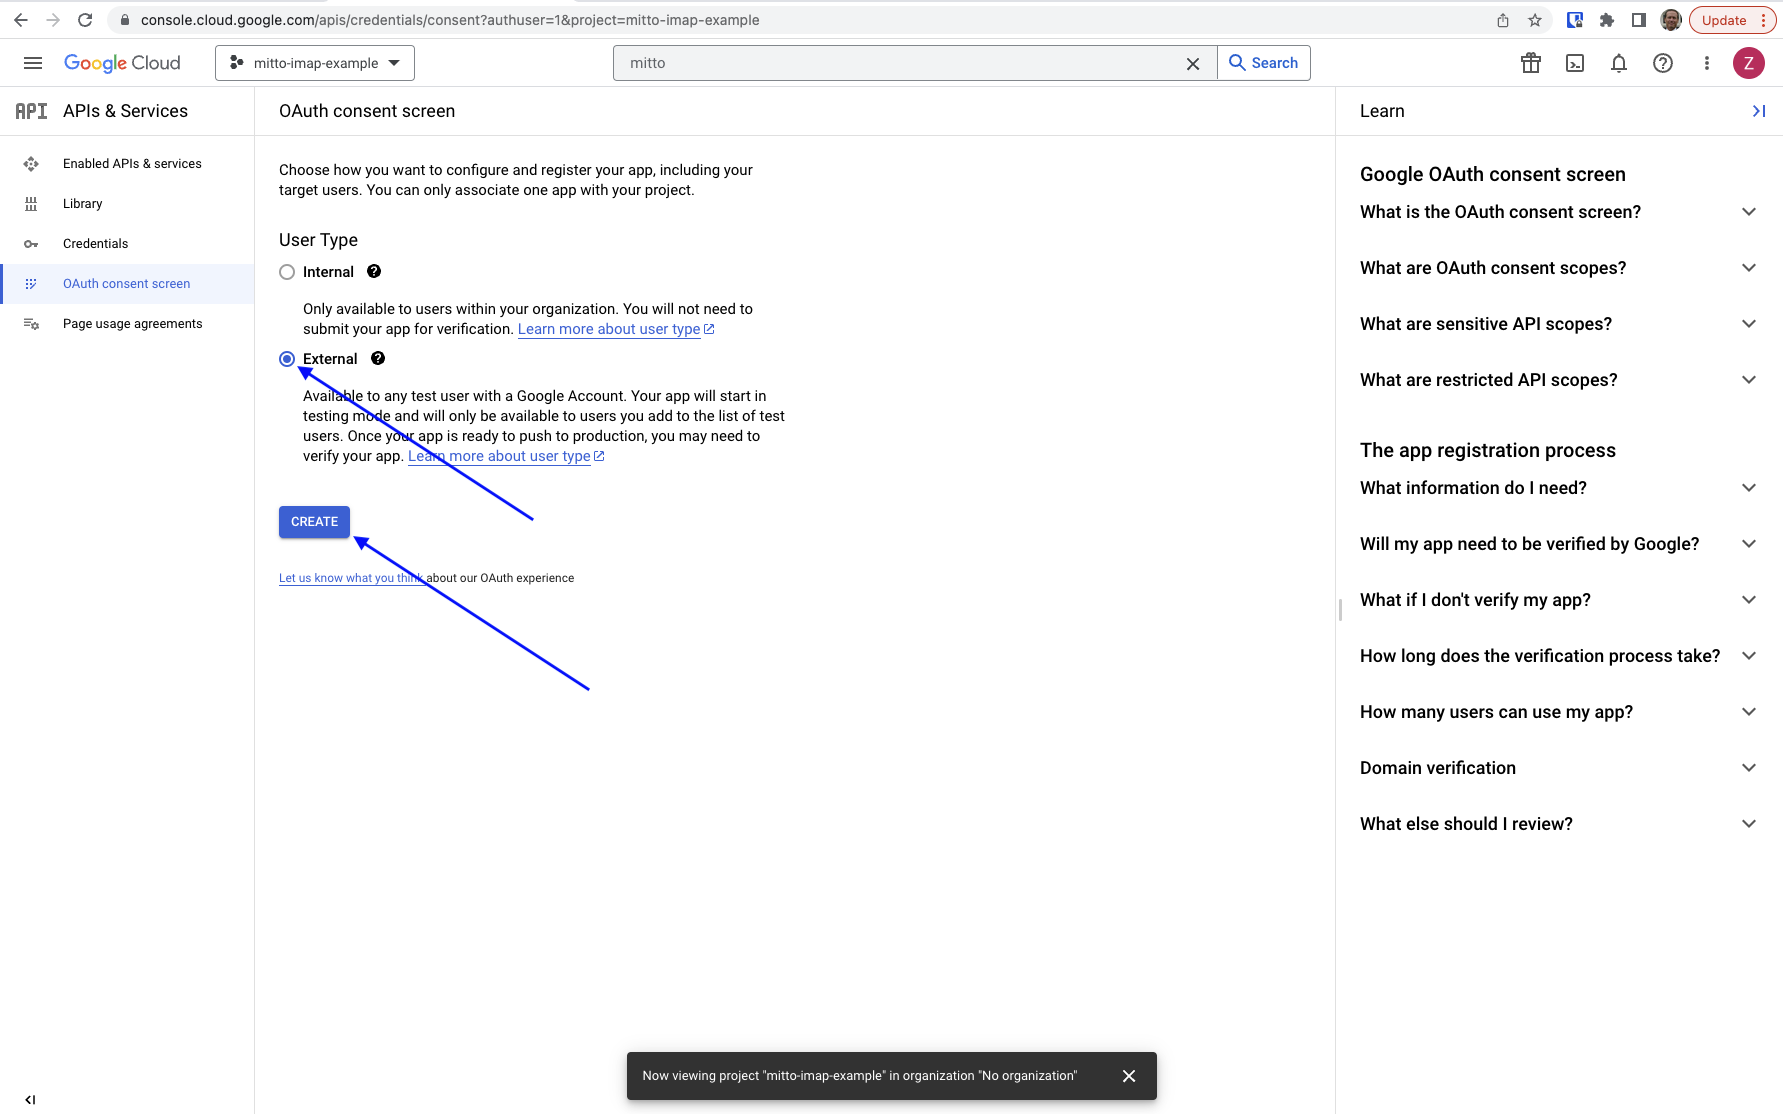
Configure OAuth Consent
Under “APIs & Services” on the left, click “OAuth consent screen”. On that start page
Click “External”
Click “CREATE”
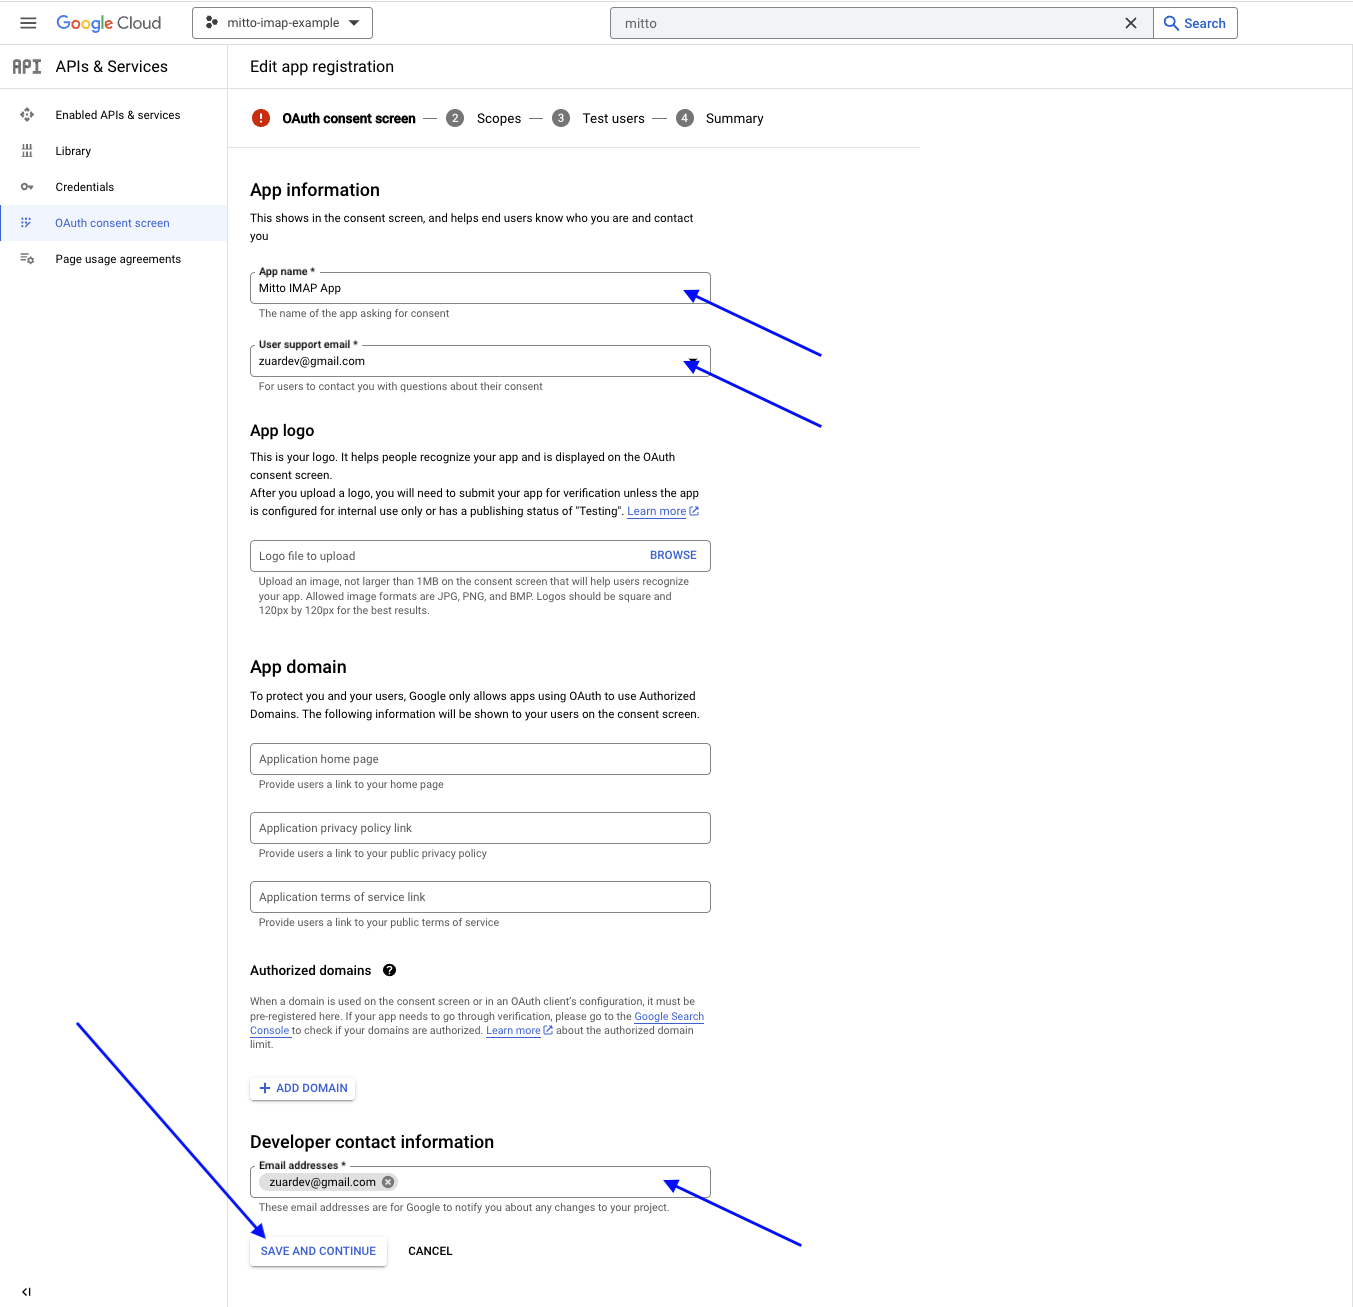
On page 1 of “OAuth consent screen” provide the minimum necessary information for your app: “App name”, “User support email”, and “Email addresses”. Click “SAVE AND CONTINUE”.
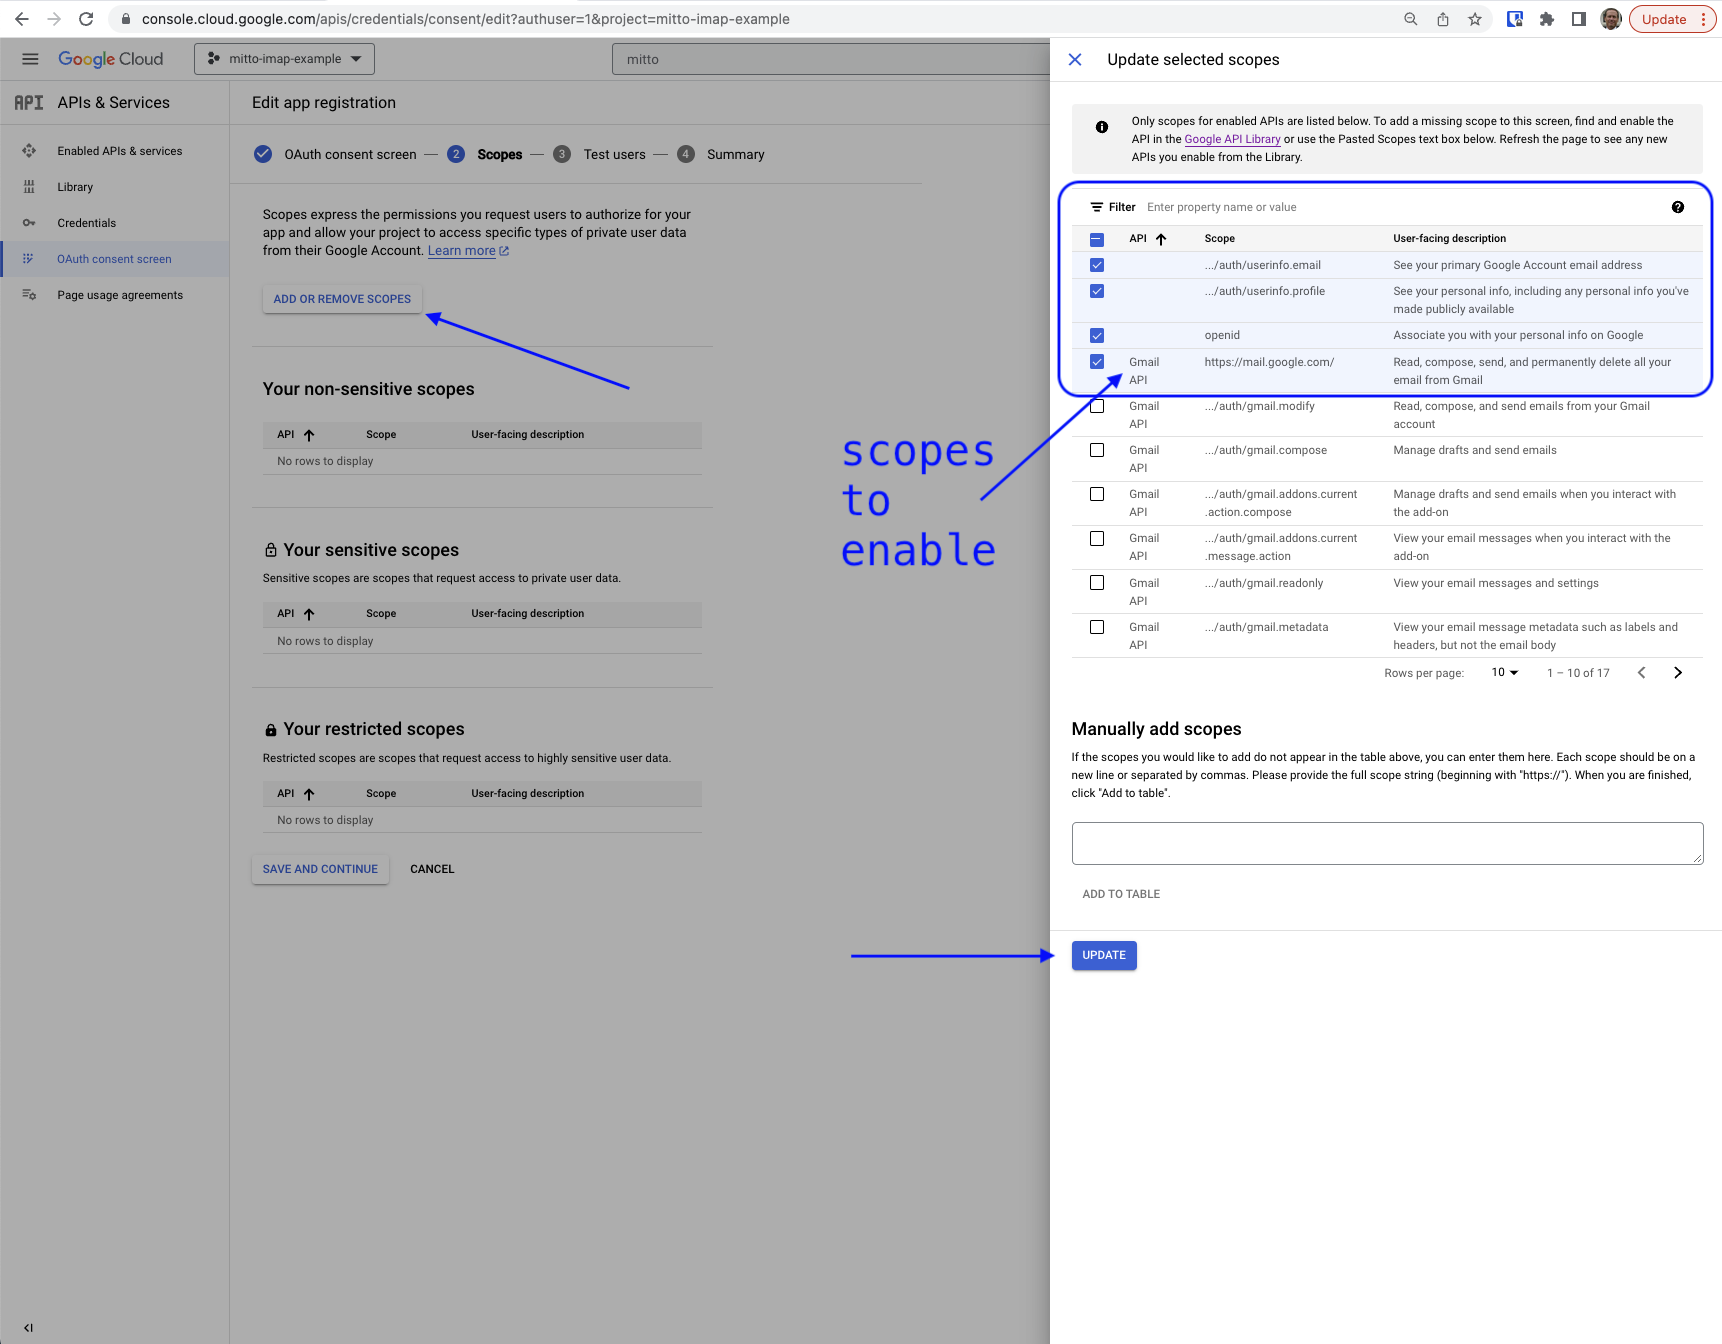
On page 2 of “OAuth consent screen”, “Scopes”
Click “ADD OR REMOVE SCOPES”
Select the scopes shown in the image below
Click “UPDATE”
Click “SAVE AND CONTINUE”
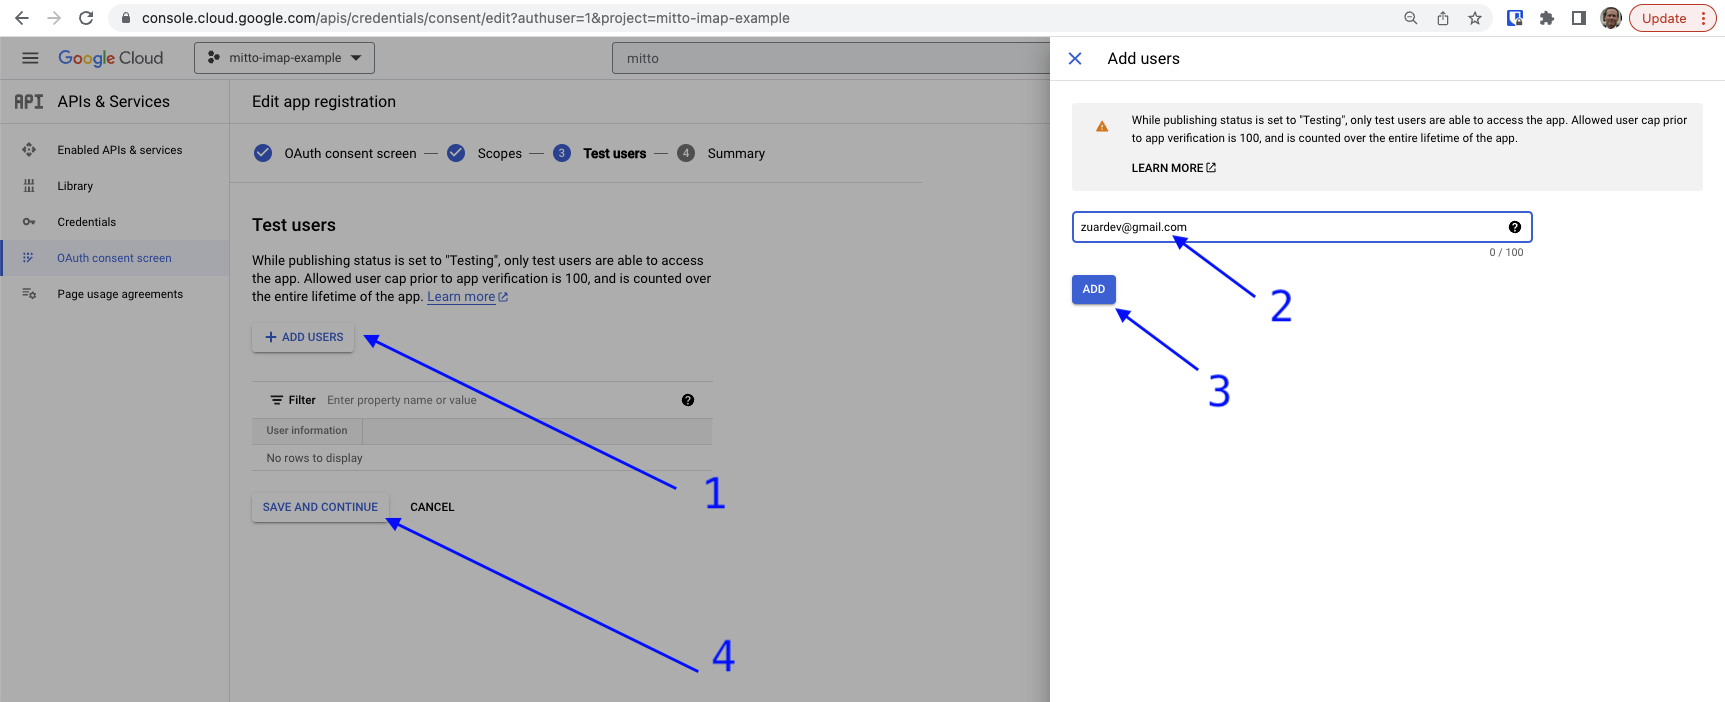
On page 3 of “OAuth consent screen”, “Test users”
Click “+ADD USERS”
Enter the Gmail address used with the job
Click “ADD”
Click “SAVE AND CONTINUE”
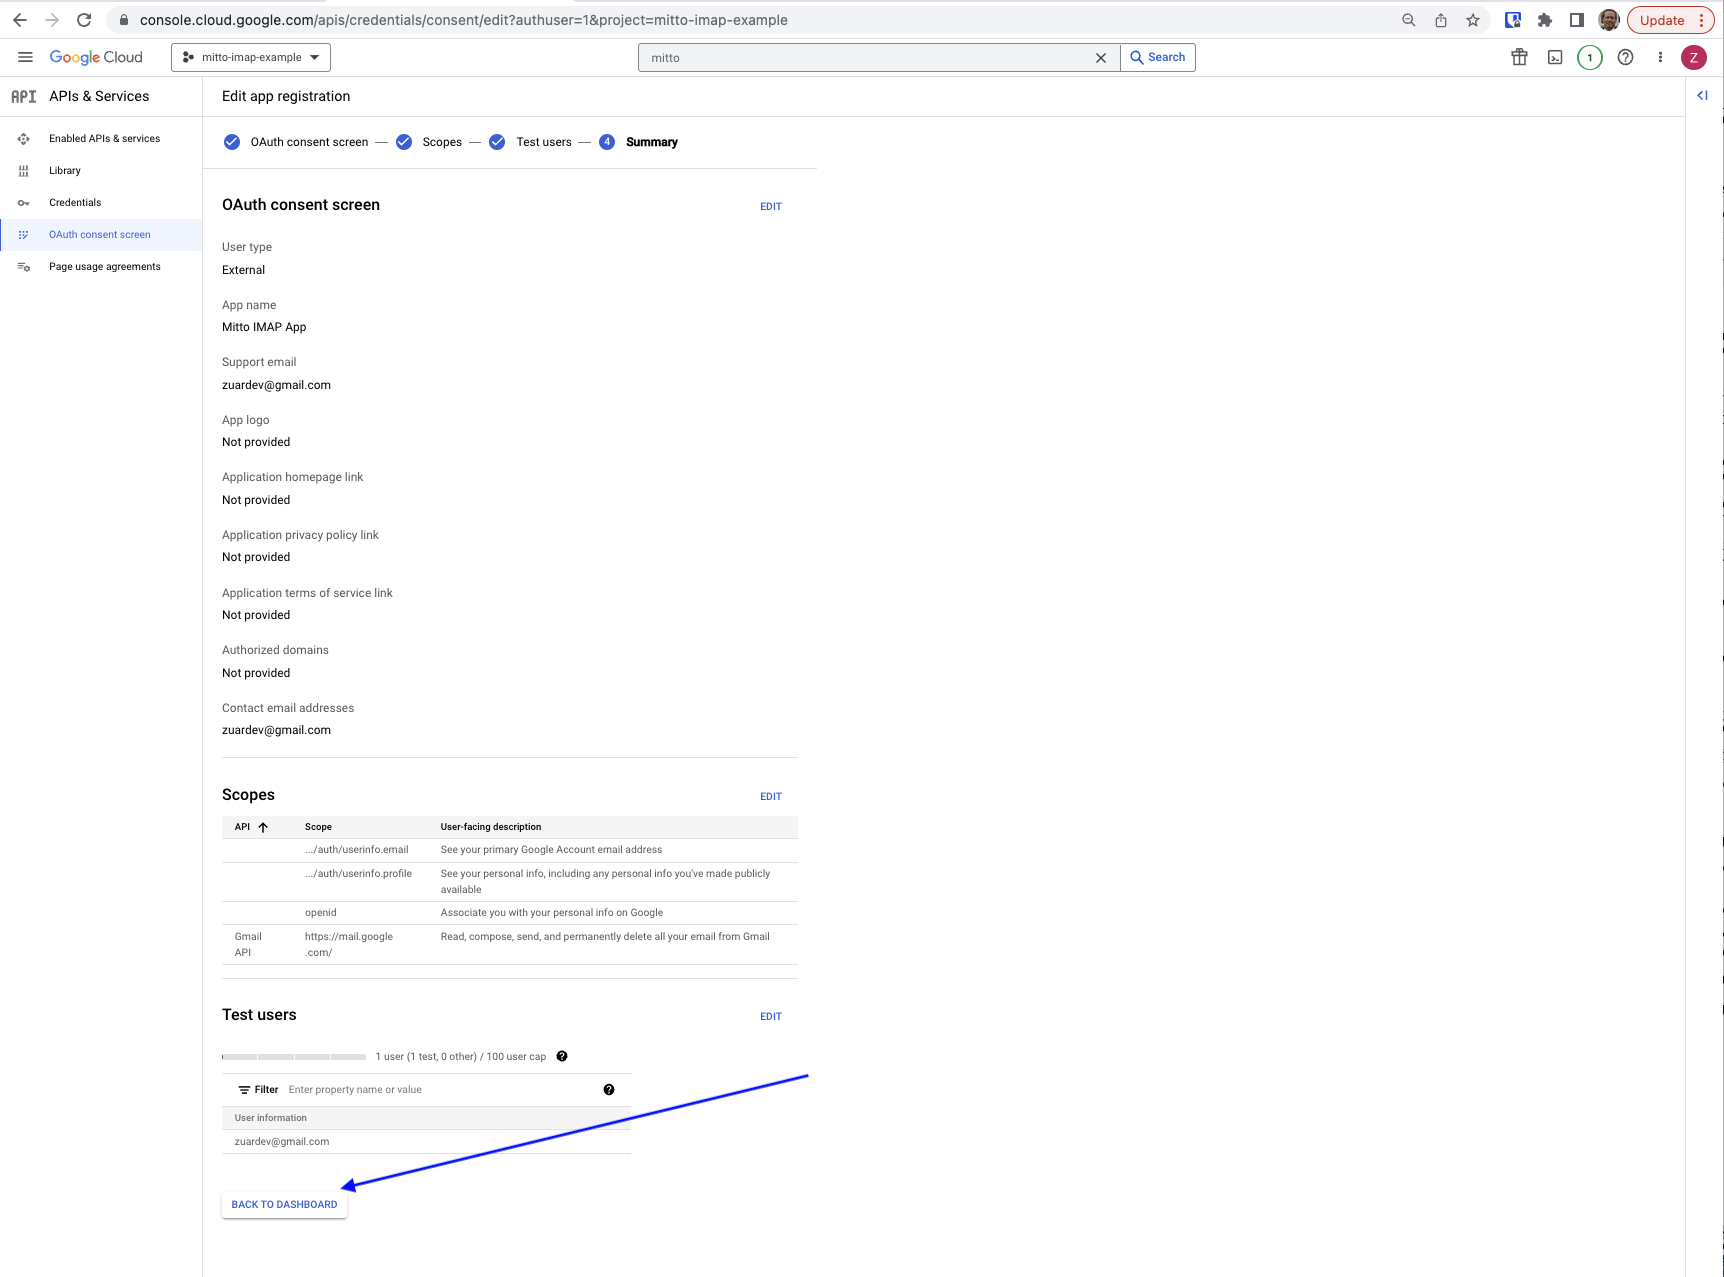
On page 3 of “OAuth consent screen”, “Summary”, click “BACK TO DASHBOARD”.
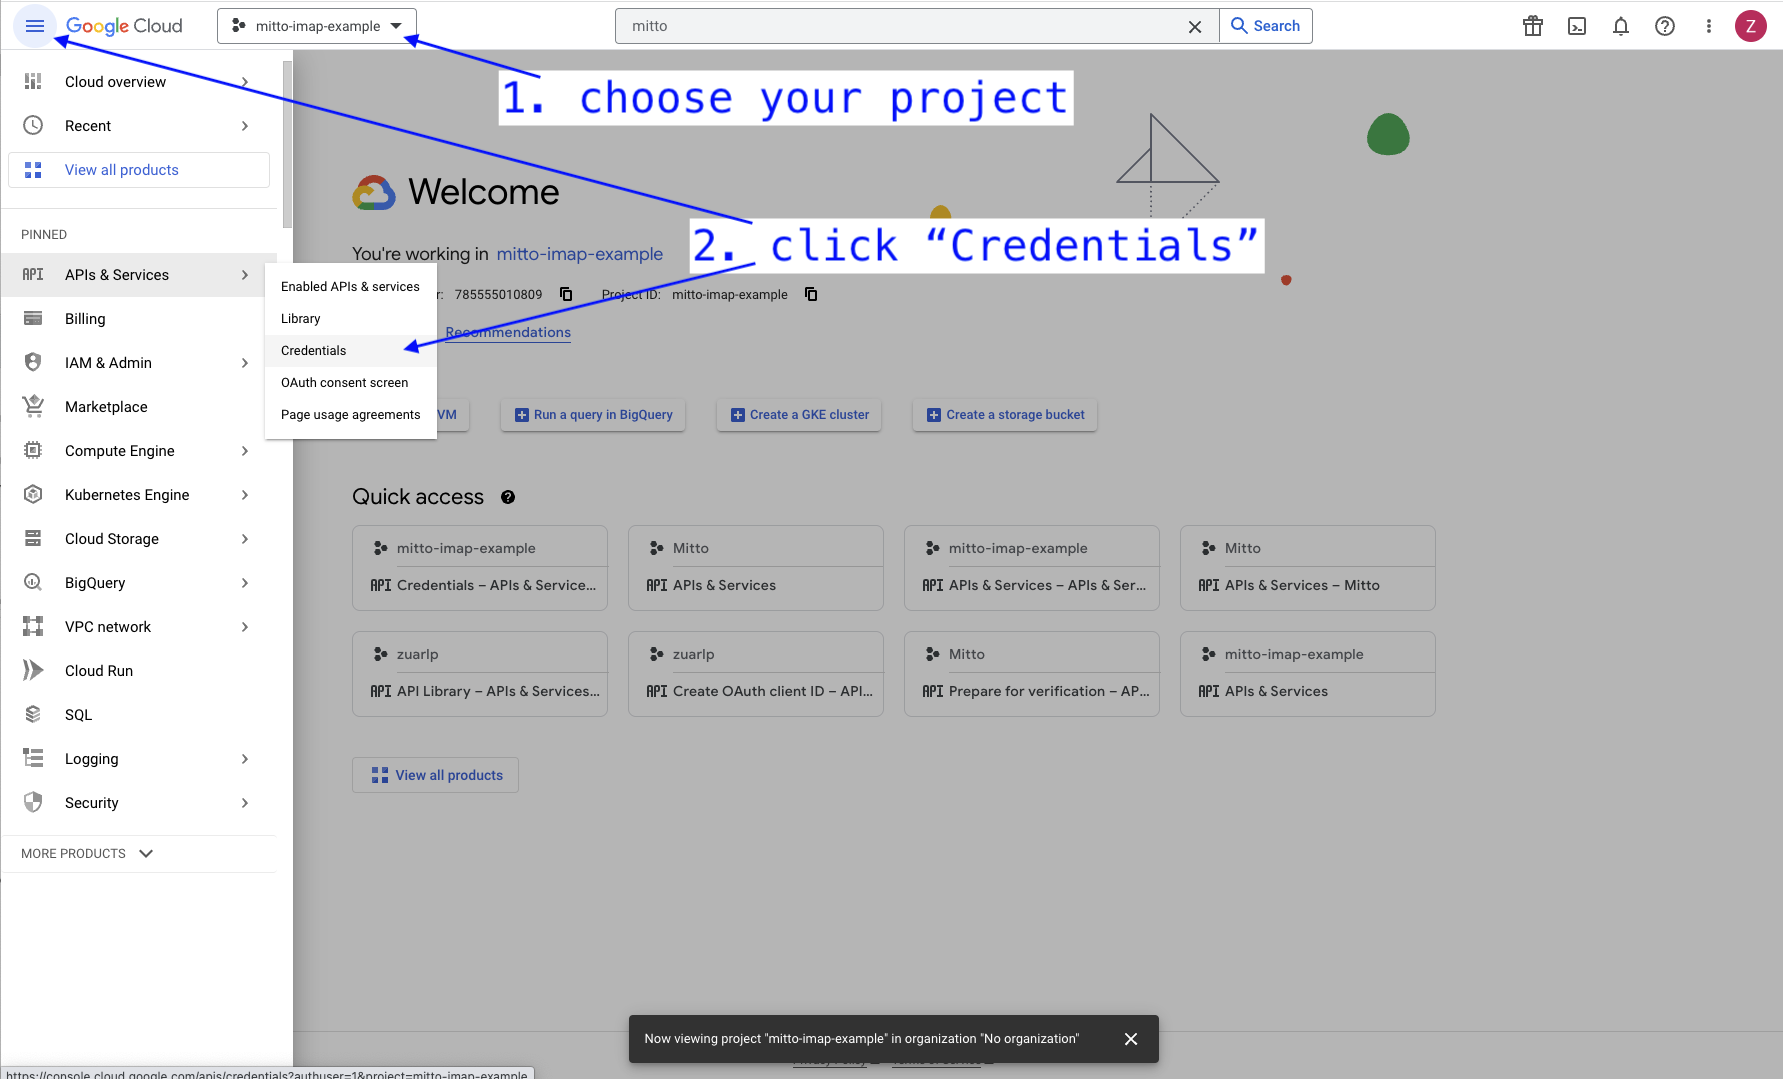
Create Credentials (an “App”)
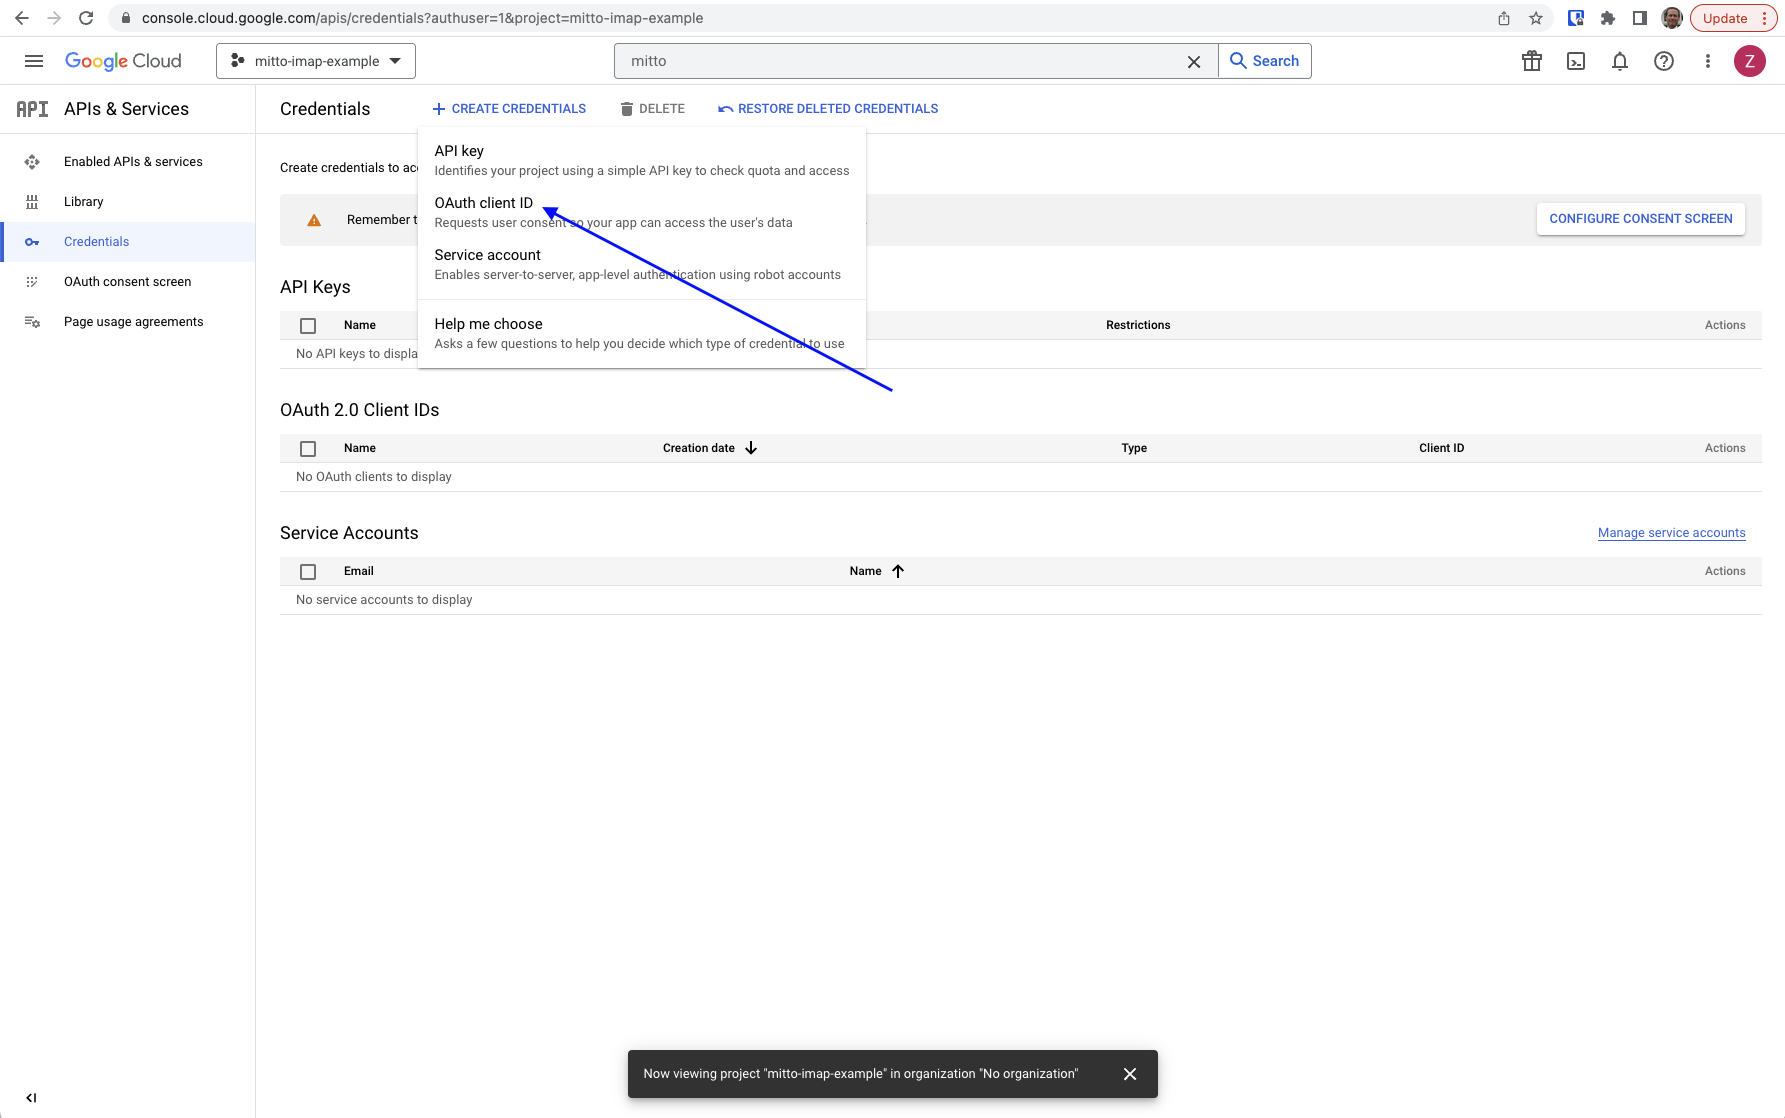
Select “API & Services –> Credentials” to open the Credentials page.
An empty Credentials page will be displayed. Click “+CREATE CREDENTIALS –> OAuth client ID”.
Complete the “Create OAuth client ID” page:
Select “Web application” from the pulldown.
Enter a name for your app.
Under the “Authorized redirect URIs” section of the page, click “+ADD URI” and enter the OAuth redirect for your Mitto instance. This should be the url of your Mitto instance with
/api/oauth_redirectat the end.
Example: https://your-mitto.zuarbase.net/api/oauth_redirect If you have more than one Mitto instance, you can add a URI for each instance.Important: your URI must end with
/api/oauth_redirect.Click “CREATE” at the bottom of the page.

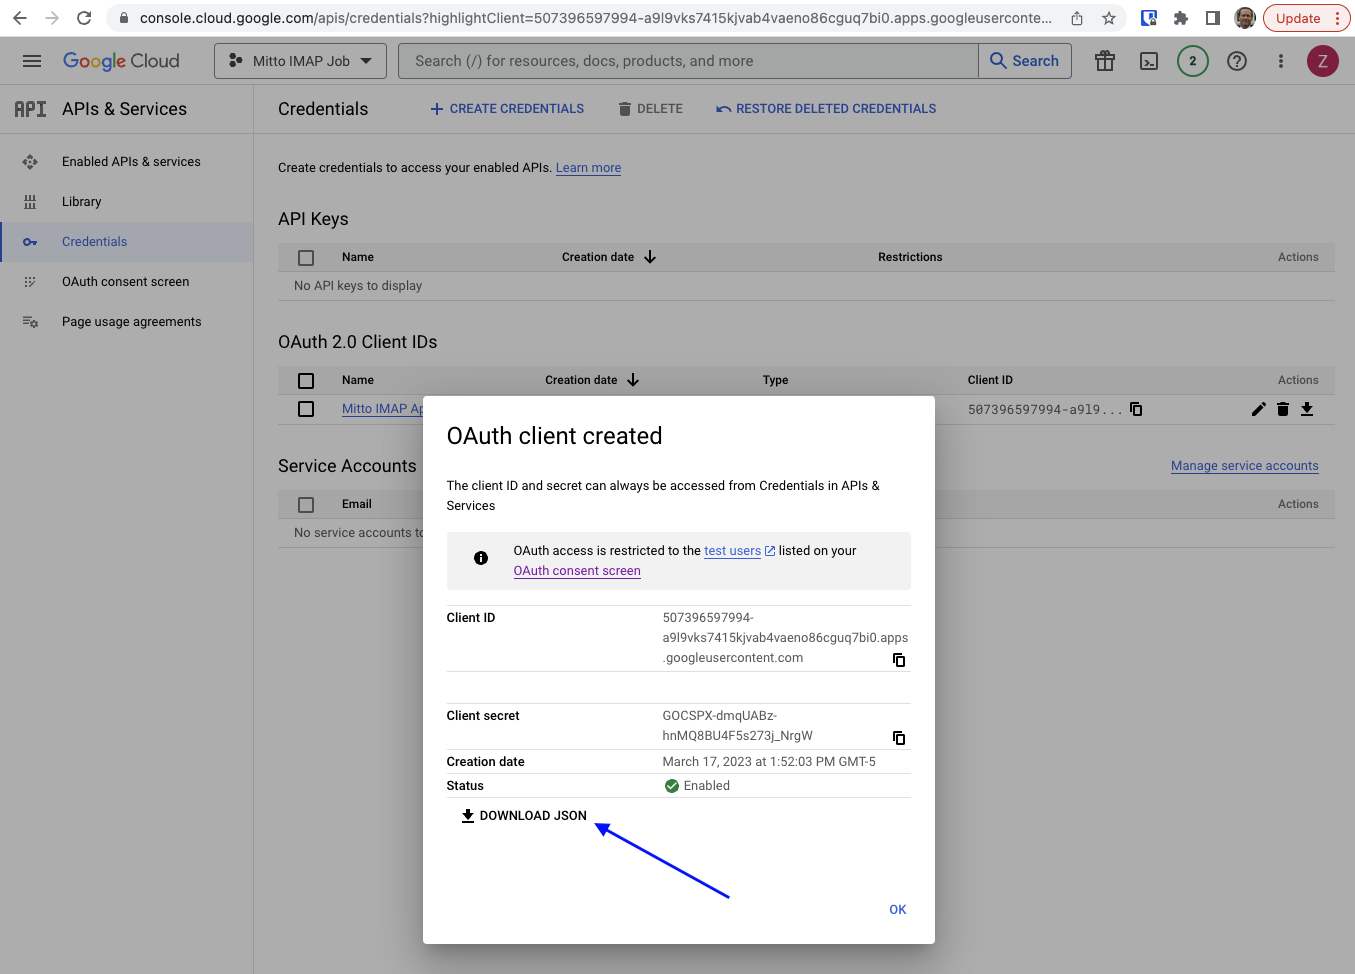
A “OAuth client created” popup will appear. Click “DOWNLOAD JSON” to download the credentials for this application.
IMPORTANT: Keep these credentials – you will need them later when using the IMAP wizard to create IMAP jobs.
Note
You have successfully configured an app within GCP that can be used with Mitto’s IMAP job.