This documentation describes an old release, version 3.7.1. Documentation for the latest release, 3.7.2, can be found here.
Creating Jobs with an Omni Connector Wizard
Each installed Omni connector adds its own wizard to Runner. All Omni wizards follow the same four steps; the specific fields (especially credentials) vary by connector. This page walks through the Salesforce connector’s wizard, “Omni Salesforce”. Other connectors work the same way.
Starting the Wizard
Click the + Add Job button in the sidebar. Each installed connector has an icon on this page.
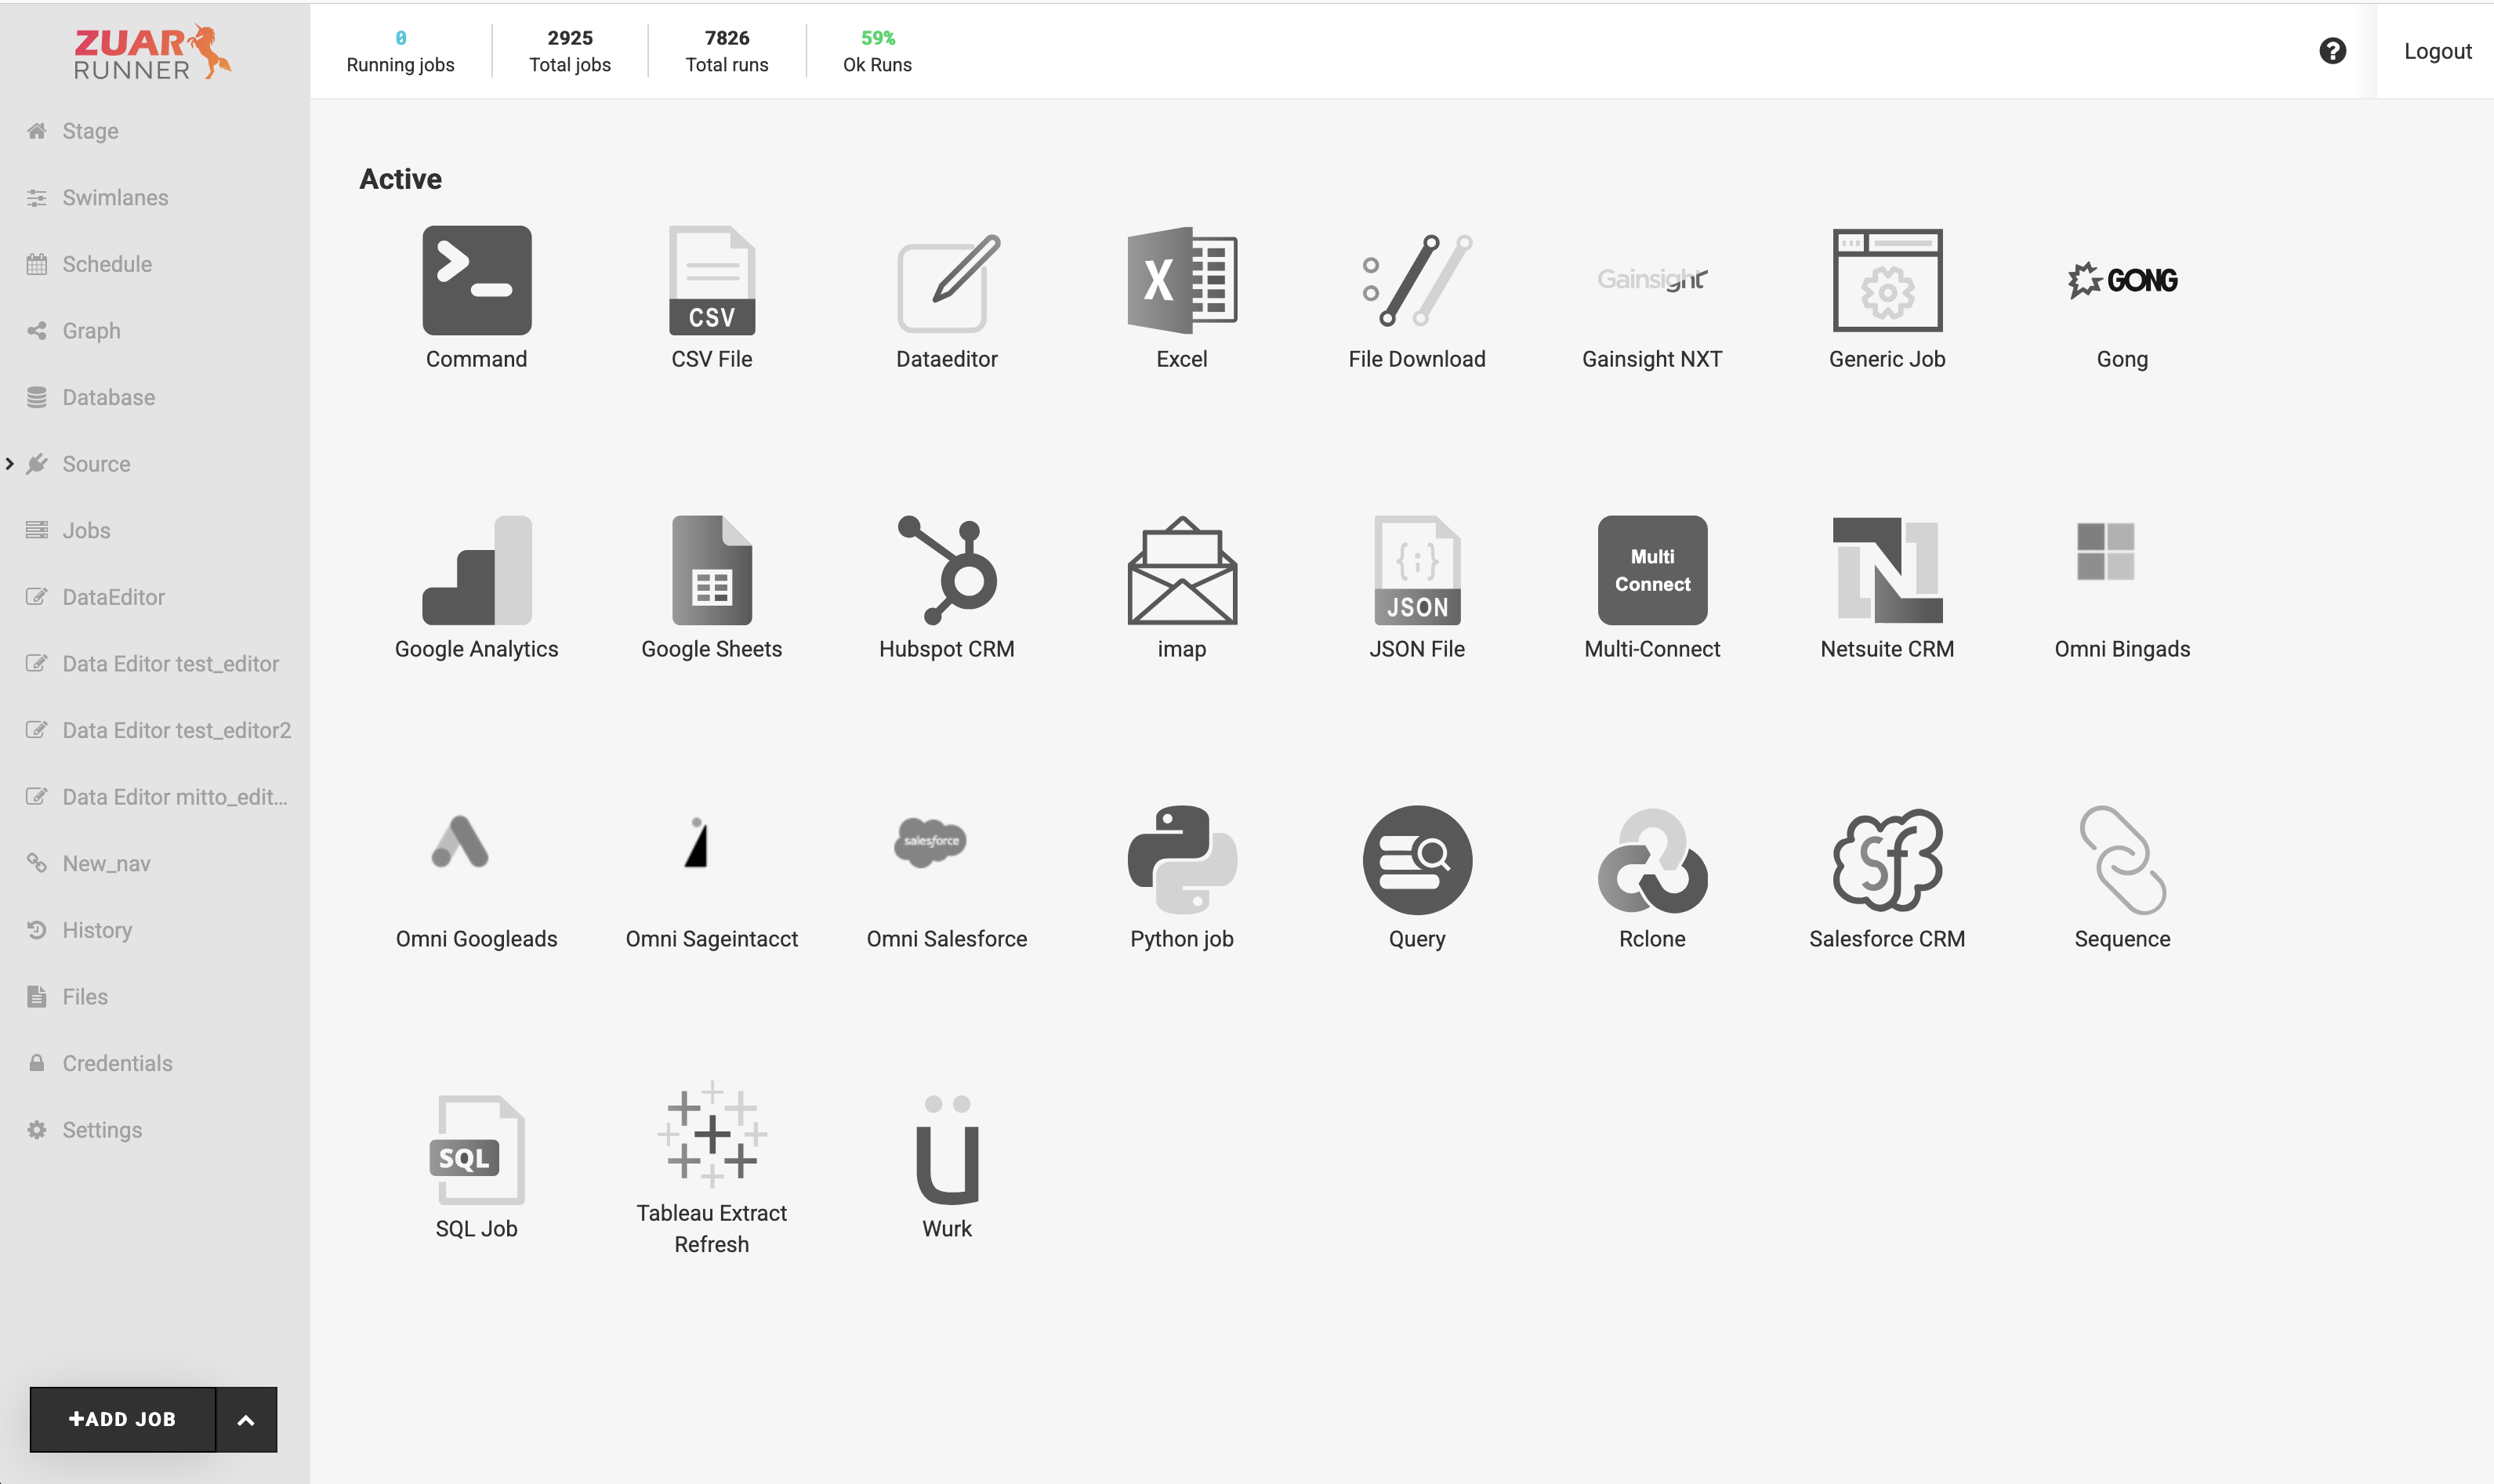
Click the connector’s icon to start its wizard.
Step 1: Provide Connection Credentials
The first screen collects credentials for the connected service. Choose one of:
Use existing named credentials: pick previously saved credentials for this connector from the dropdown. Credentials saved by an Omni wizard are specific to that connector.
Provide credentials now, to be saved under Credential Name: enter new credentials. They are saved under the name you provide and can be reused by later jobs and wizard runs. See Credentials for how stored credentials work in Runner.
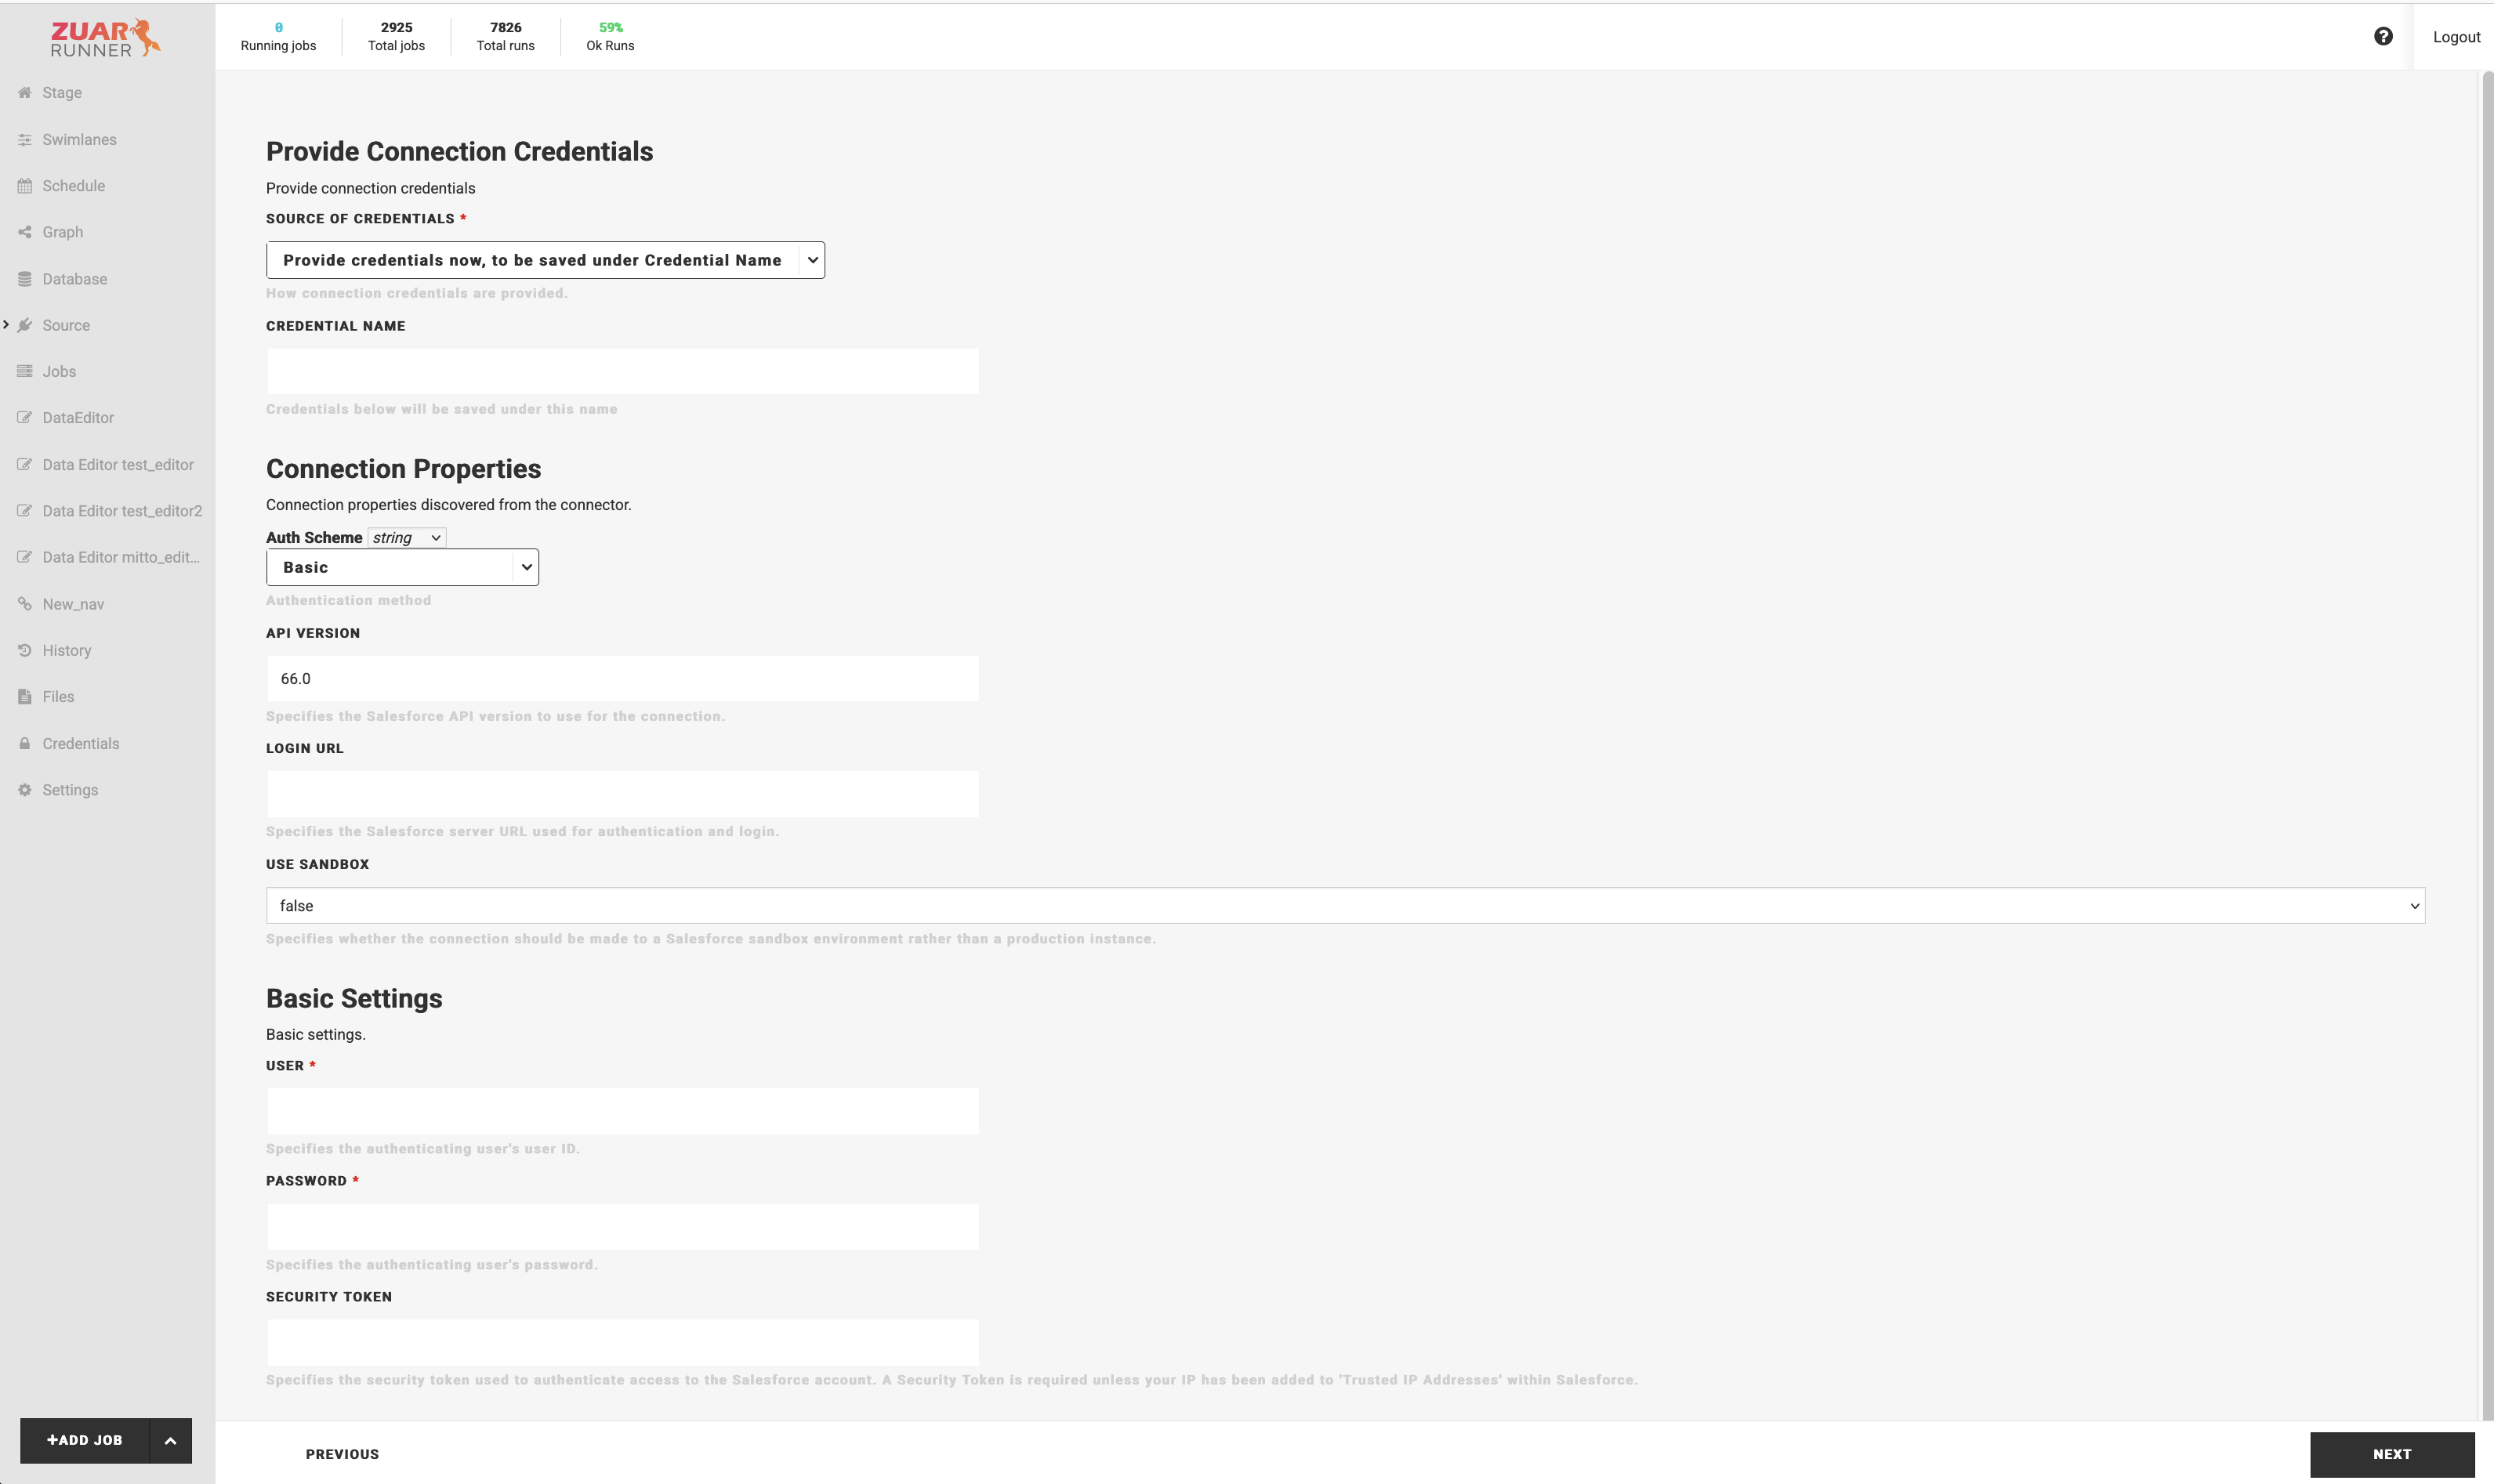
When providing new credentials, select the authentication scheme the service account uses. The available schemes and their fields depend on the connector. Salesforce offers, among others:
Basic: user name, password, and security token.
OAuth: authorize Runner against Salesforce in your browser. For OAuth schemes the screen also displays a read-only callback URL; if the service requires registering a callback URL for the OAuth application, use this value.
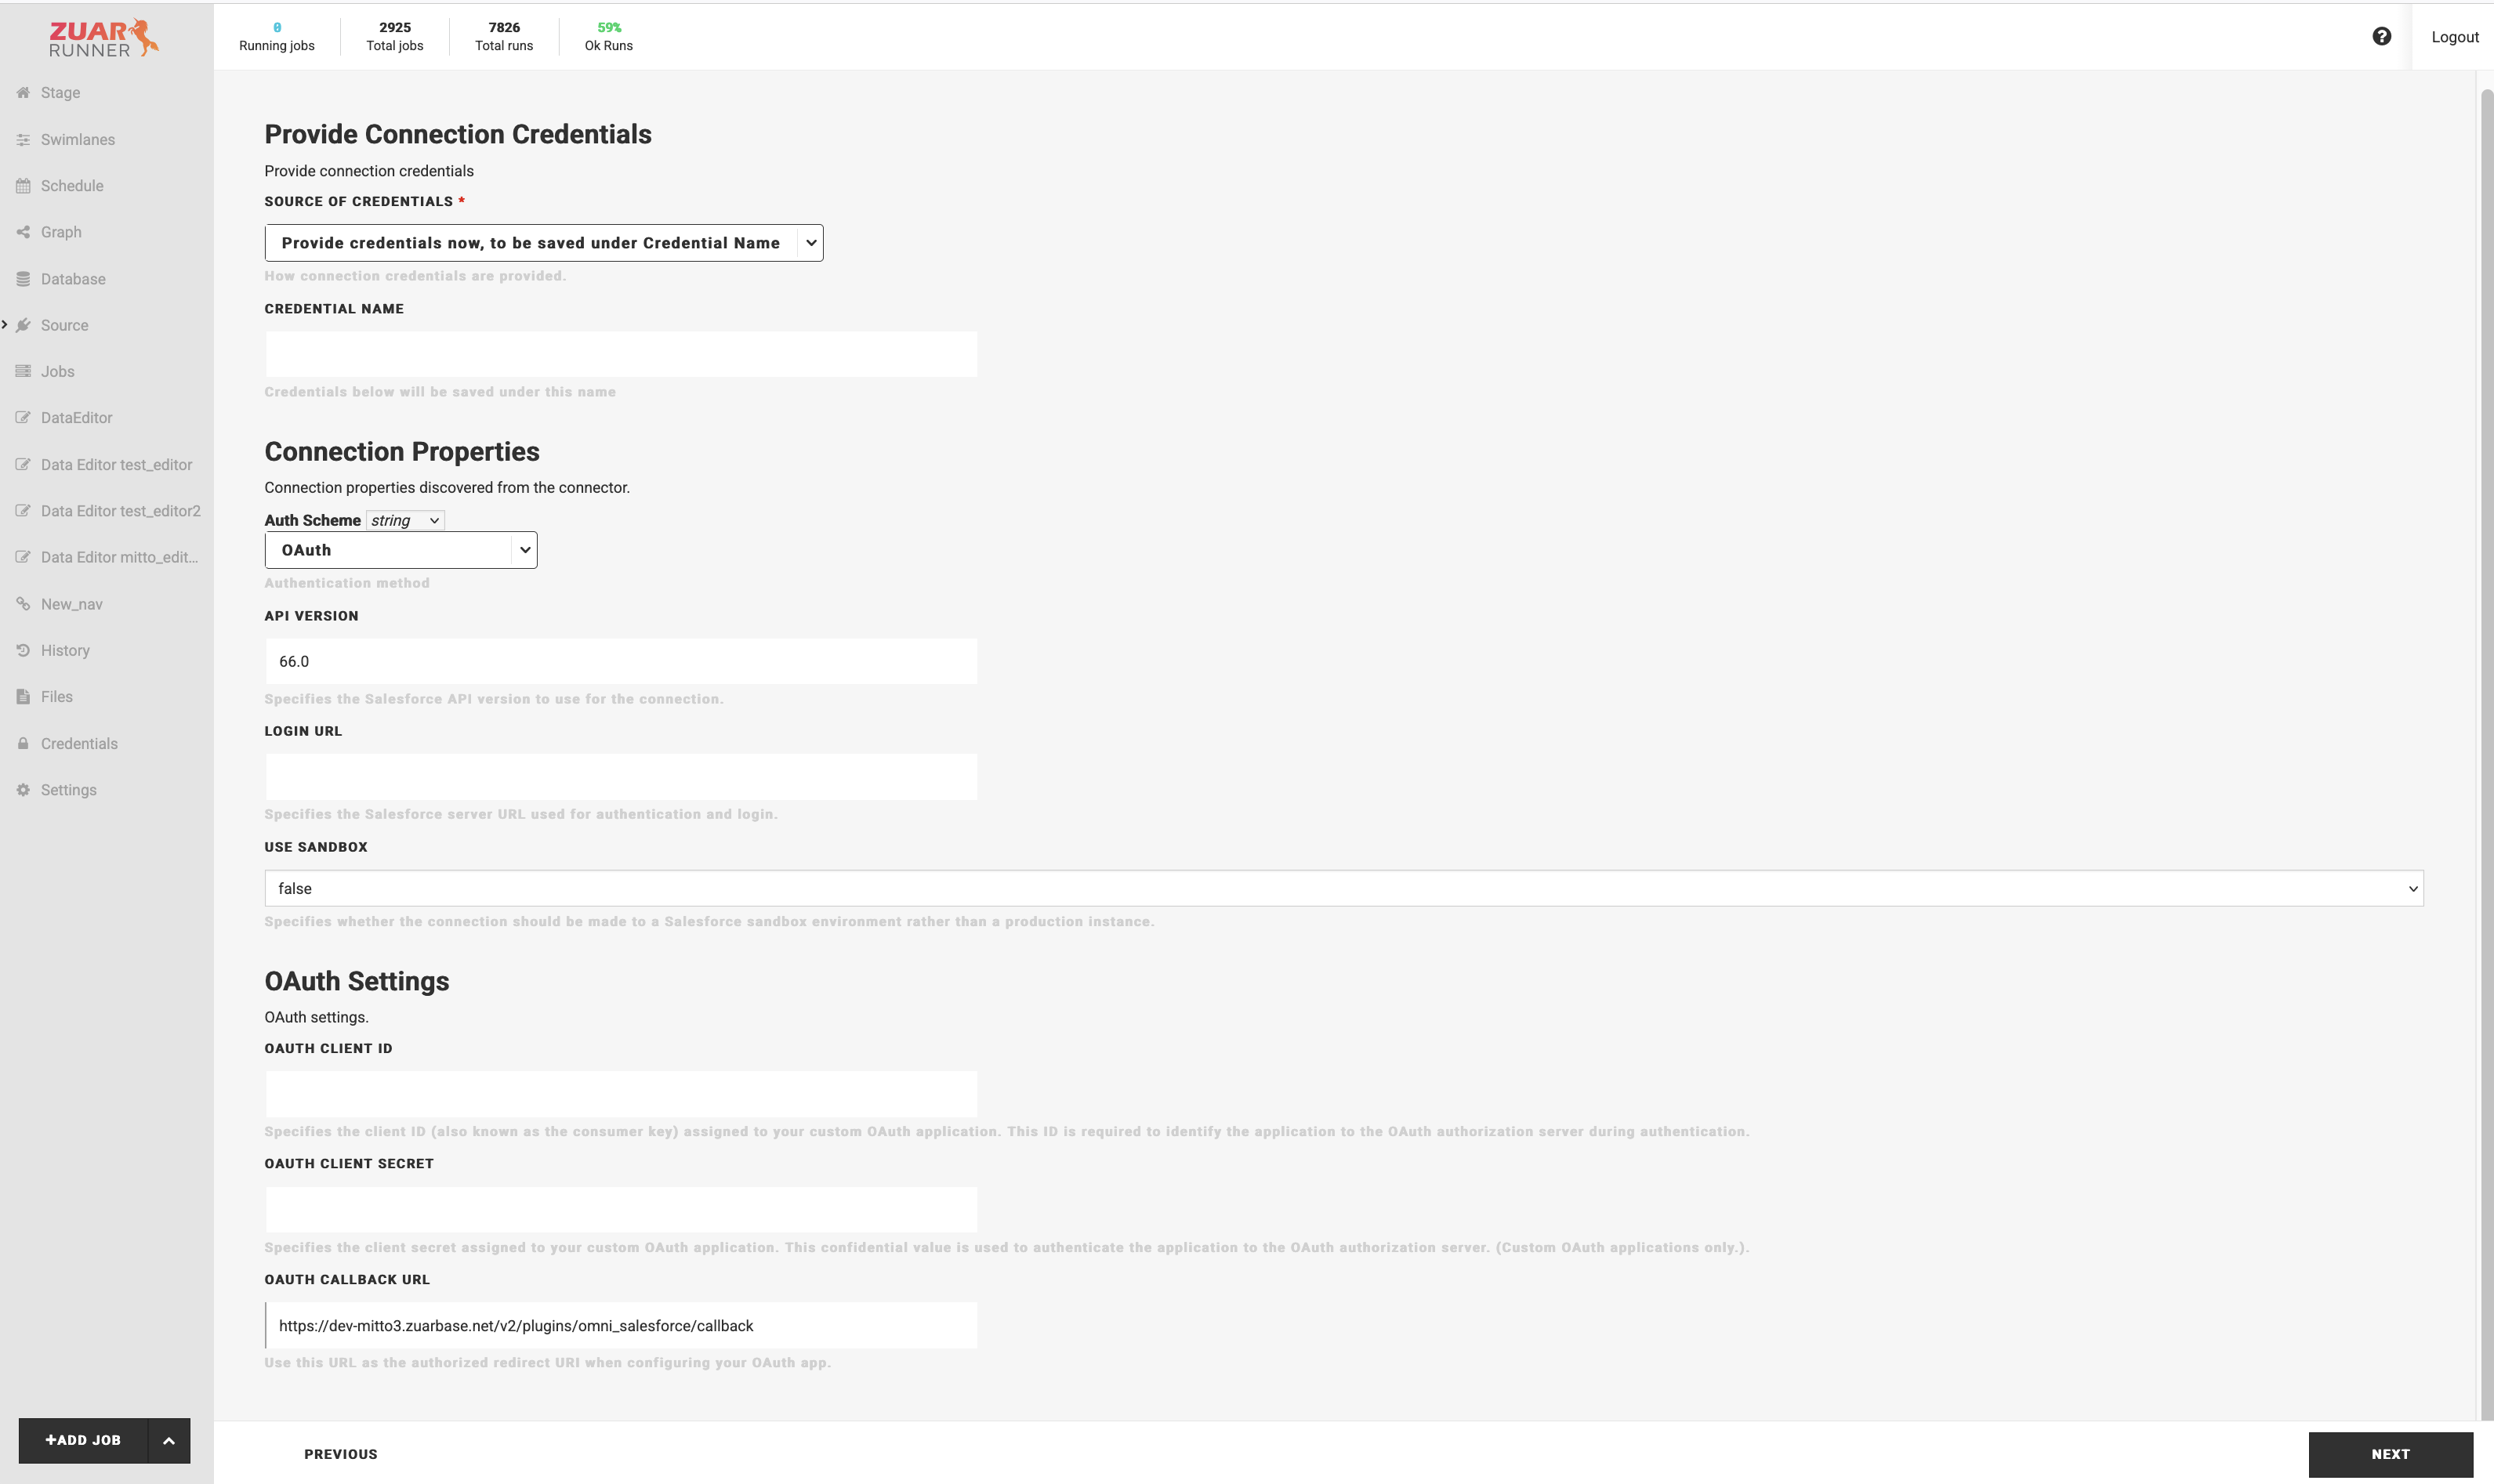
Click Next. The wizard tests the connection with the credentials you provided and reports any errors before continuing.
Step 3: Select Tables
The wizard queries the service for its available tables and lists them. The list includes any custom records or objects defined in your account (for example, Salesforce custom objects or NetSuite custom records), so it reflects how your service is customized.
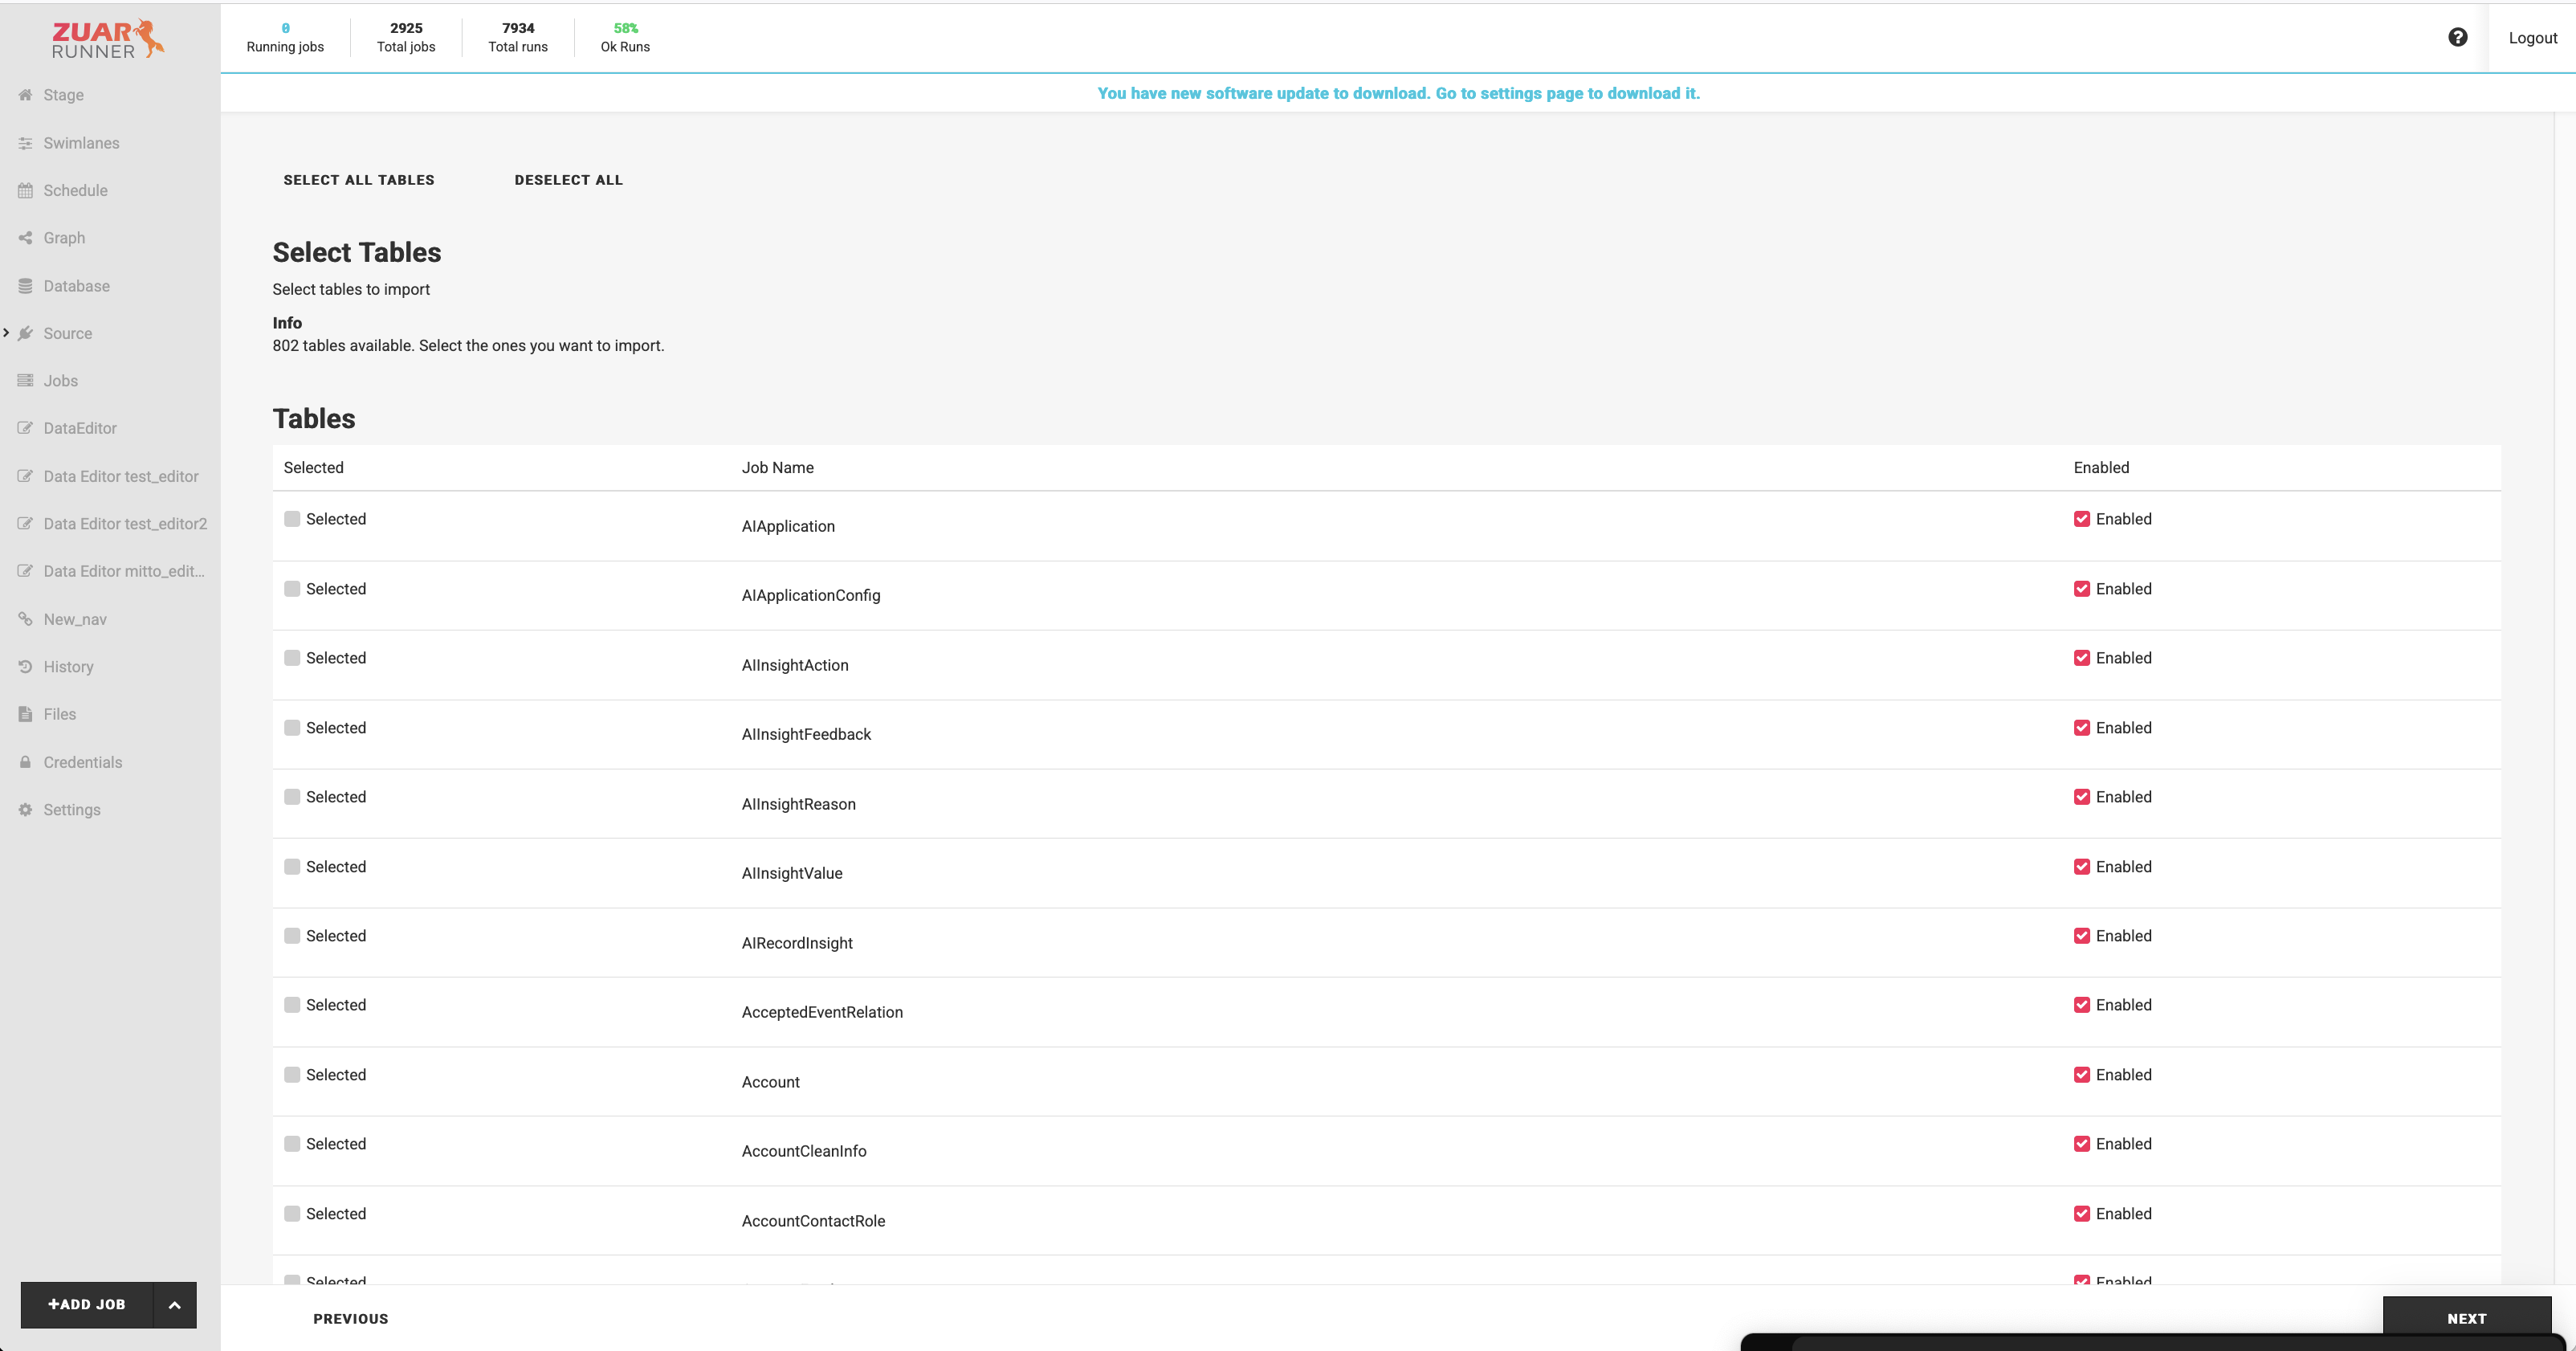
Check each table you want to load. At least one table must be selected. One job will be created per selected table. Click Next.
Step 4: Specify the Output
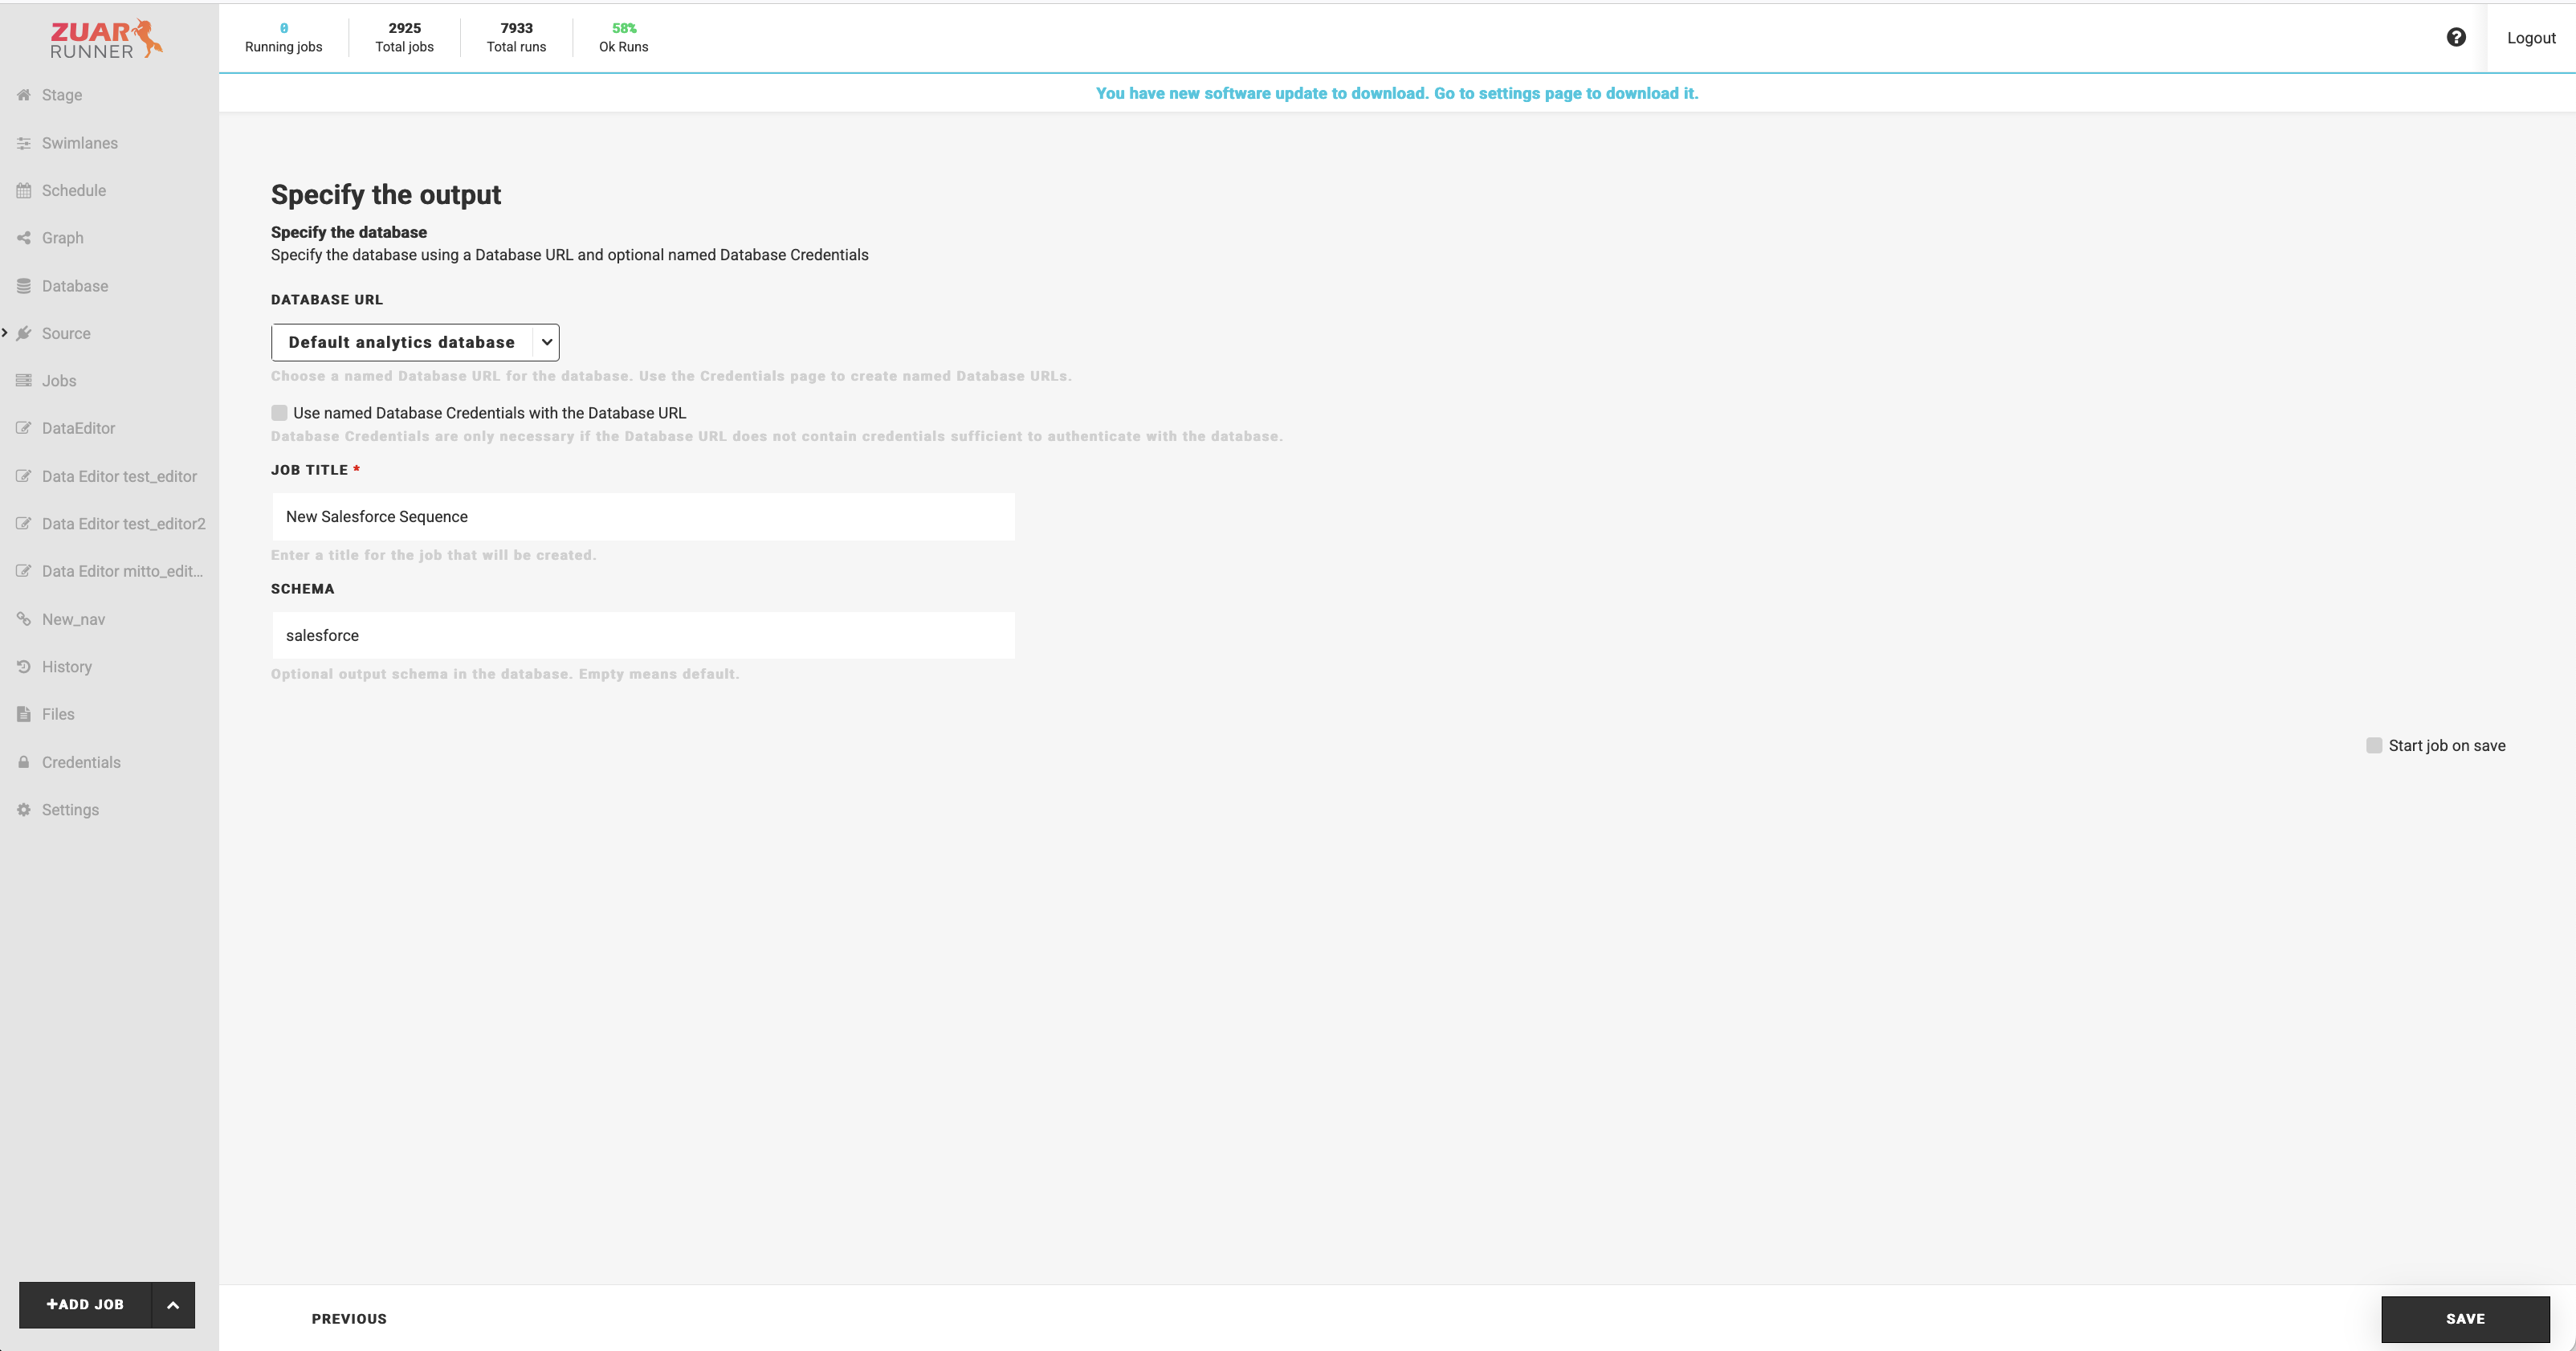
Job Title: the title of the sequence that will contain the created jobs.
Database URL: the destination database, chosen from your named Database URLs. See Database URLs.
Credentials: optional named database credentials.
Schema: optional destination schema. When empty, the connector’s name is used (for example,
salesforce).
Click Save. To run the created sequence immediately after it is saved, check Start job on save before clicking Save.
What the Wizard Creates
When you click Save:
The credentials are saved (if you provided new ones).
One job is created per selected table, named after the connector and table (for example,
salesforce_accountwith title[Salesforce] Account), taggedomniand with the connector name.A sequence containing all the created jobs is created with the title you provided, and the wizard opens it. Run the sequence to load the selected tables, or schedule it like any other Runner job. See Scheduling.
Each job loads its table in full on every run. To customize job behavior, including loading only new and changed rows, see Configuring Jobs.