Power BI
Introduction
Zuar Portal's Power BI Report Block uses Power BI's REST API. To configure Portal to access to your Power BI, we need to obtain an Entra ID (formerly Azure Active Directory) application and grant the necessary pernissions.
Obtain Entra ID credentials
- Login to Azure.
- Search for
App registrationsand then choose it from the listed Services.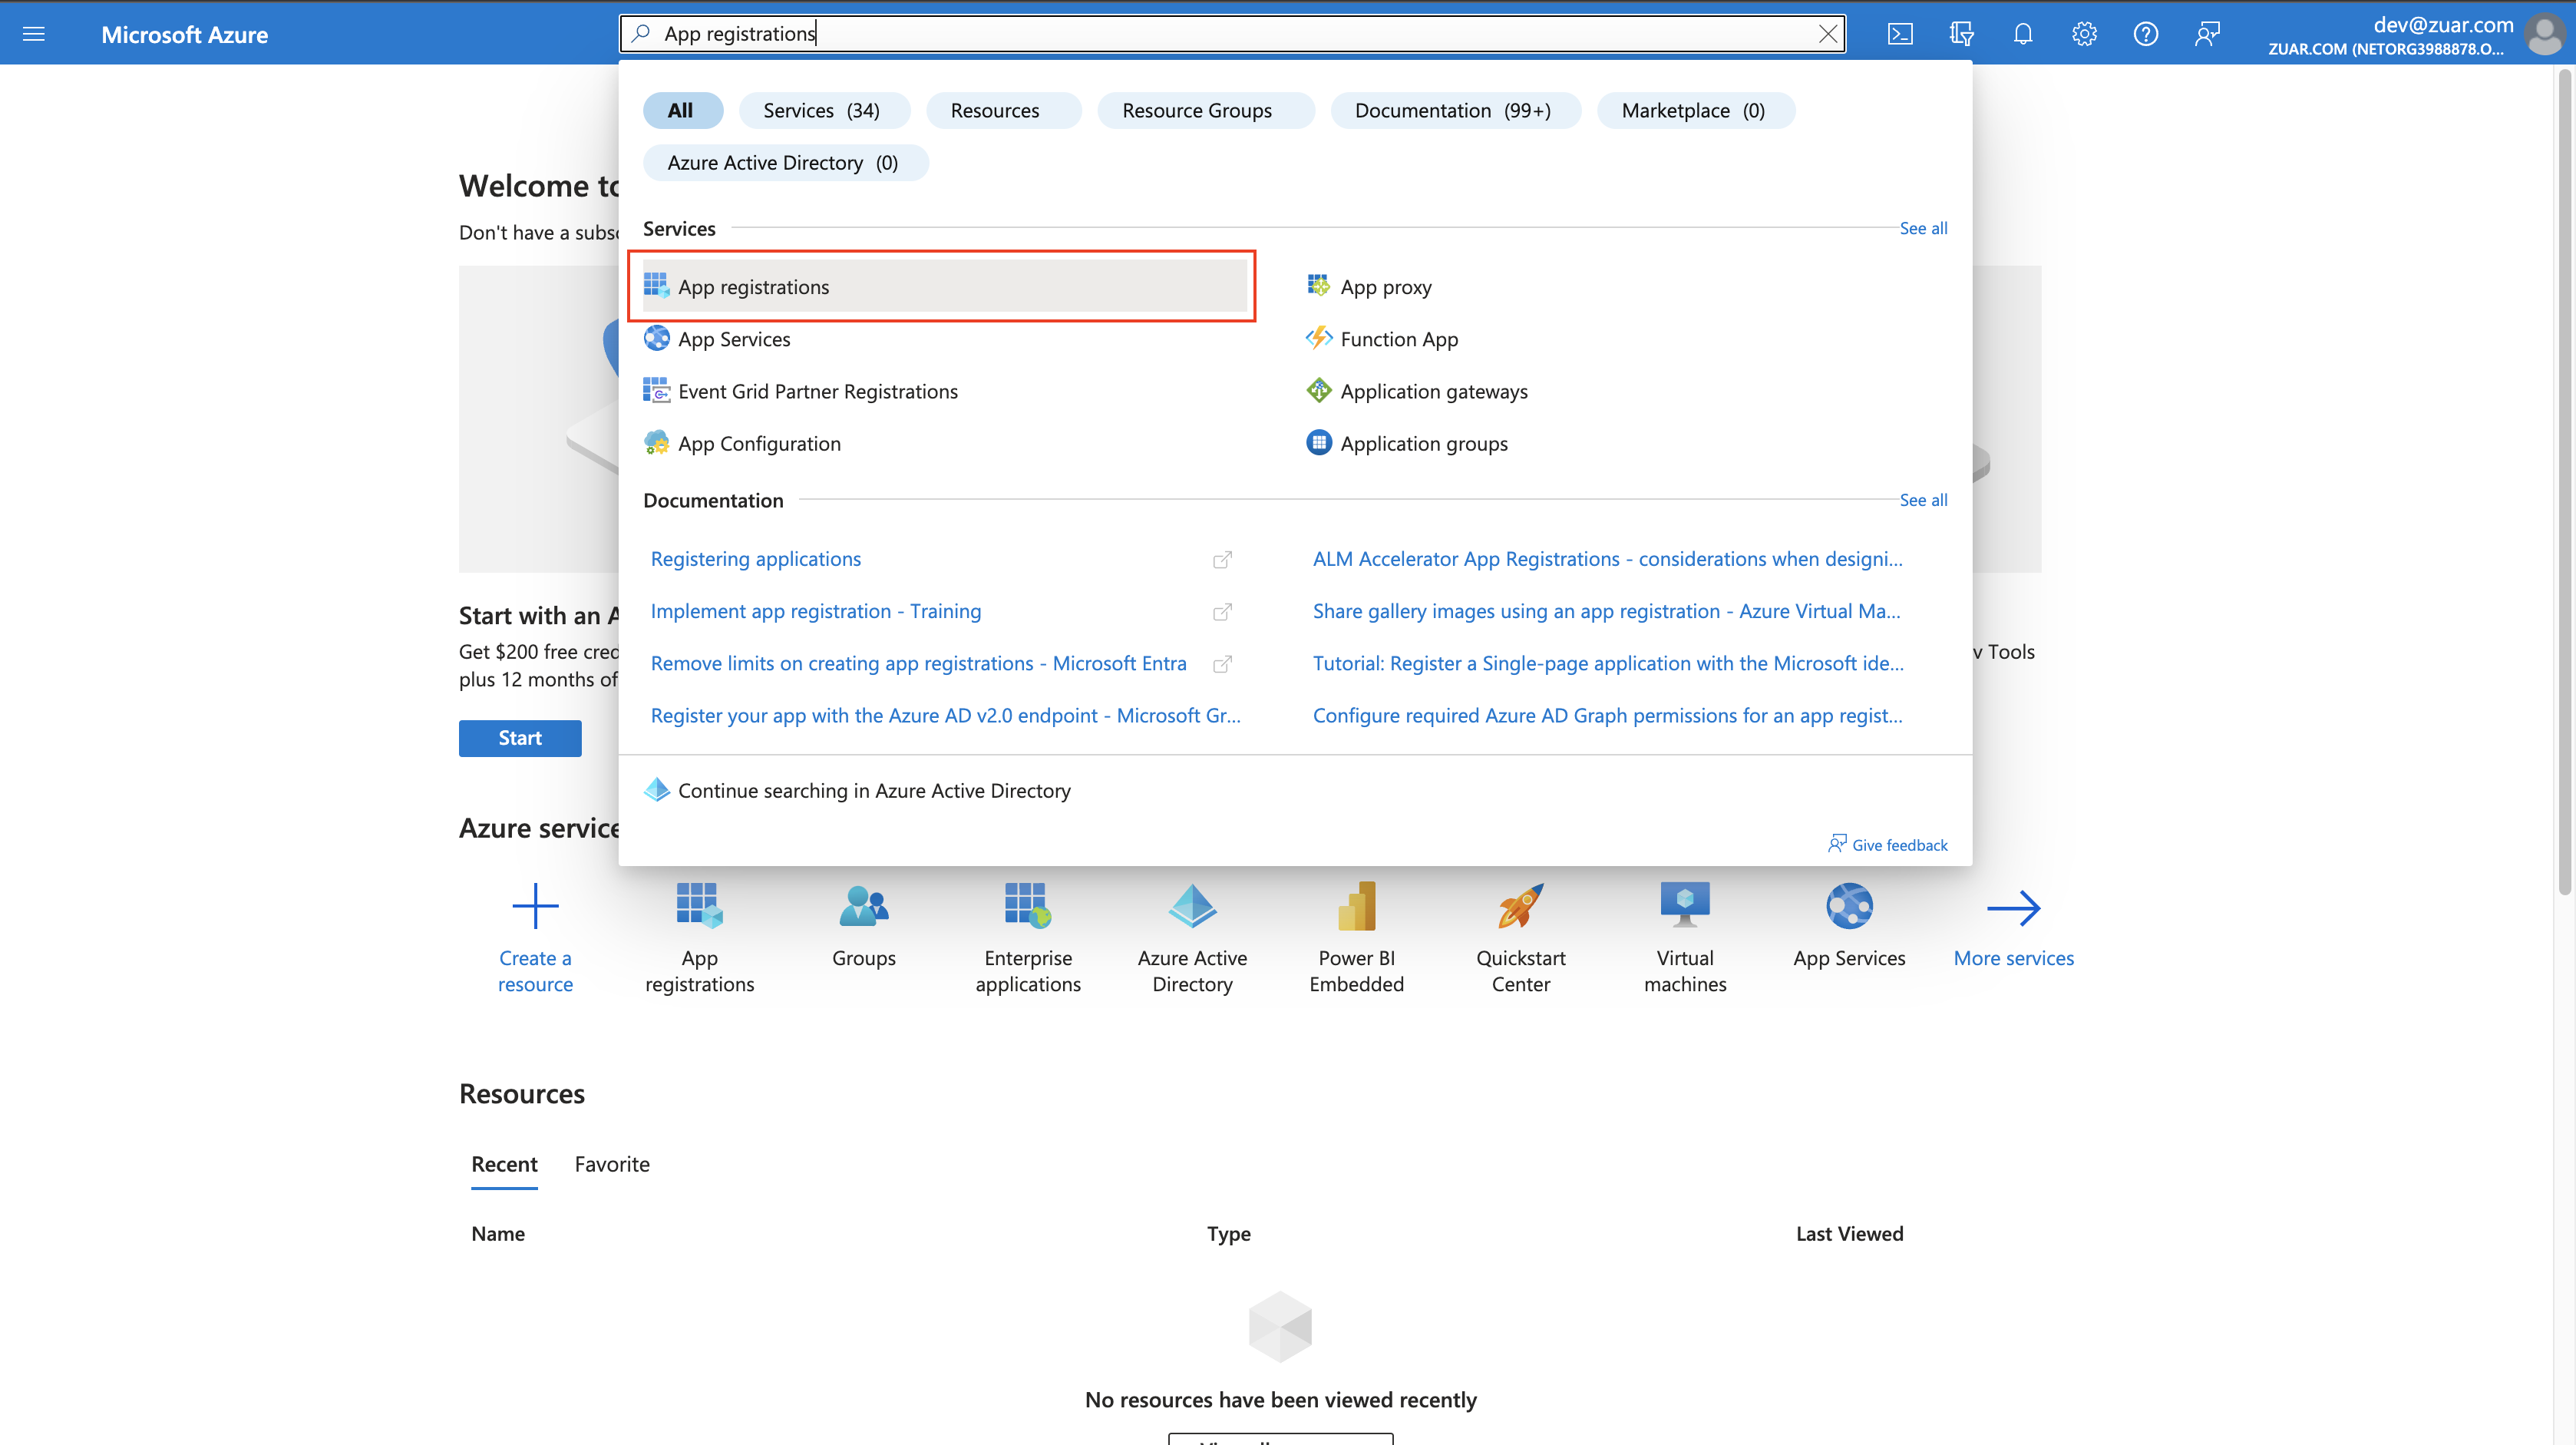
- Choose
New registrationto create a new application. - Enter the application
Name, select the appropriate option underSupported account types, underRedirect URIselectSingle-page Application (SPA)and enter your Zuar Portal domain (e.g.https://customer.zuarbase.net). Finally, clickRegister.
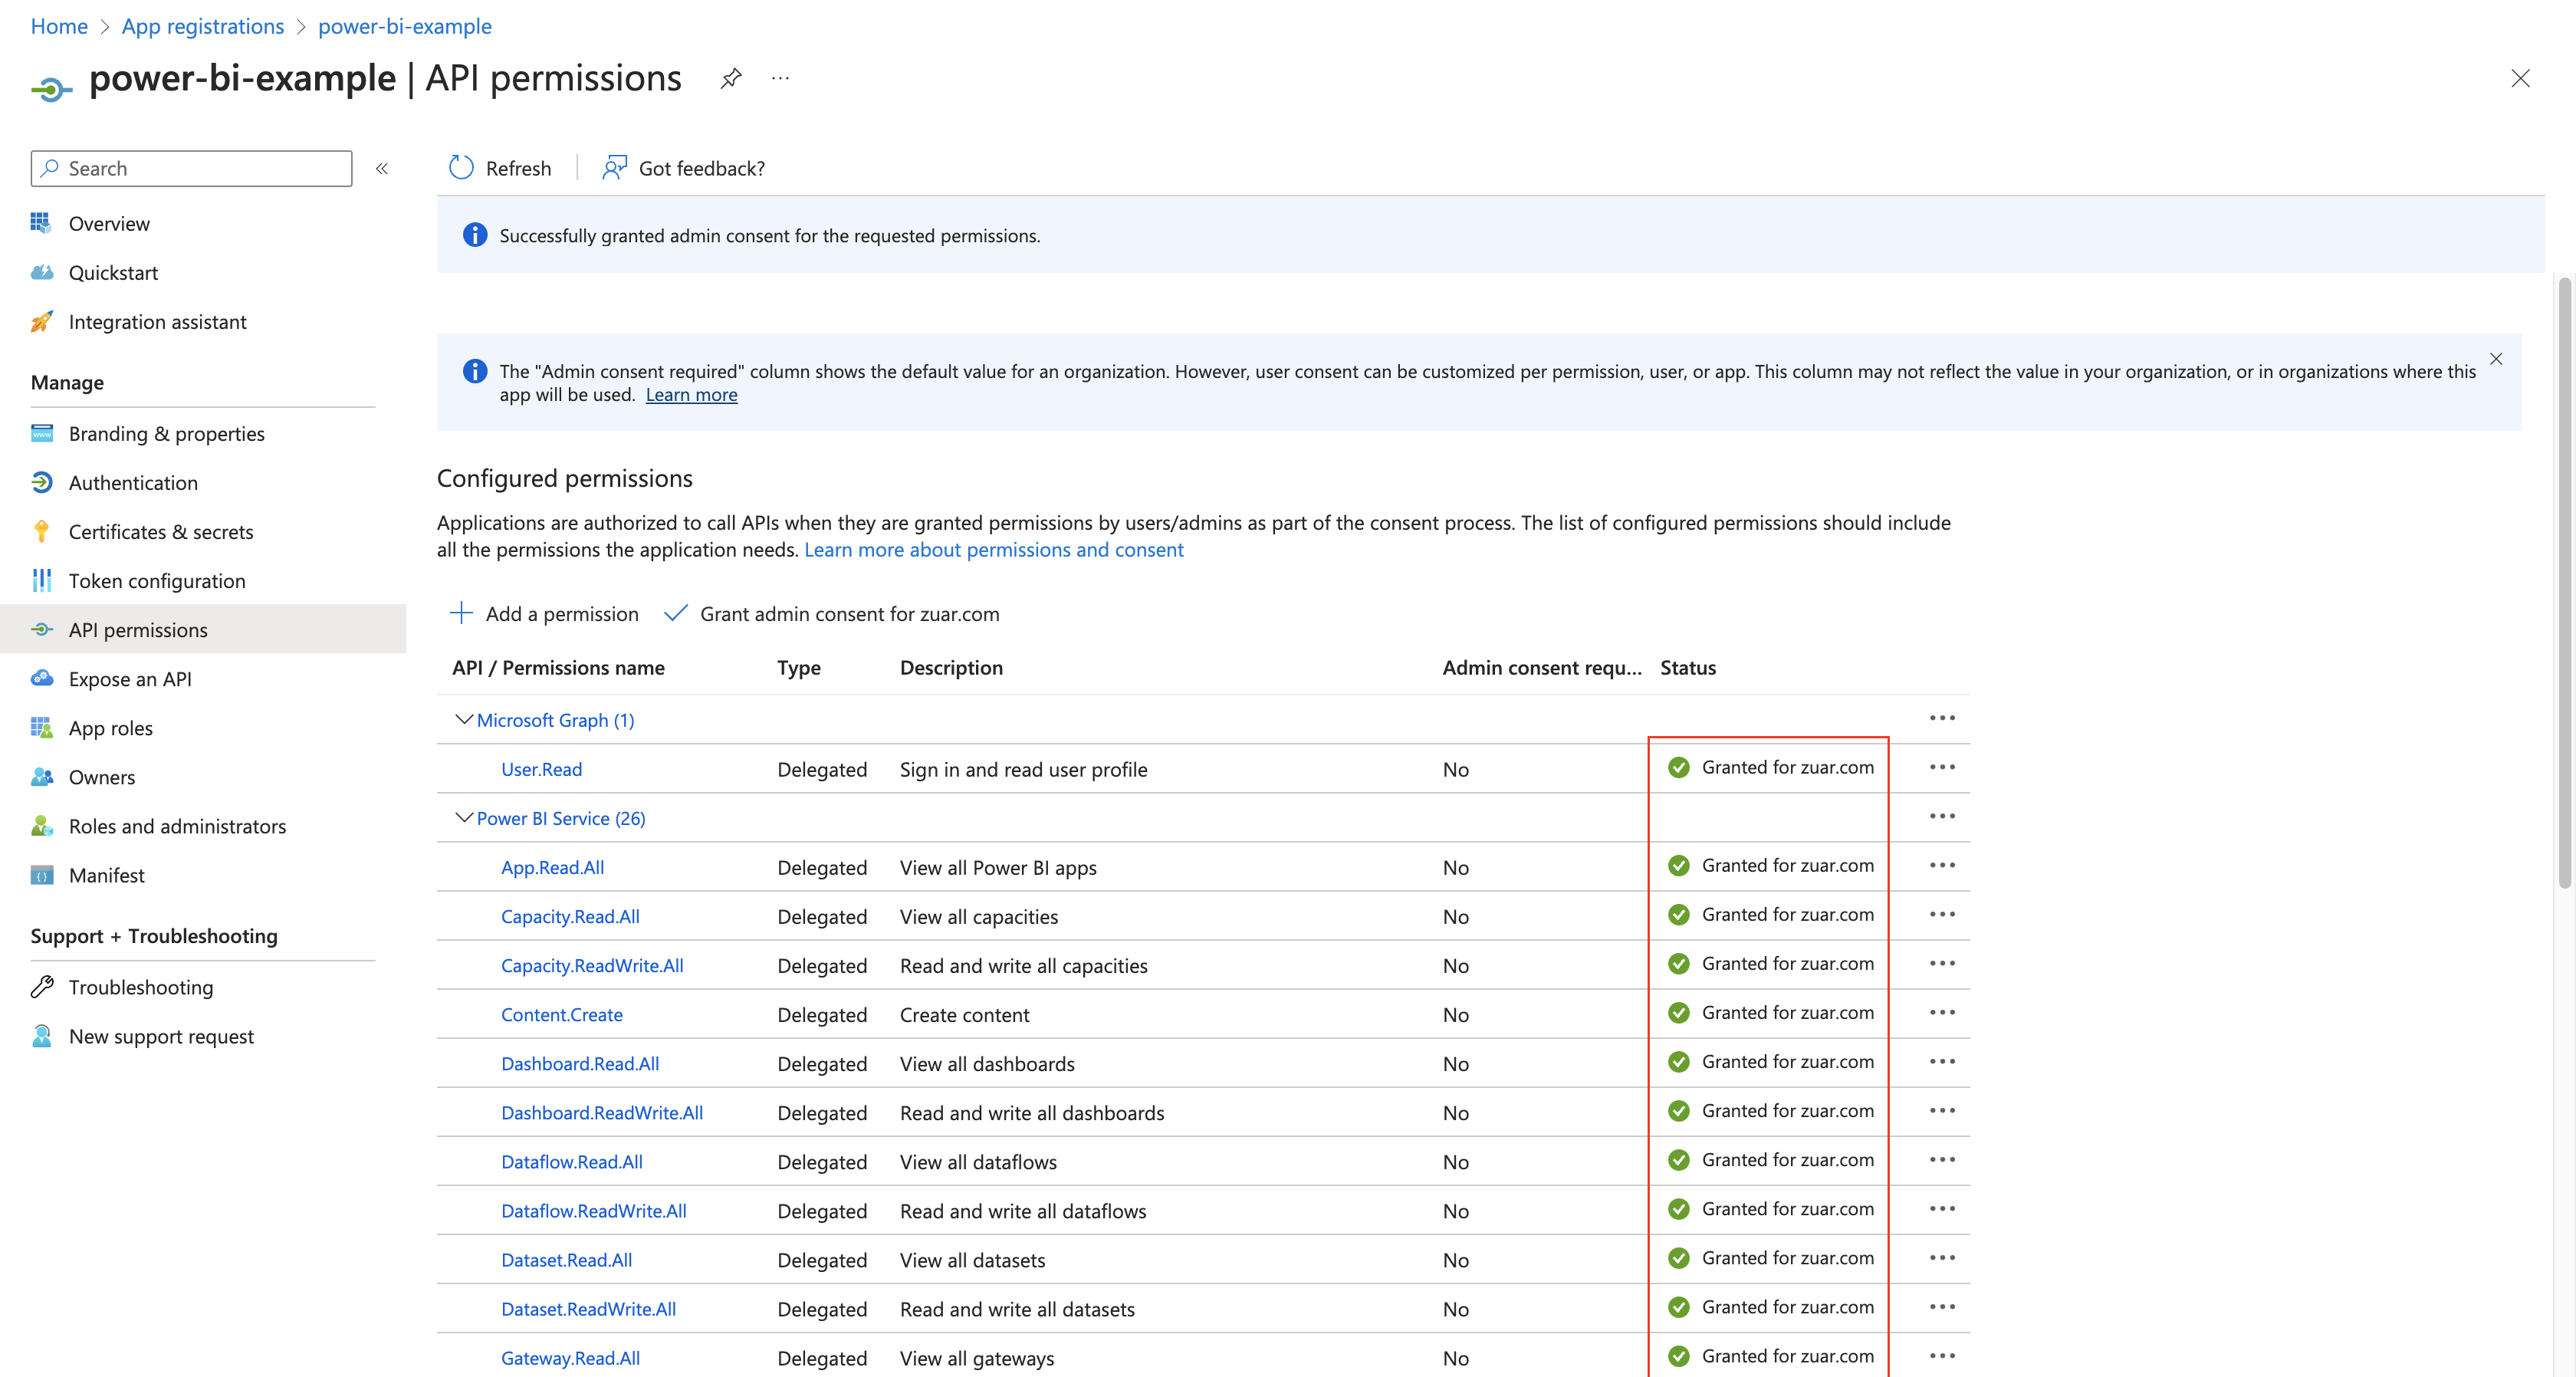
- Choose
API permissionsin left sidebar. Then click+ Add a permission.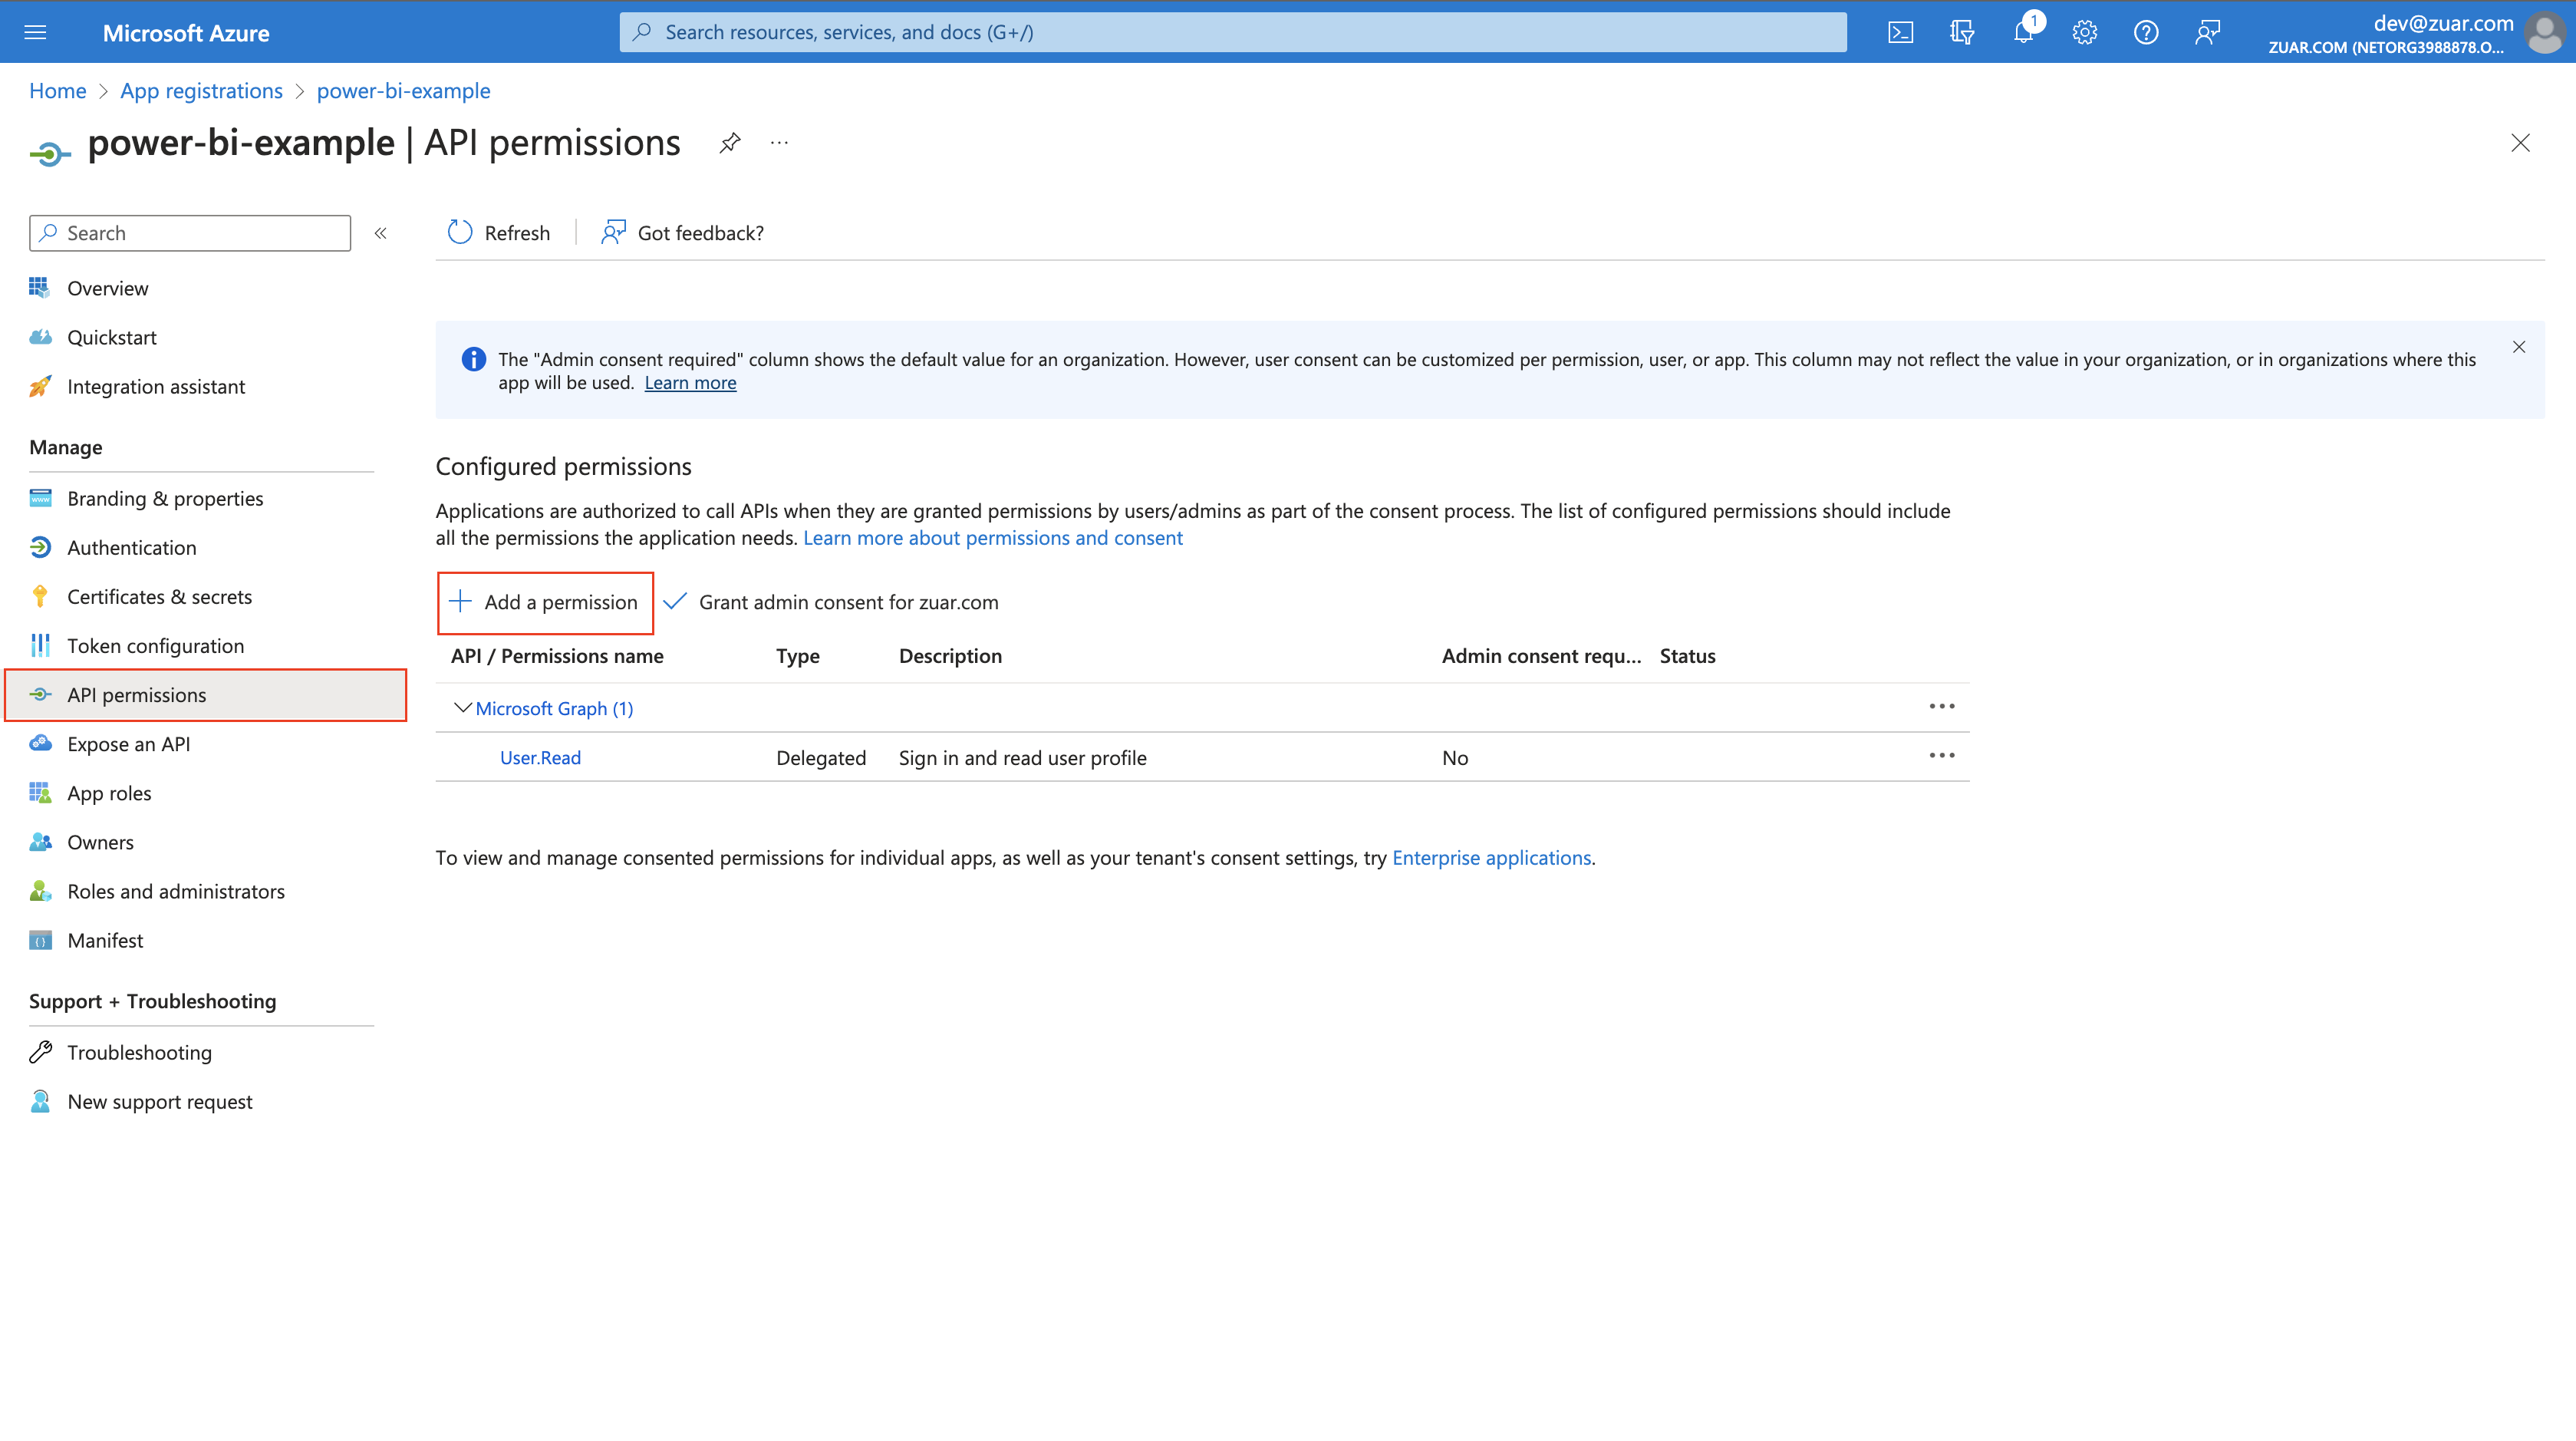
- Select
Power BI Service.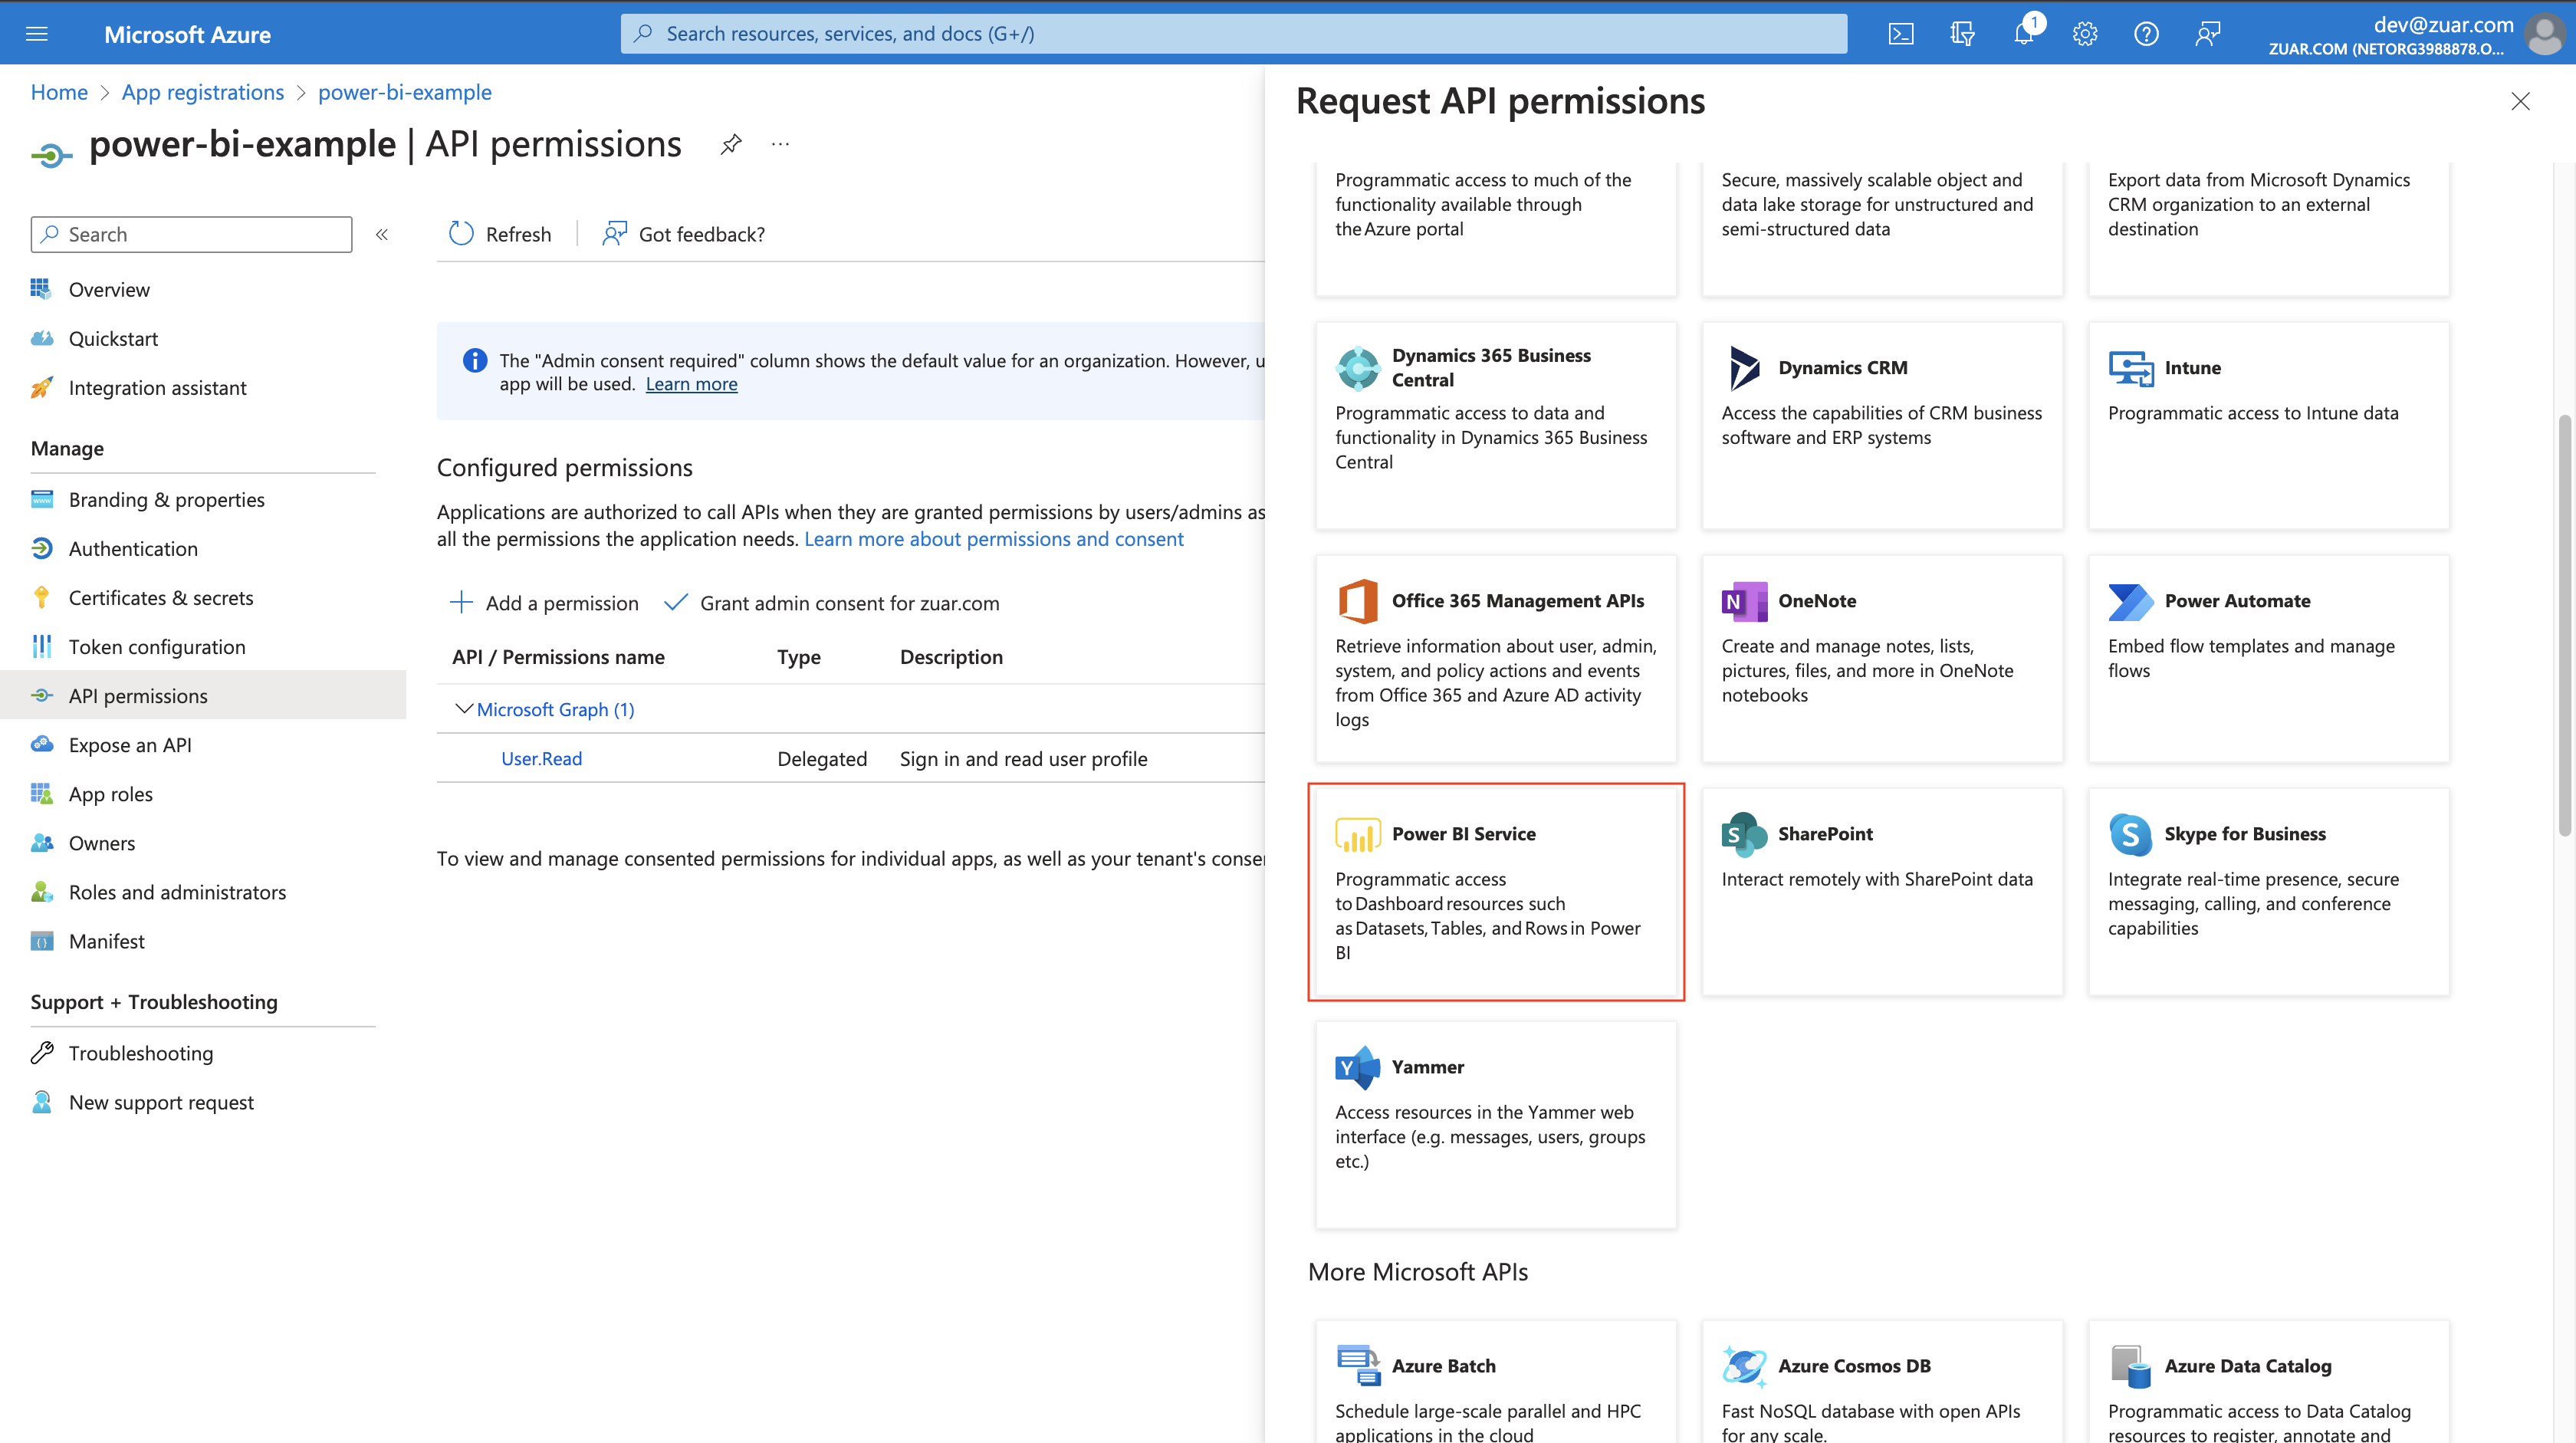
- Click
Delegated permissions, and select required permissions below.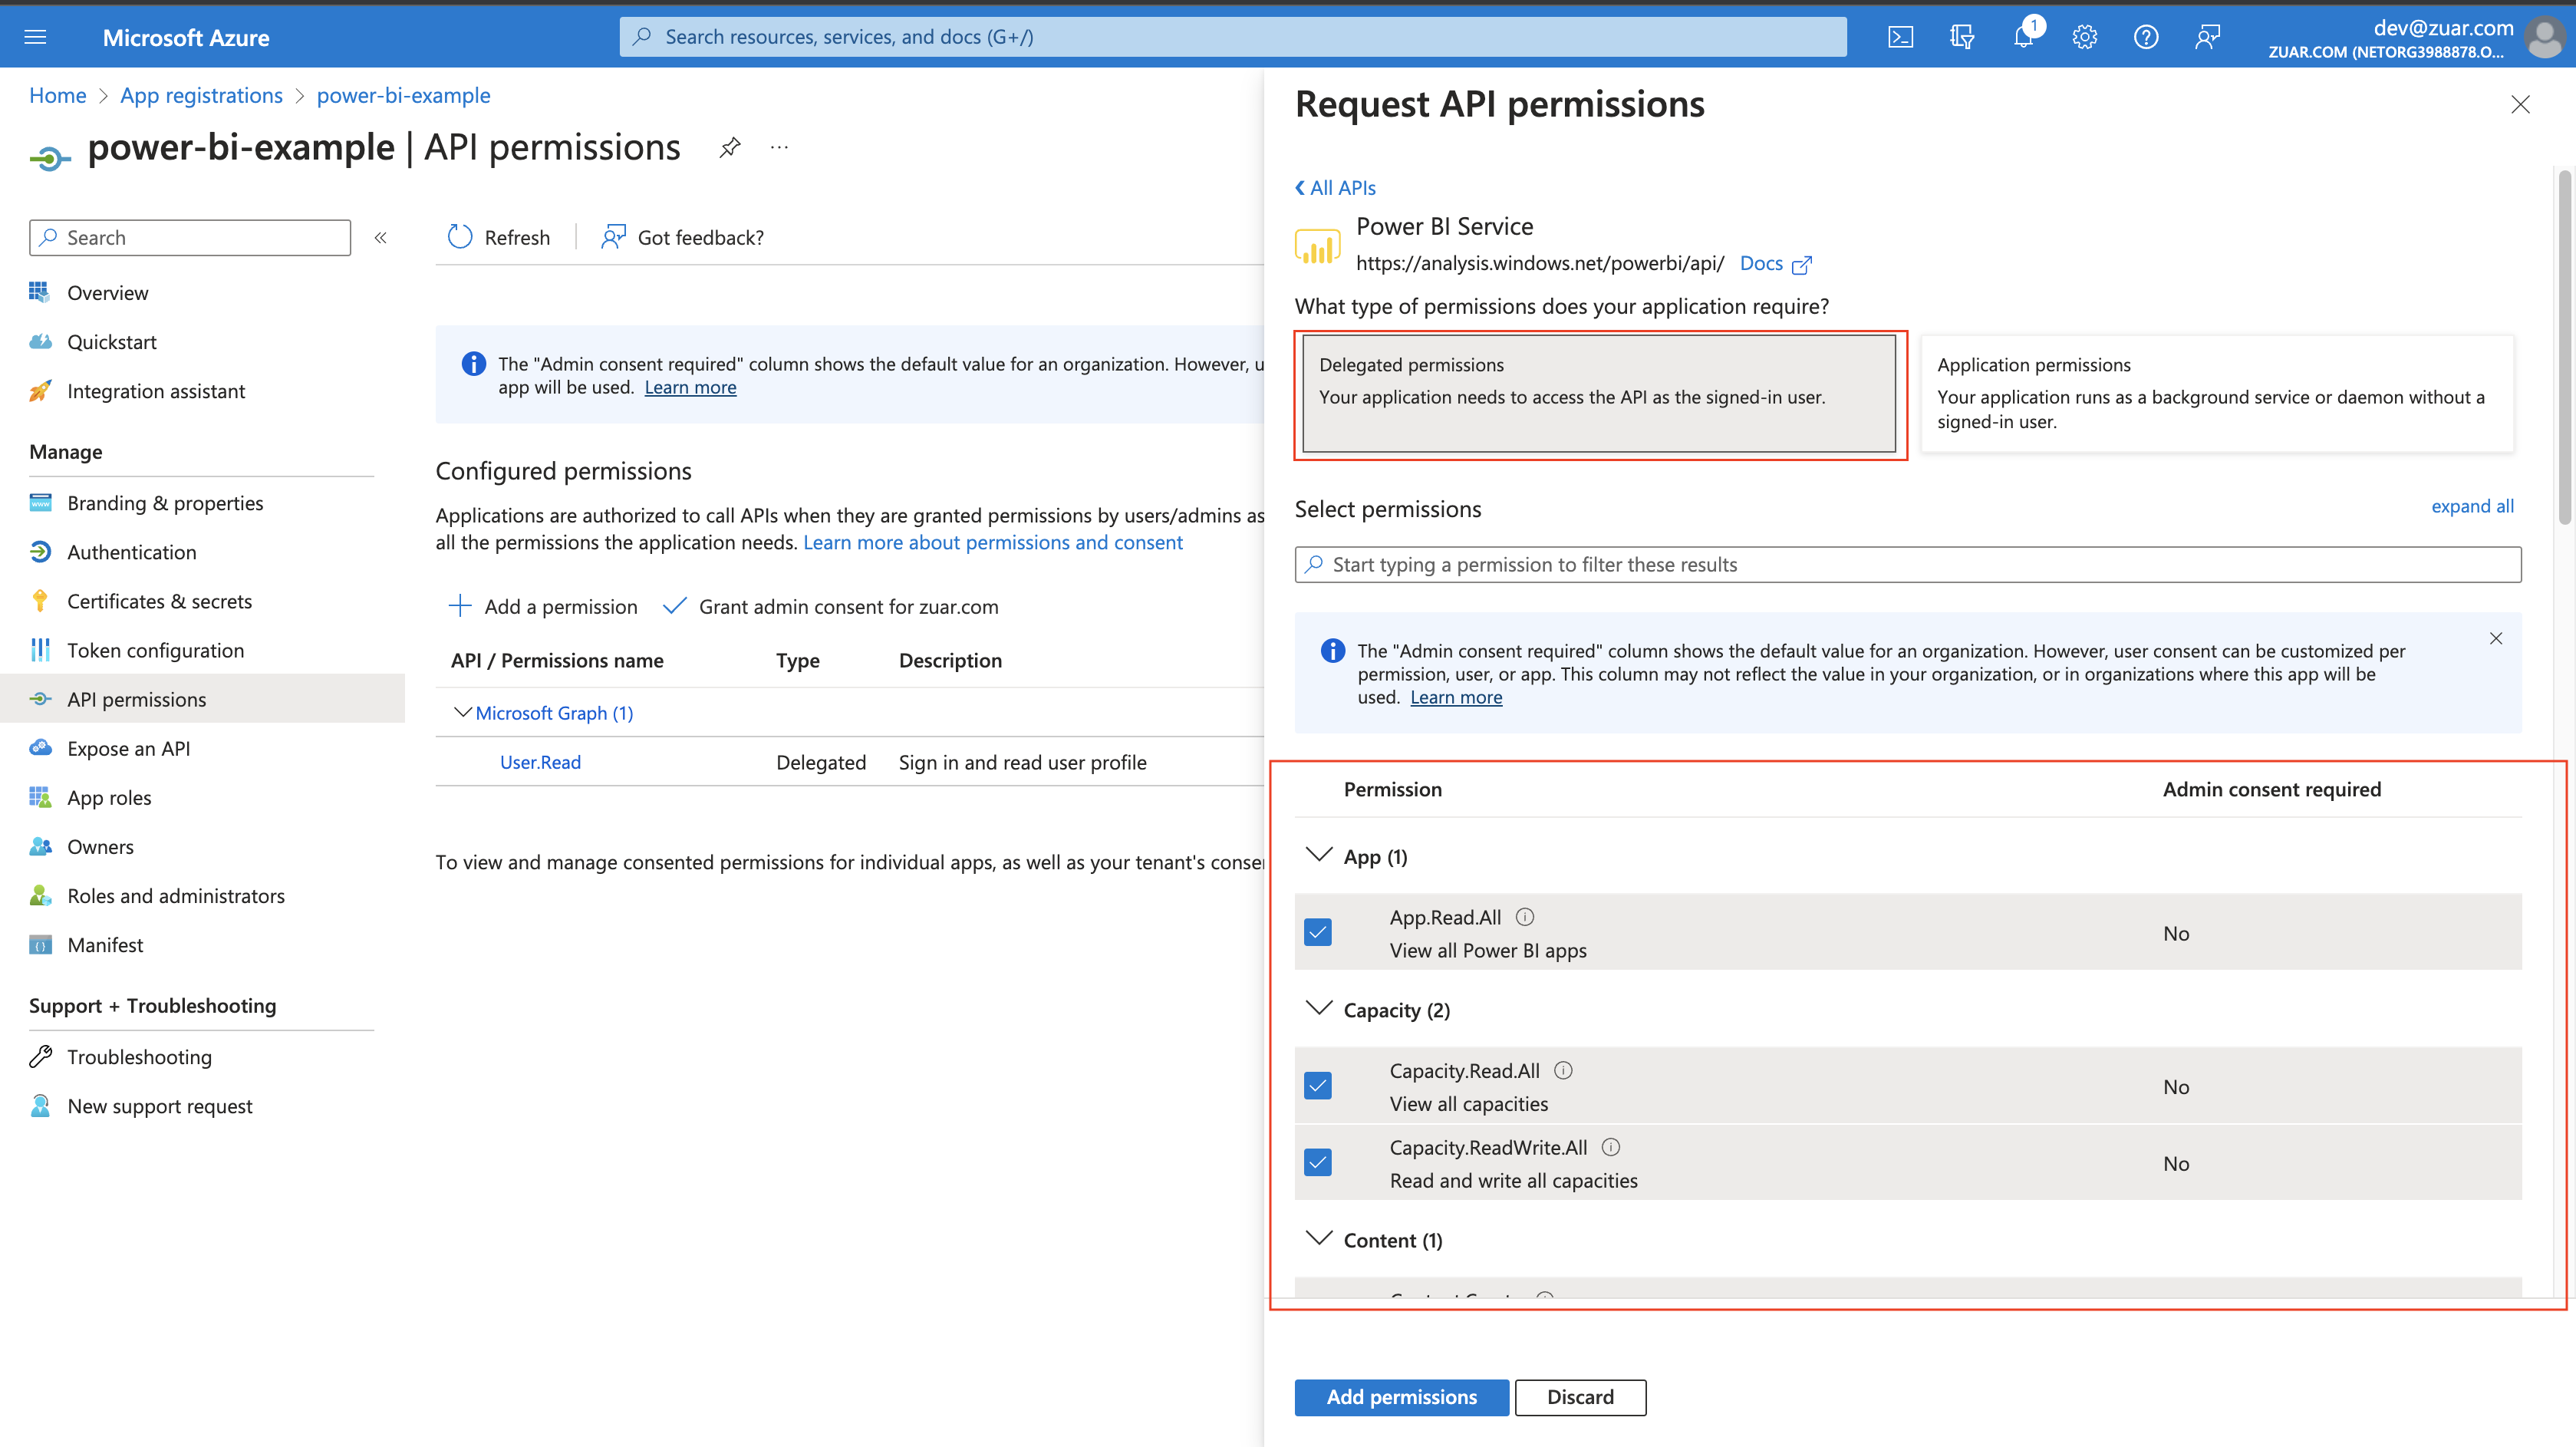
- Click
Application permissions, and select required permissions below.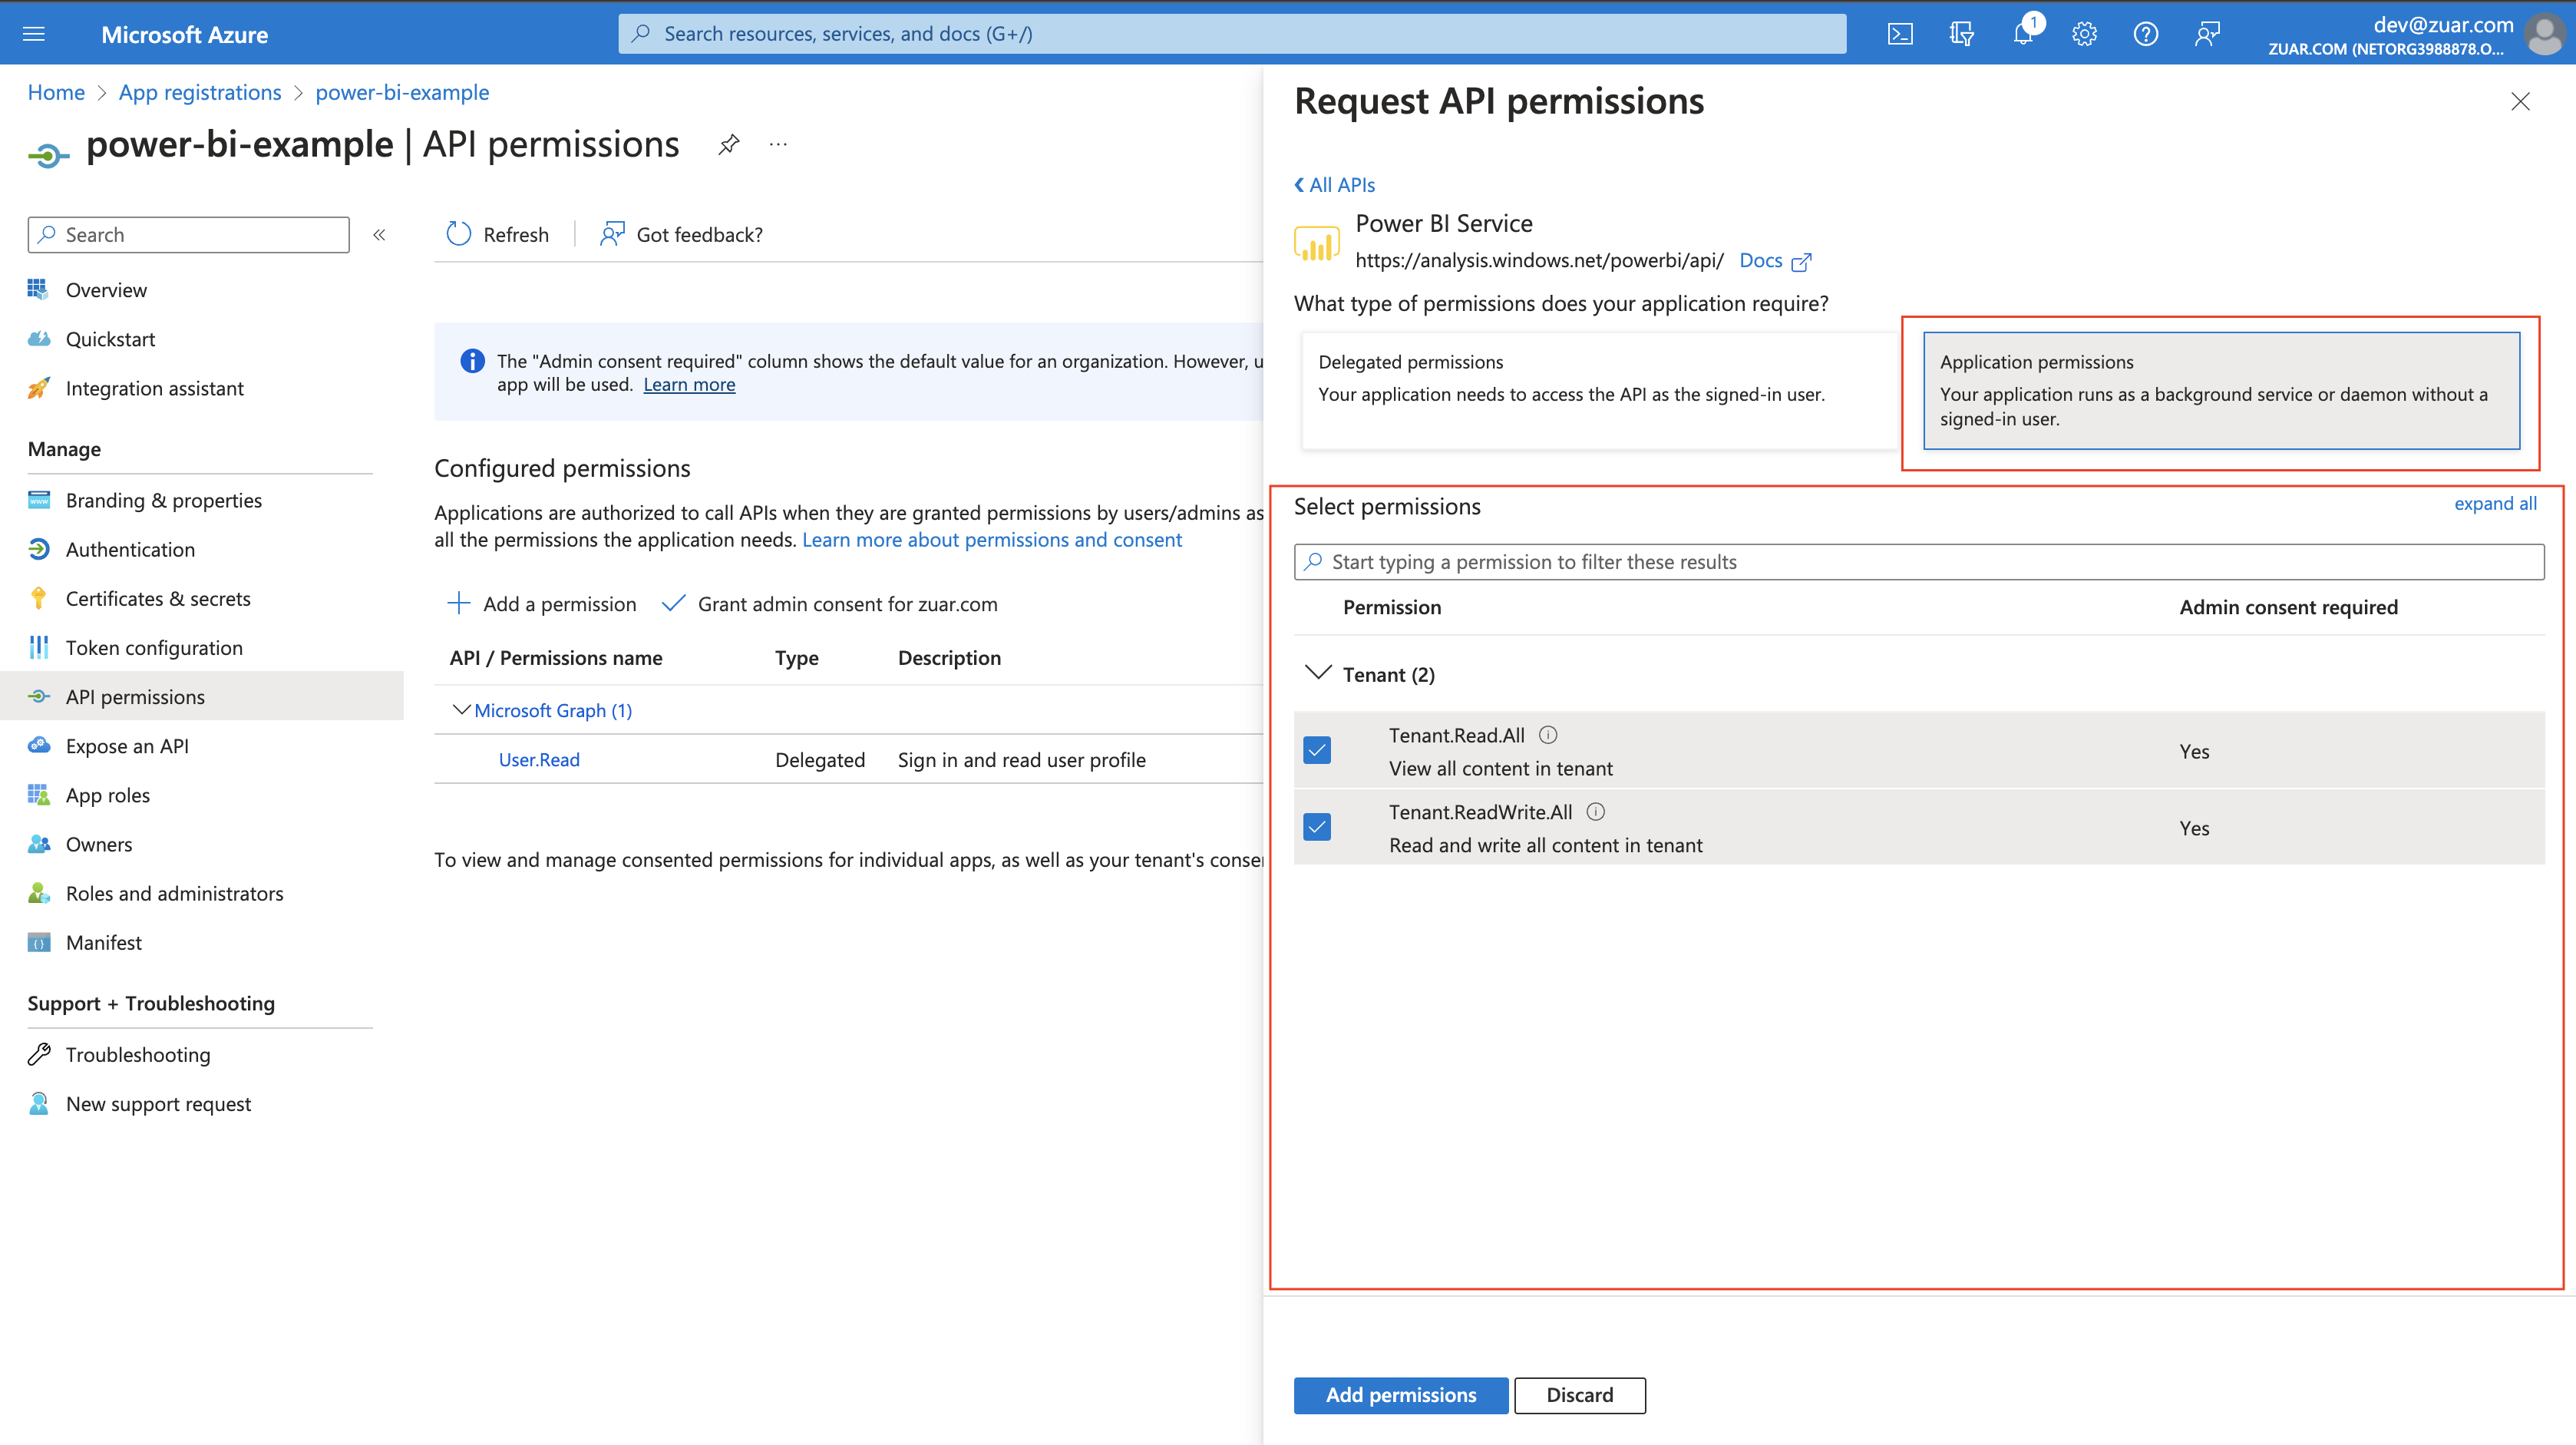
- Click
Add permissions.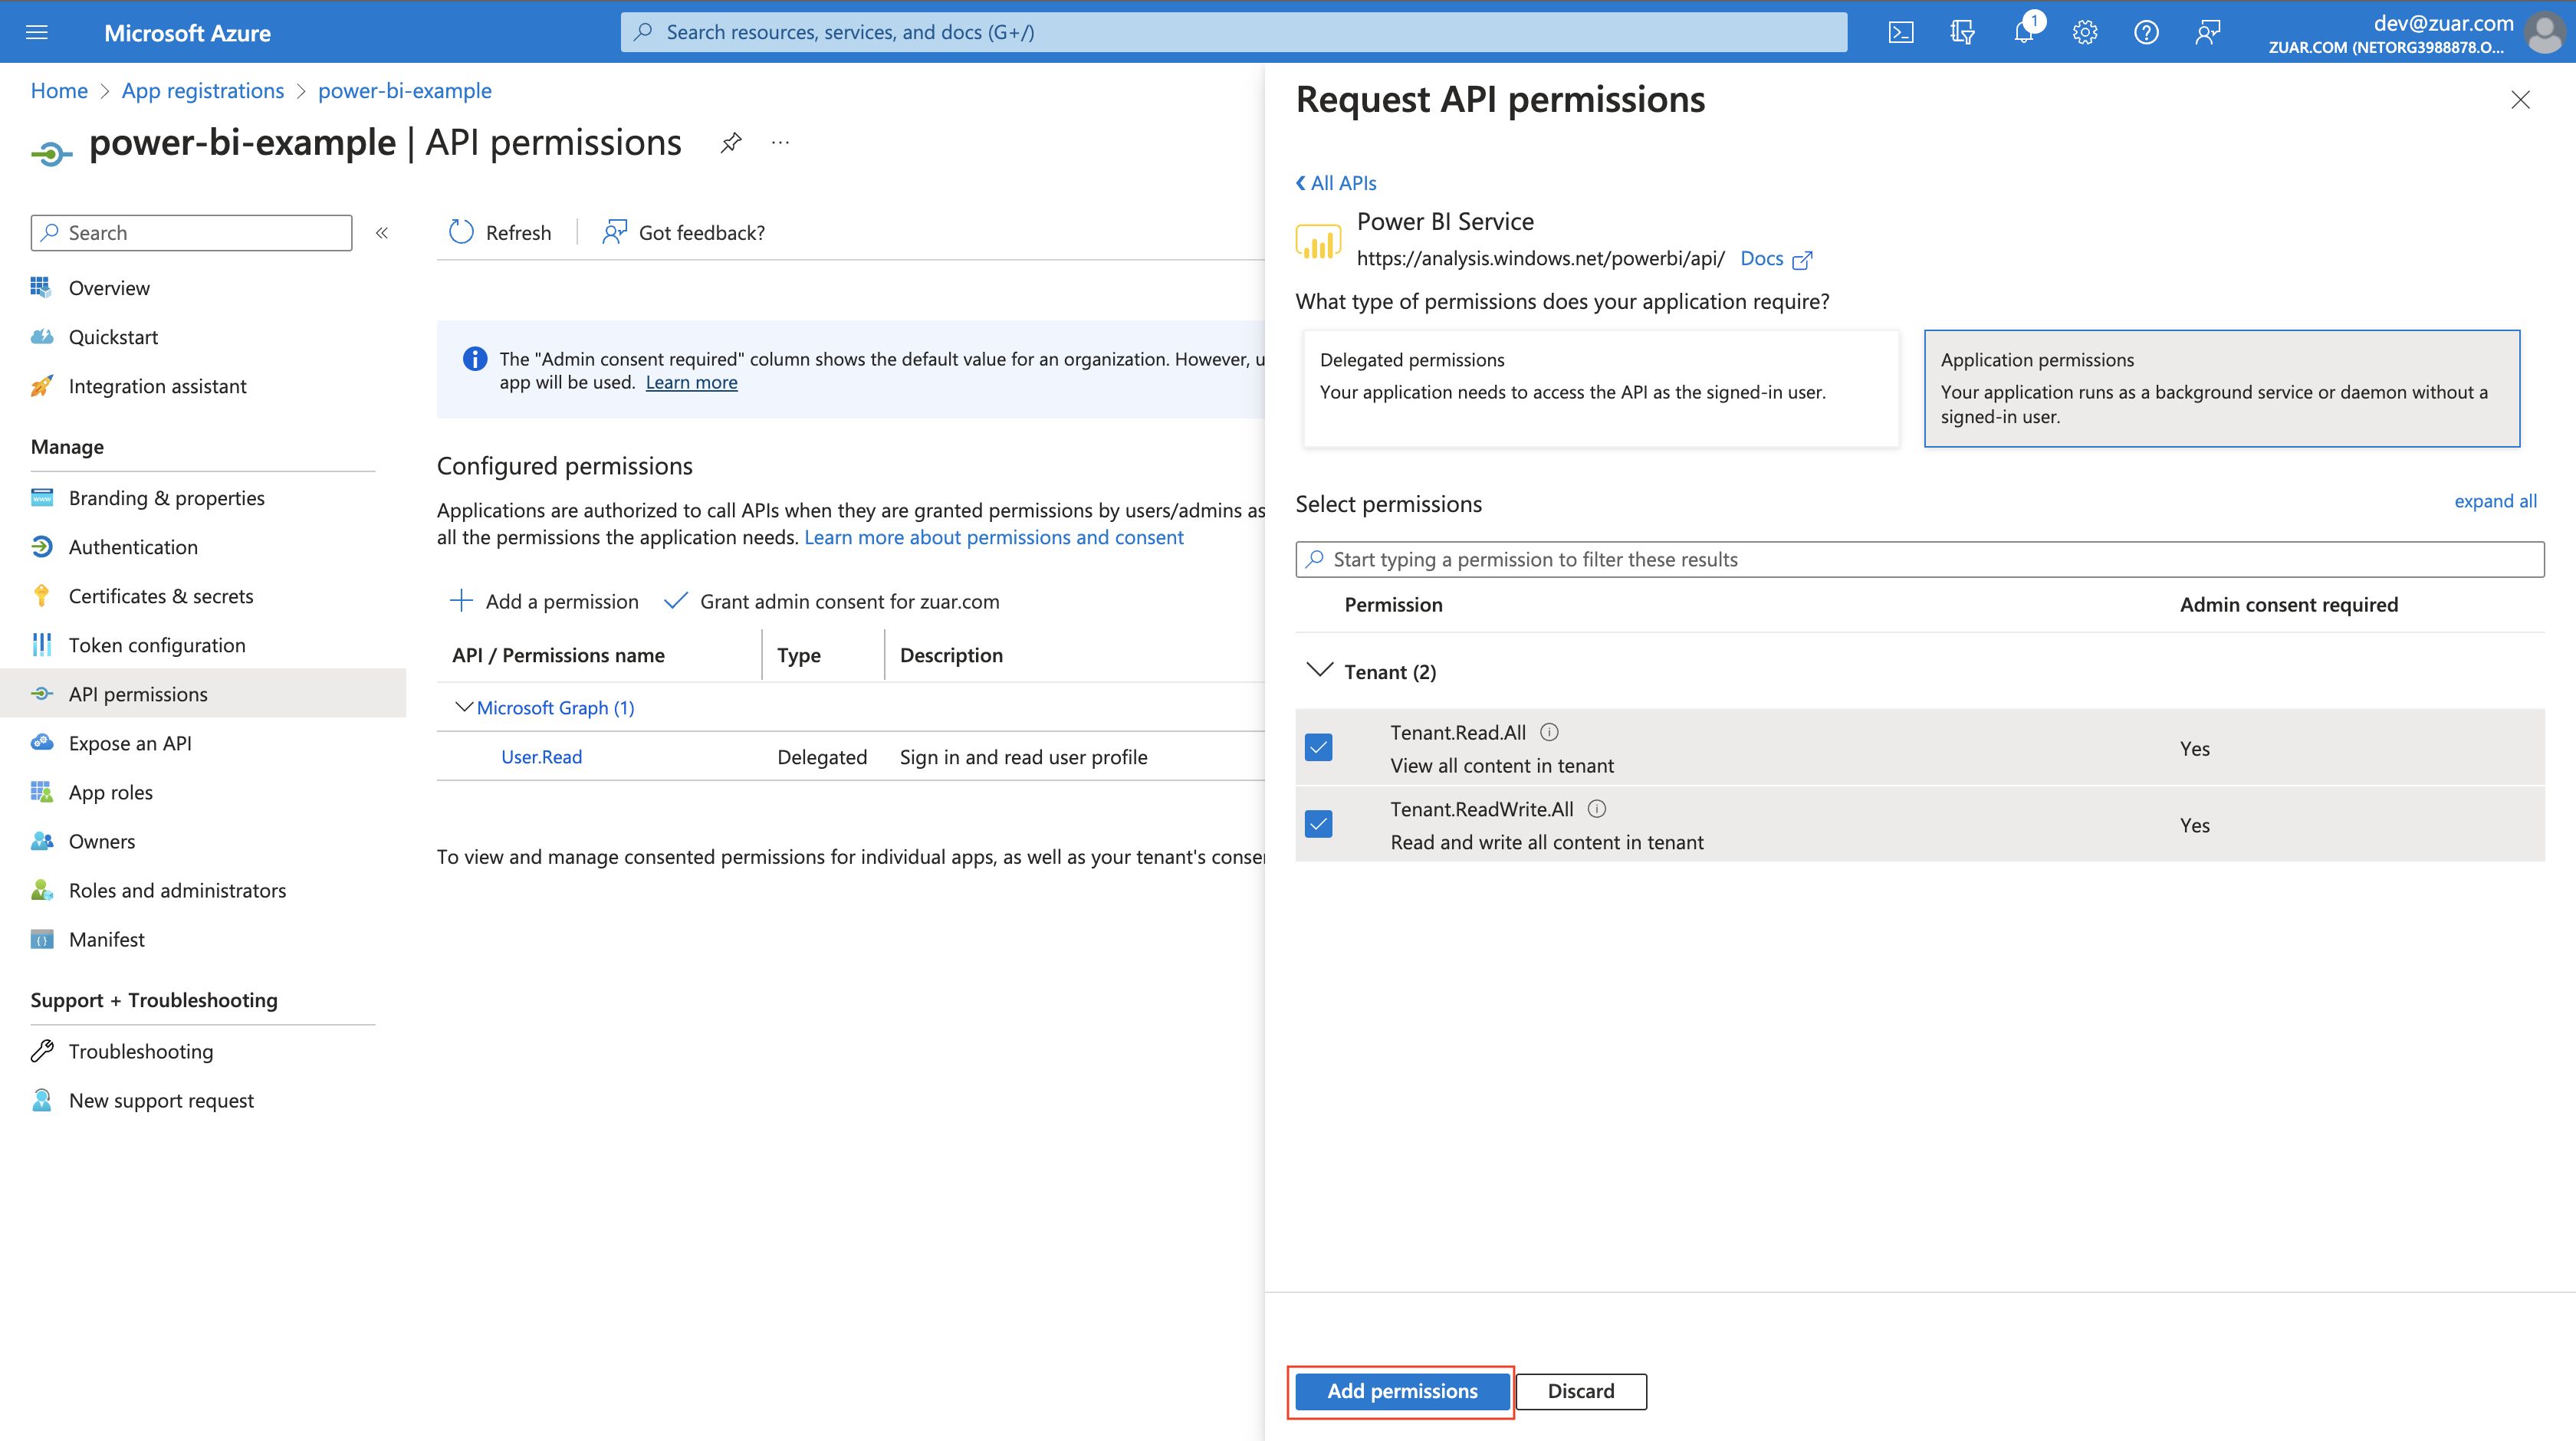
- Click
Grant admin consent for .... There should be green checkmarks in the Status column for each row.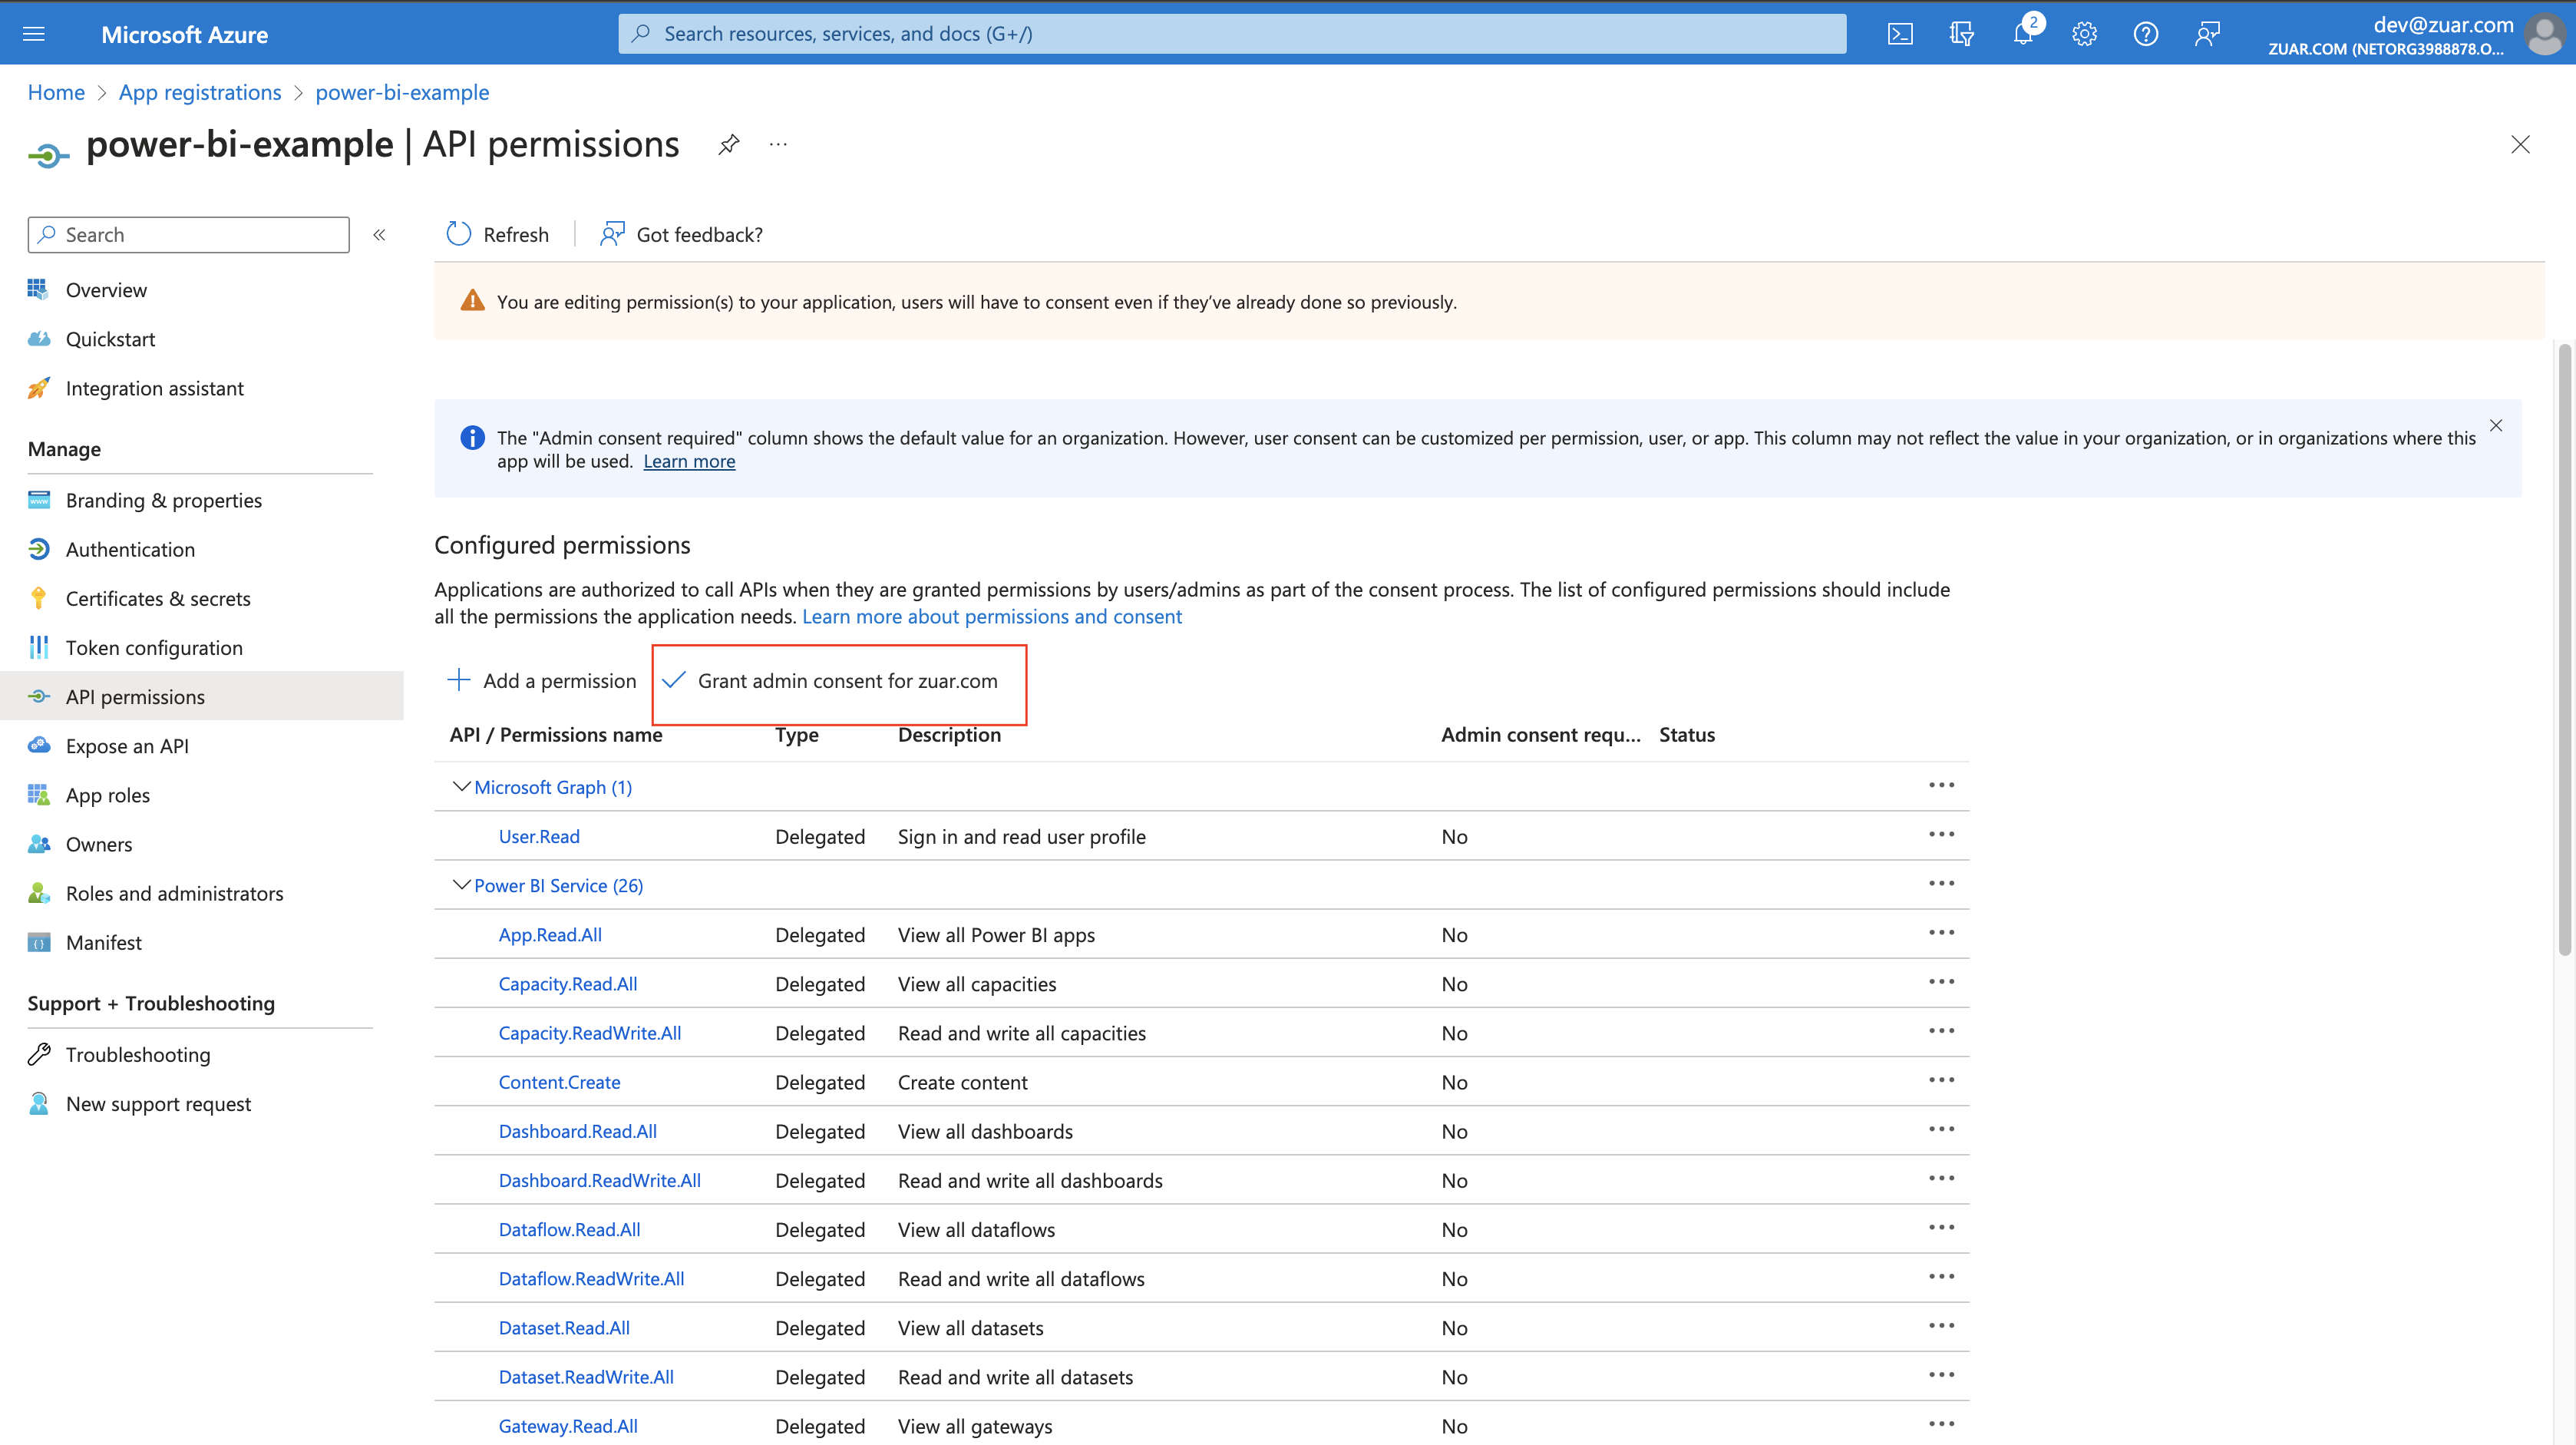
- Click
Certificates & secretsin the left sidebar. Click+ New Client secret.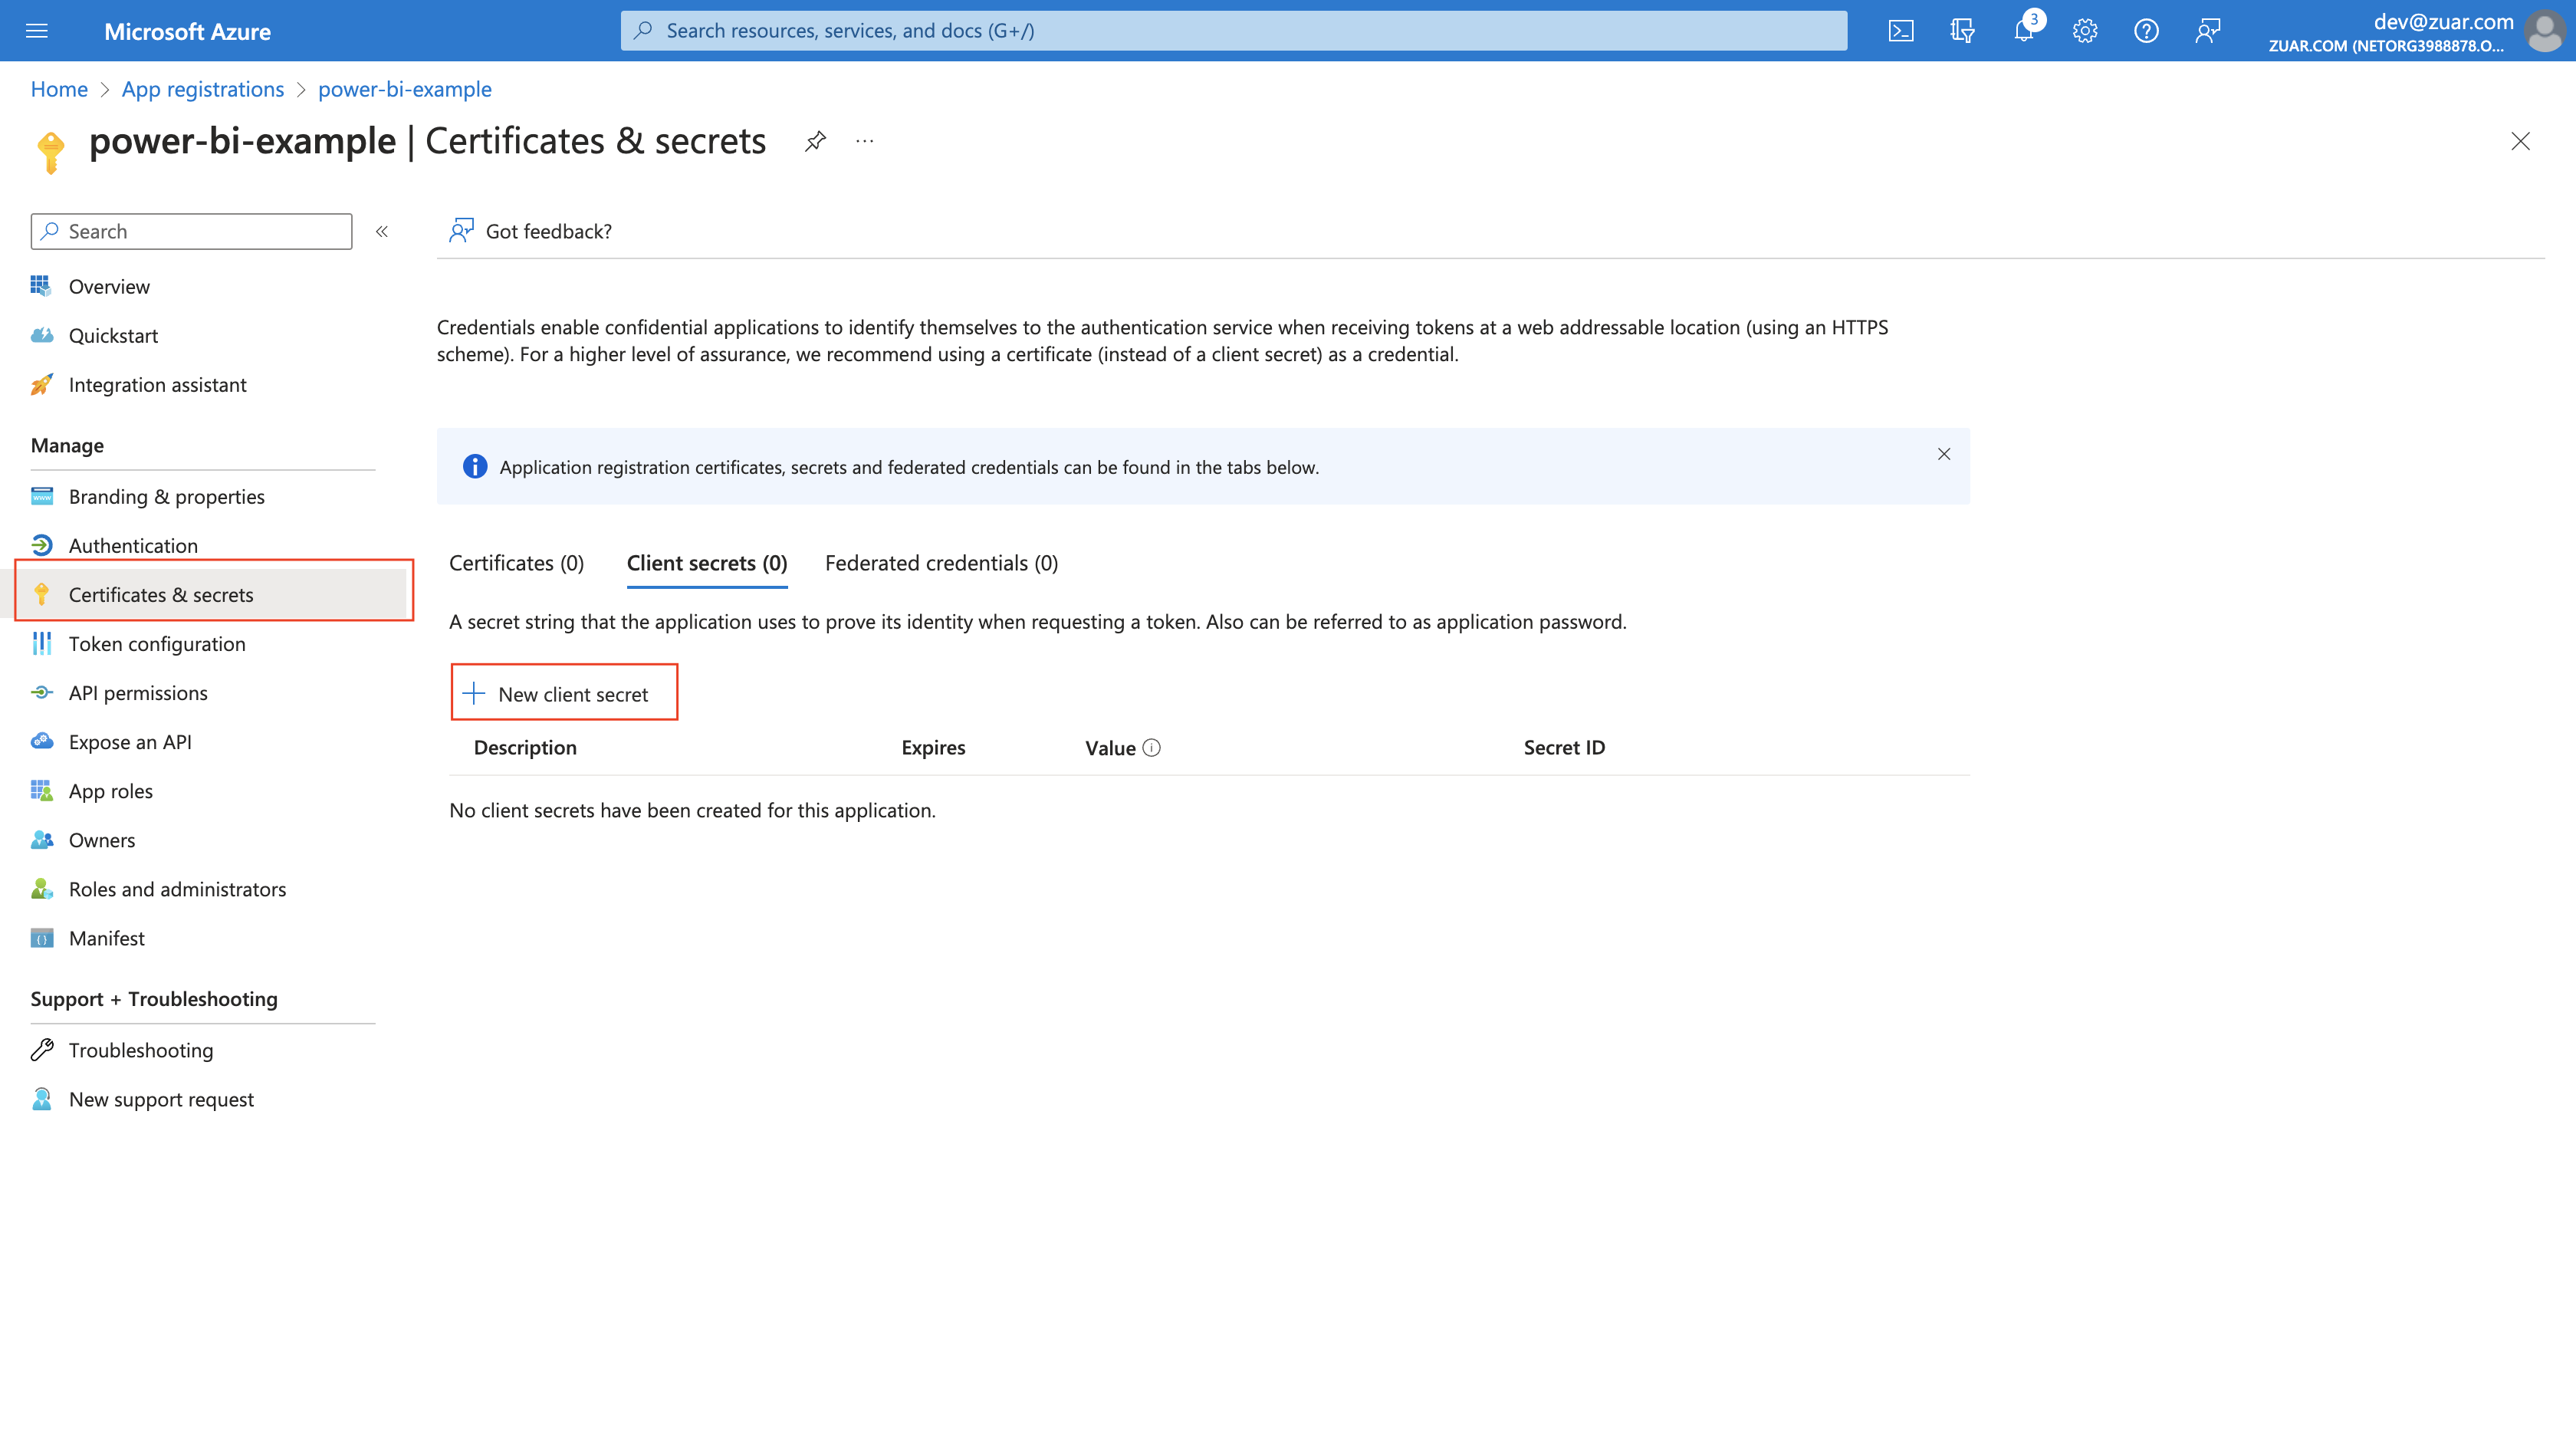
- Enter a
Descriptionand select an appropriateExpiresdate, then clickAdd.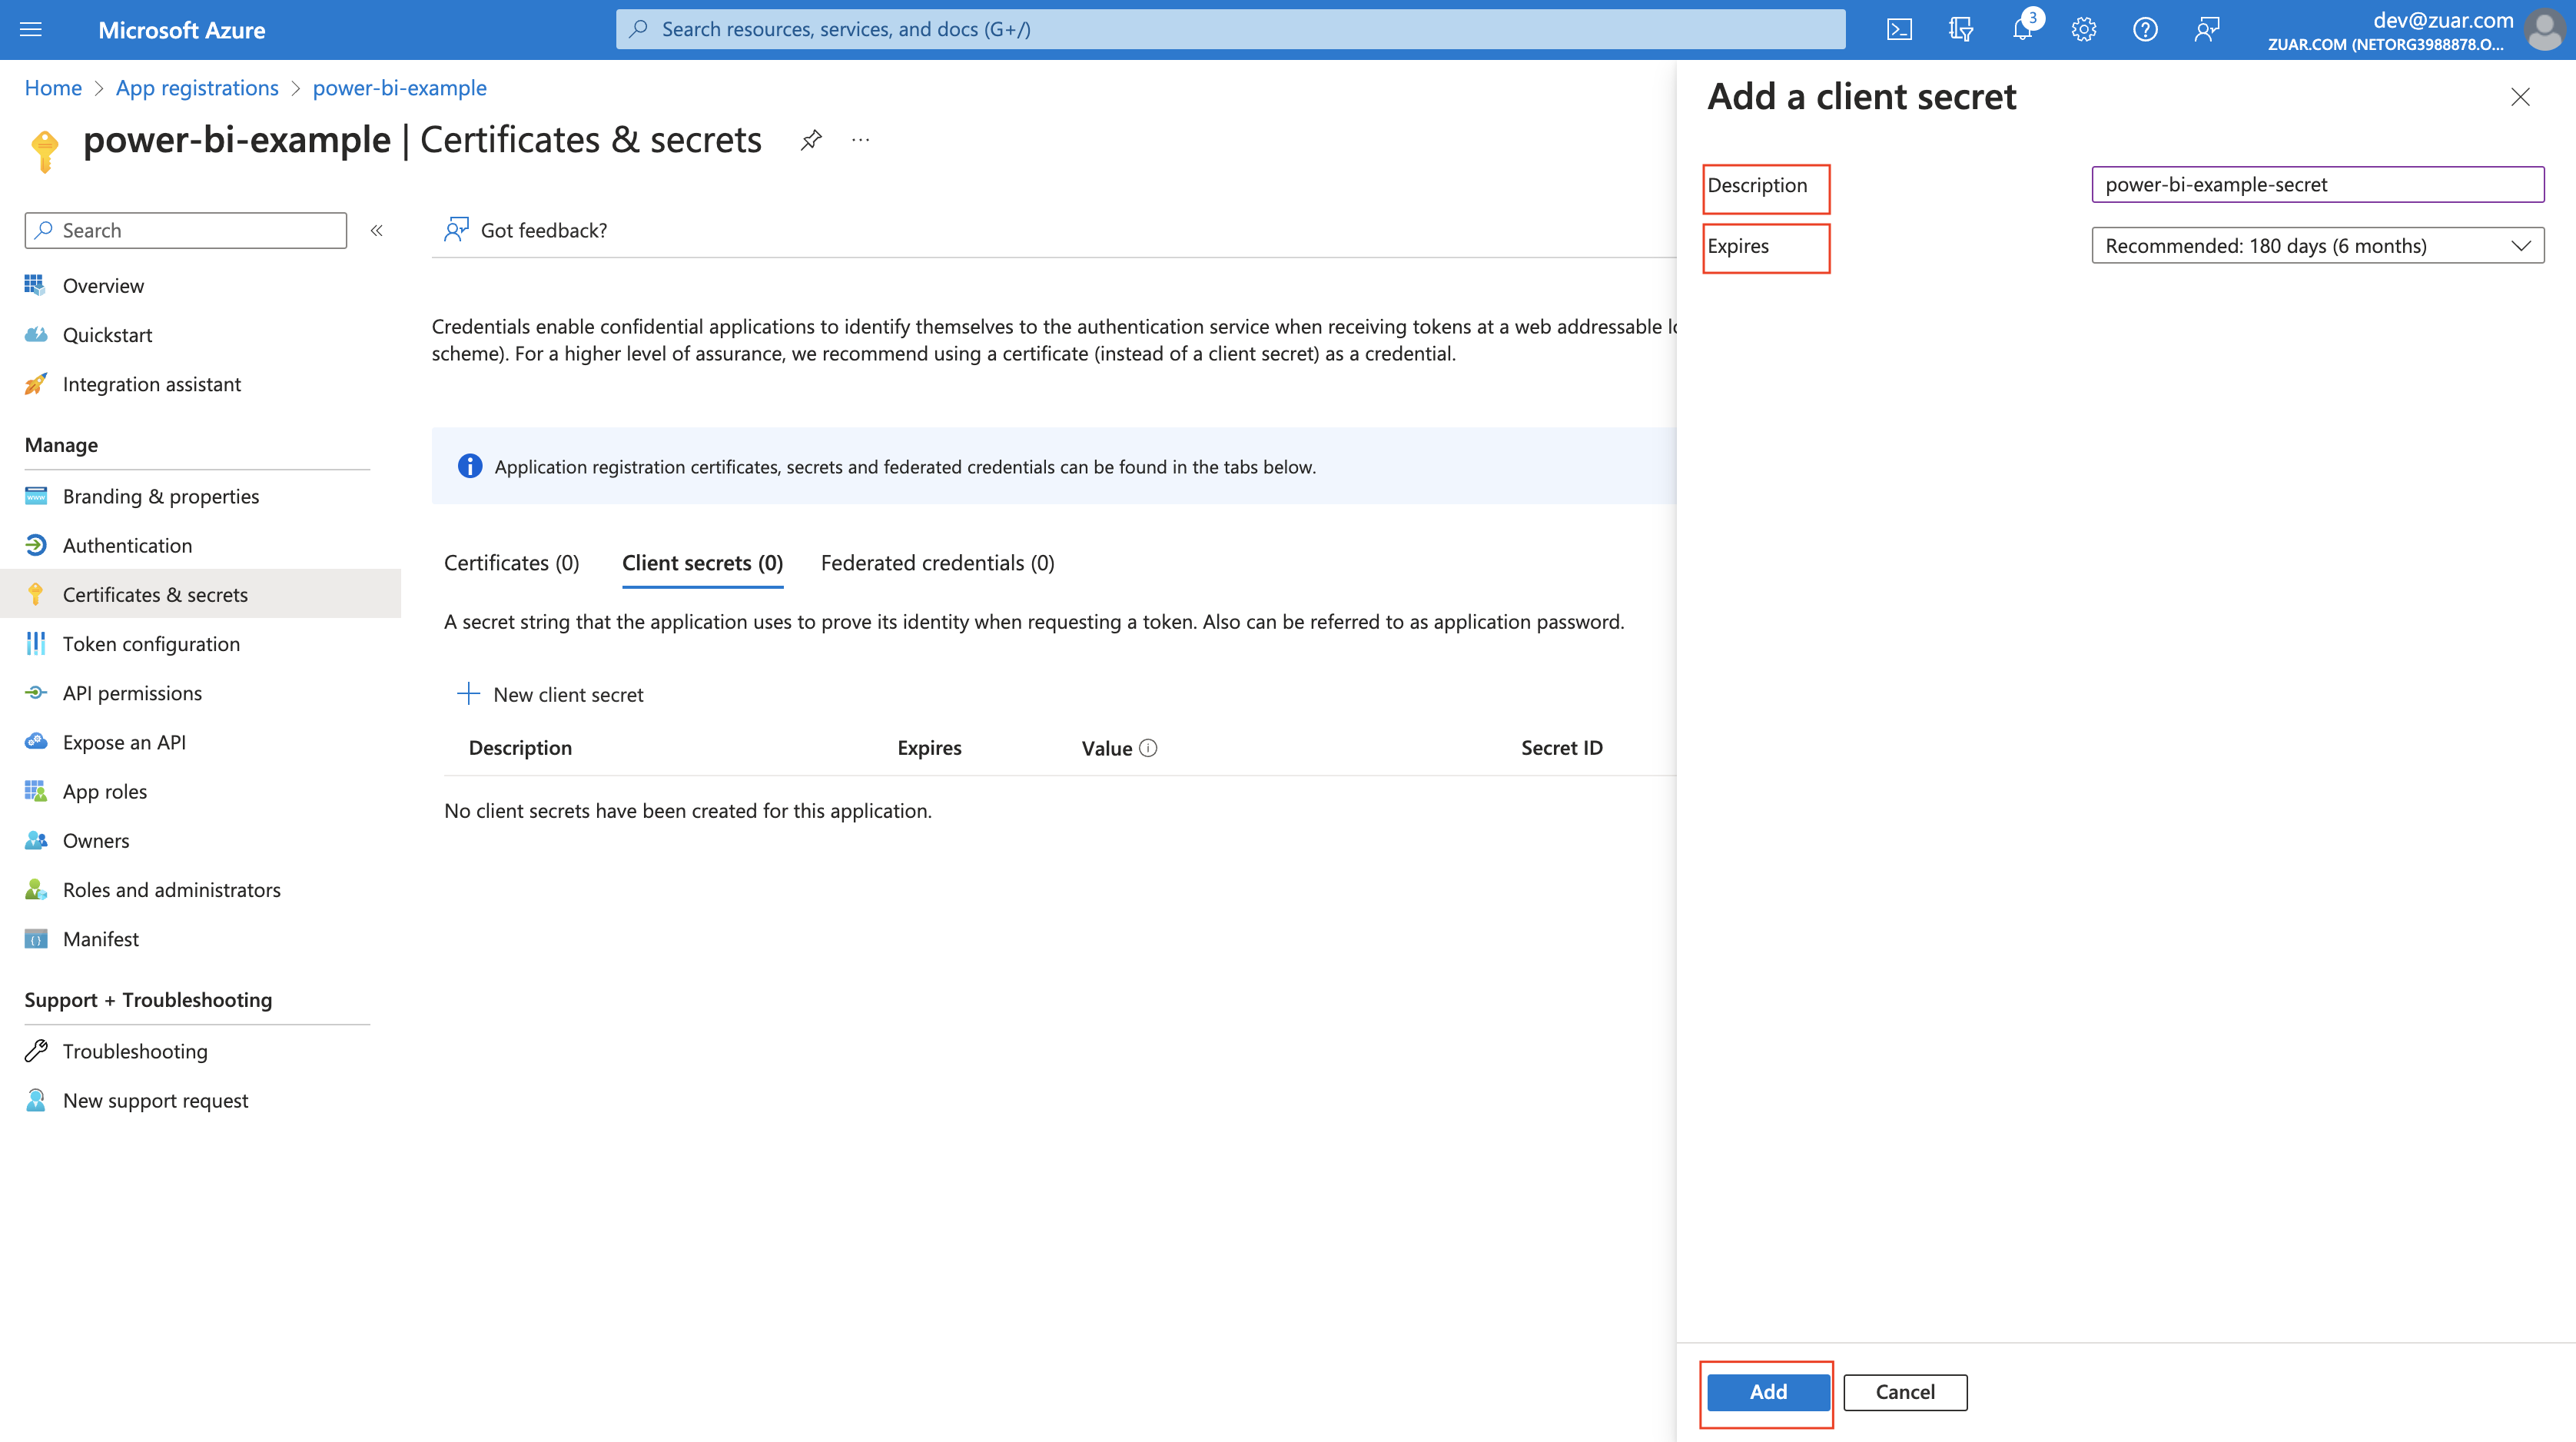
- Click the copy icon next to the
Valueand save it. This is ourClient secretvalue and we will need it later.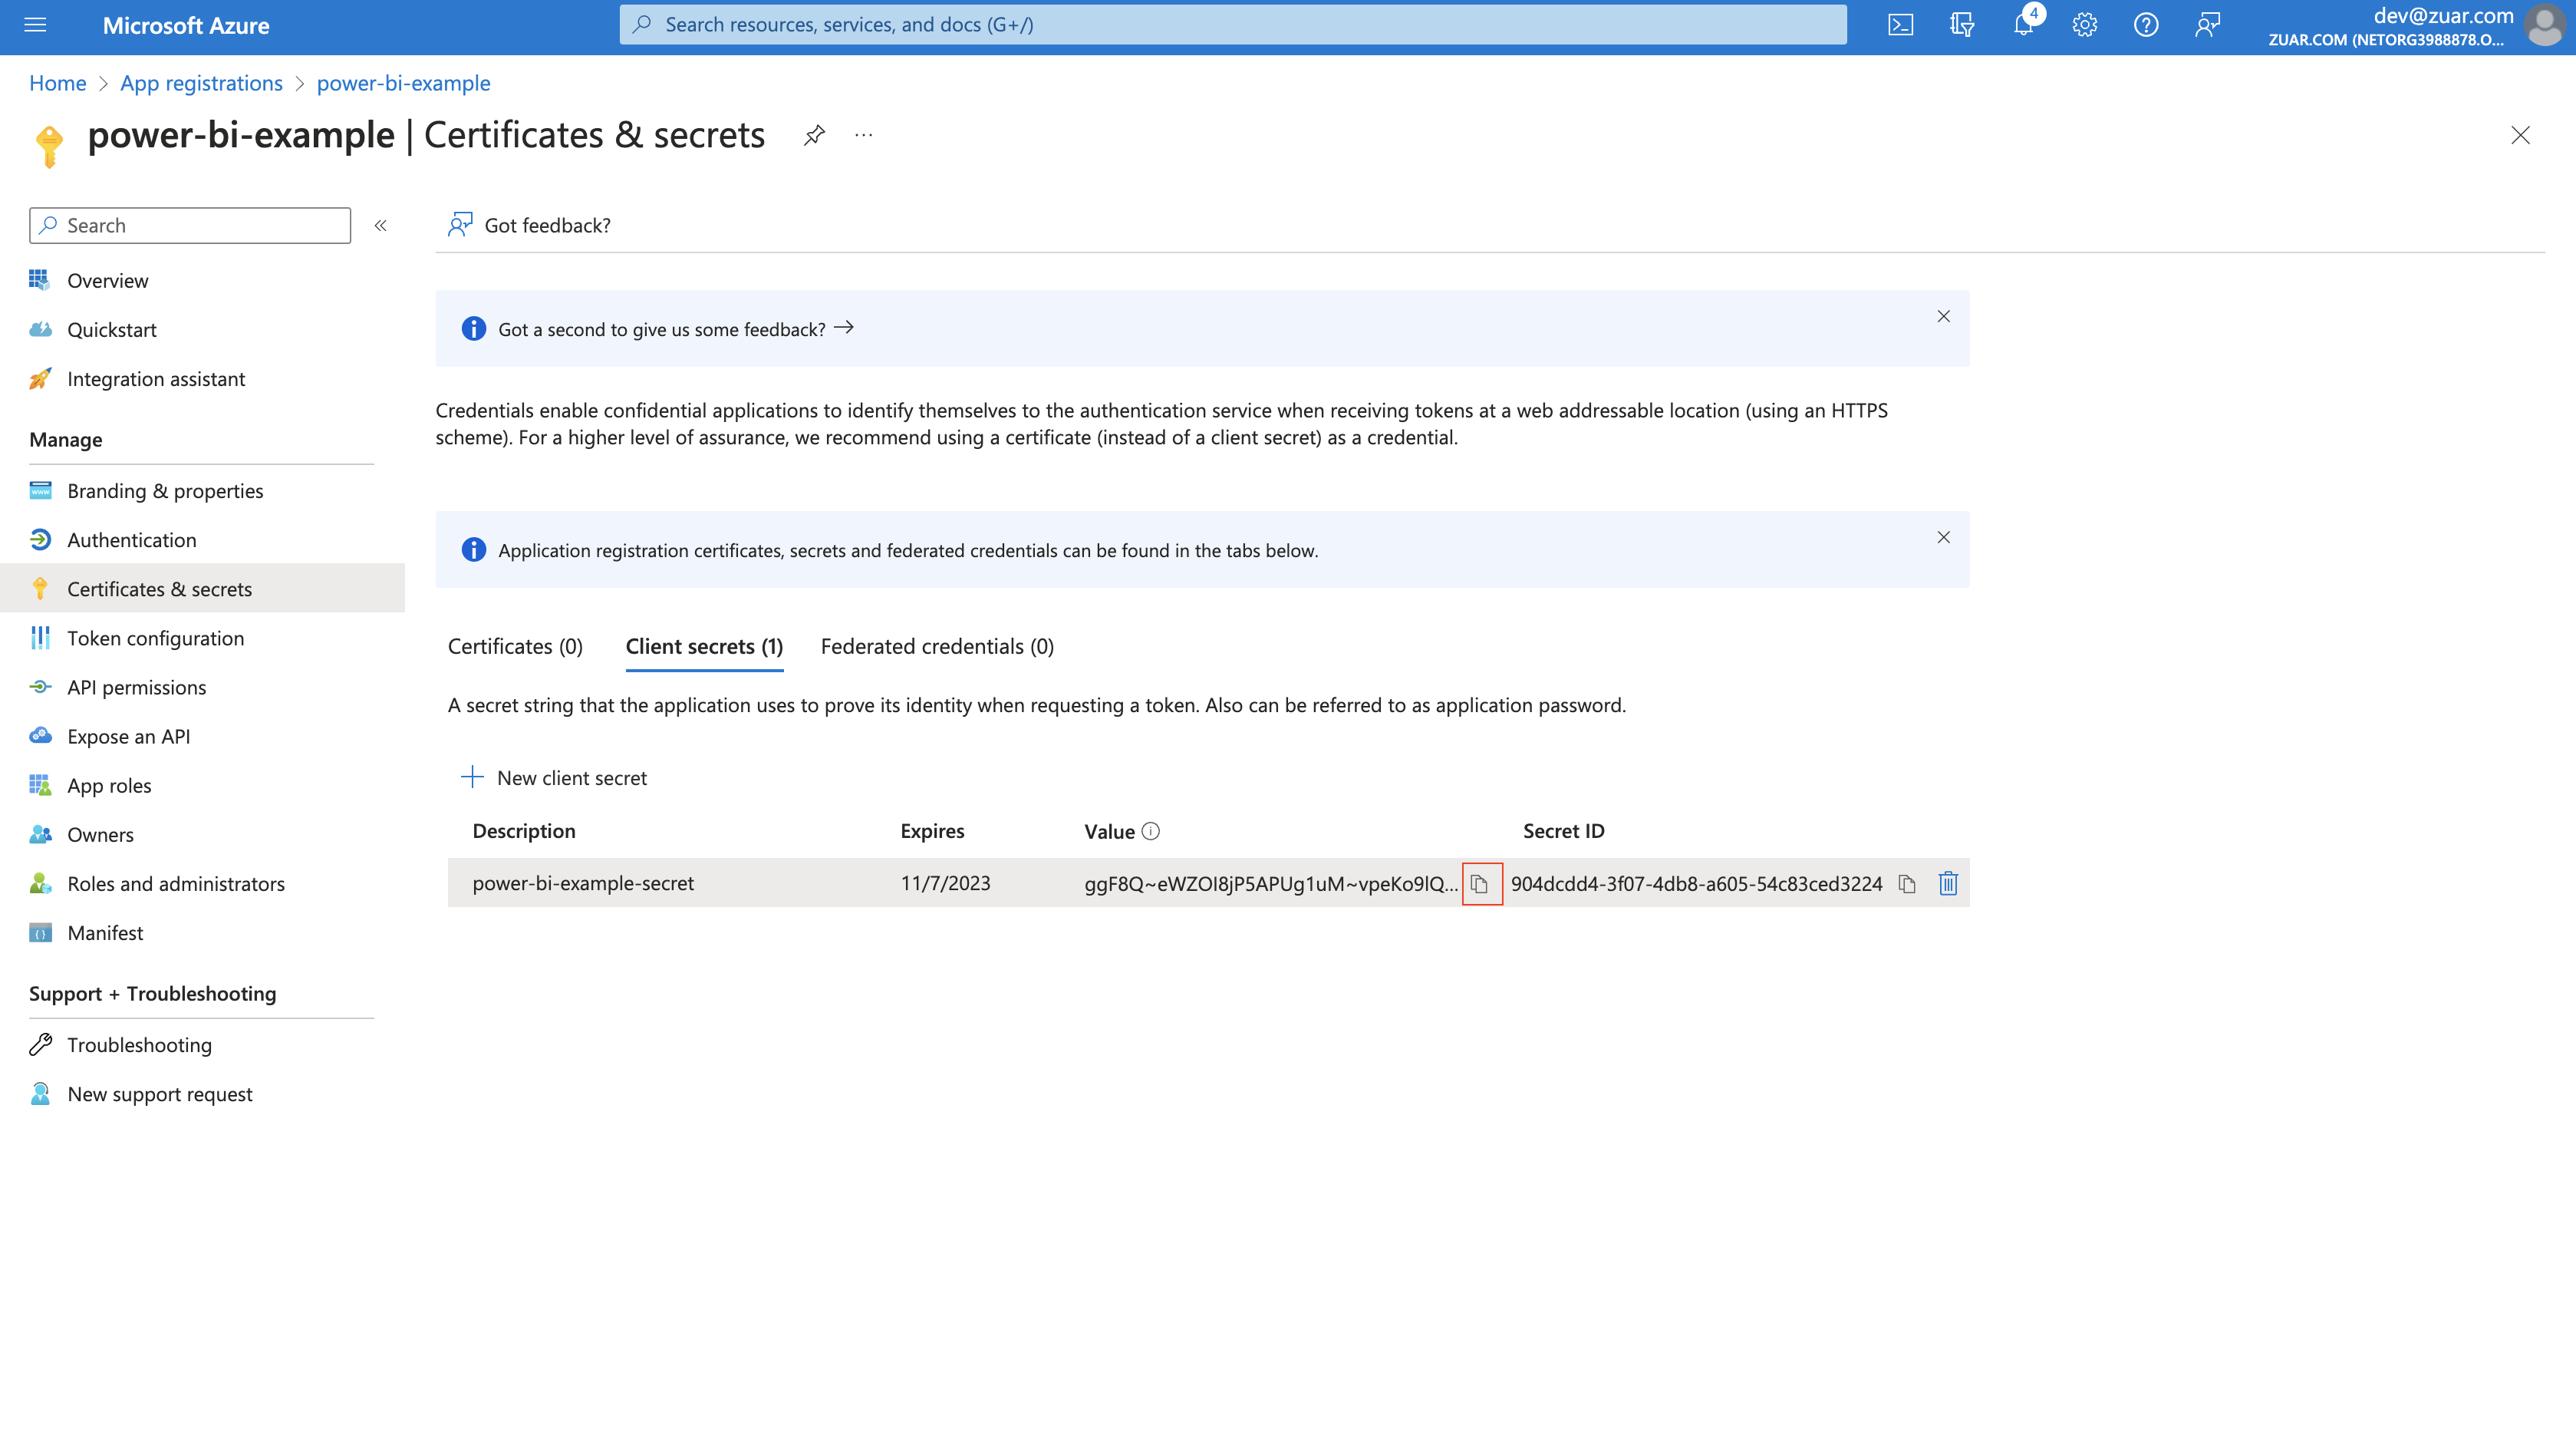
- Click
Overviewin the left sidebar, then collect next values,Application (client) ID,Directory (tenant) ID.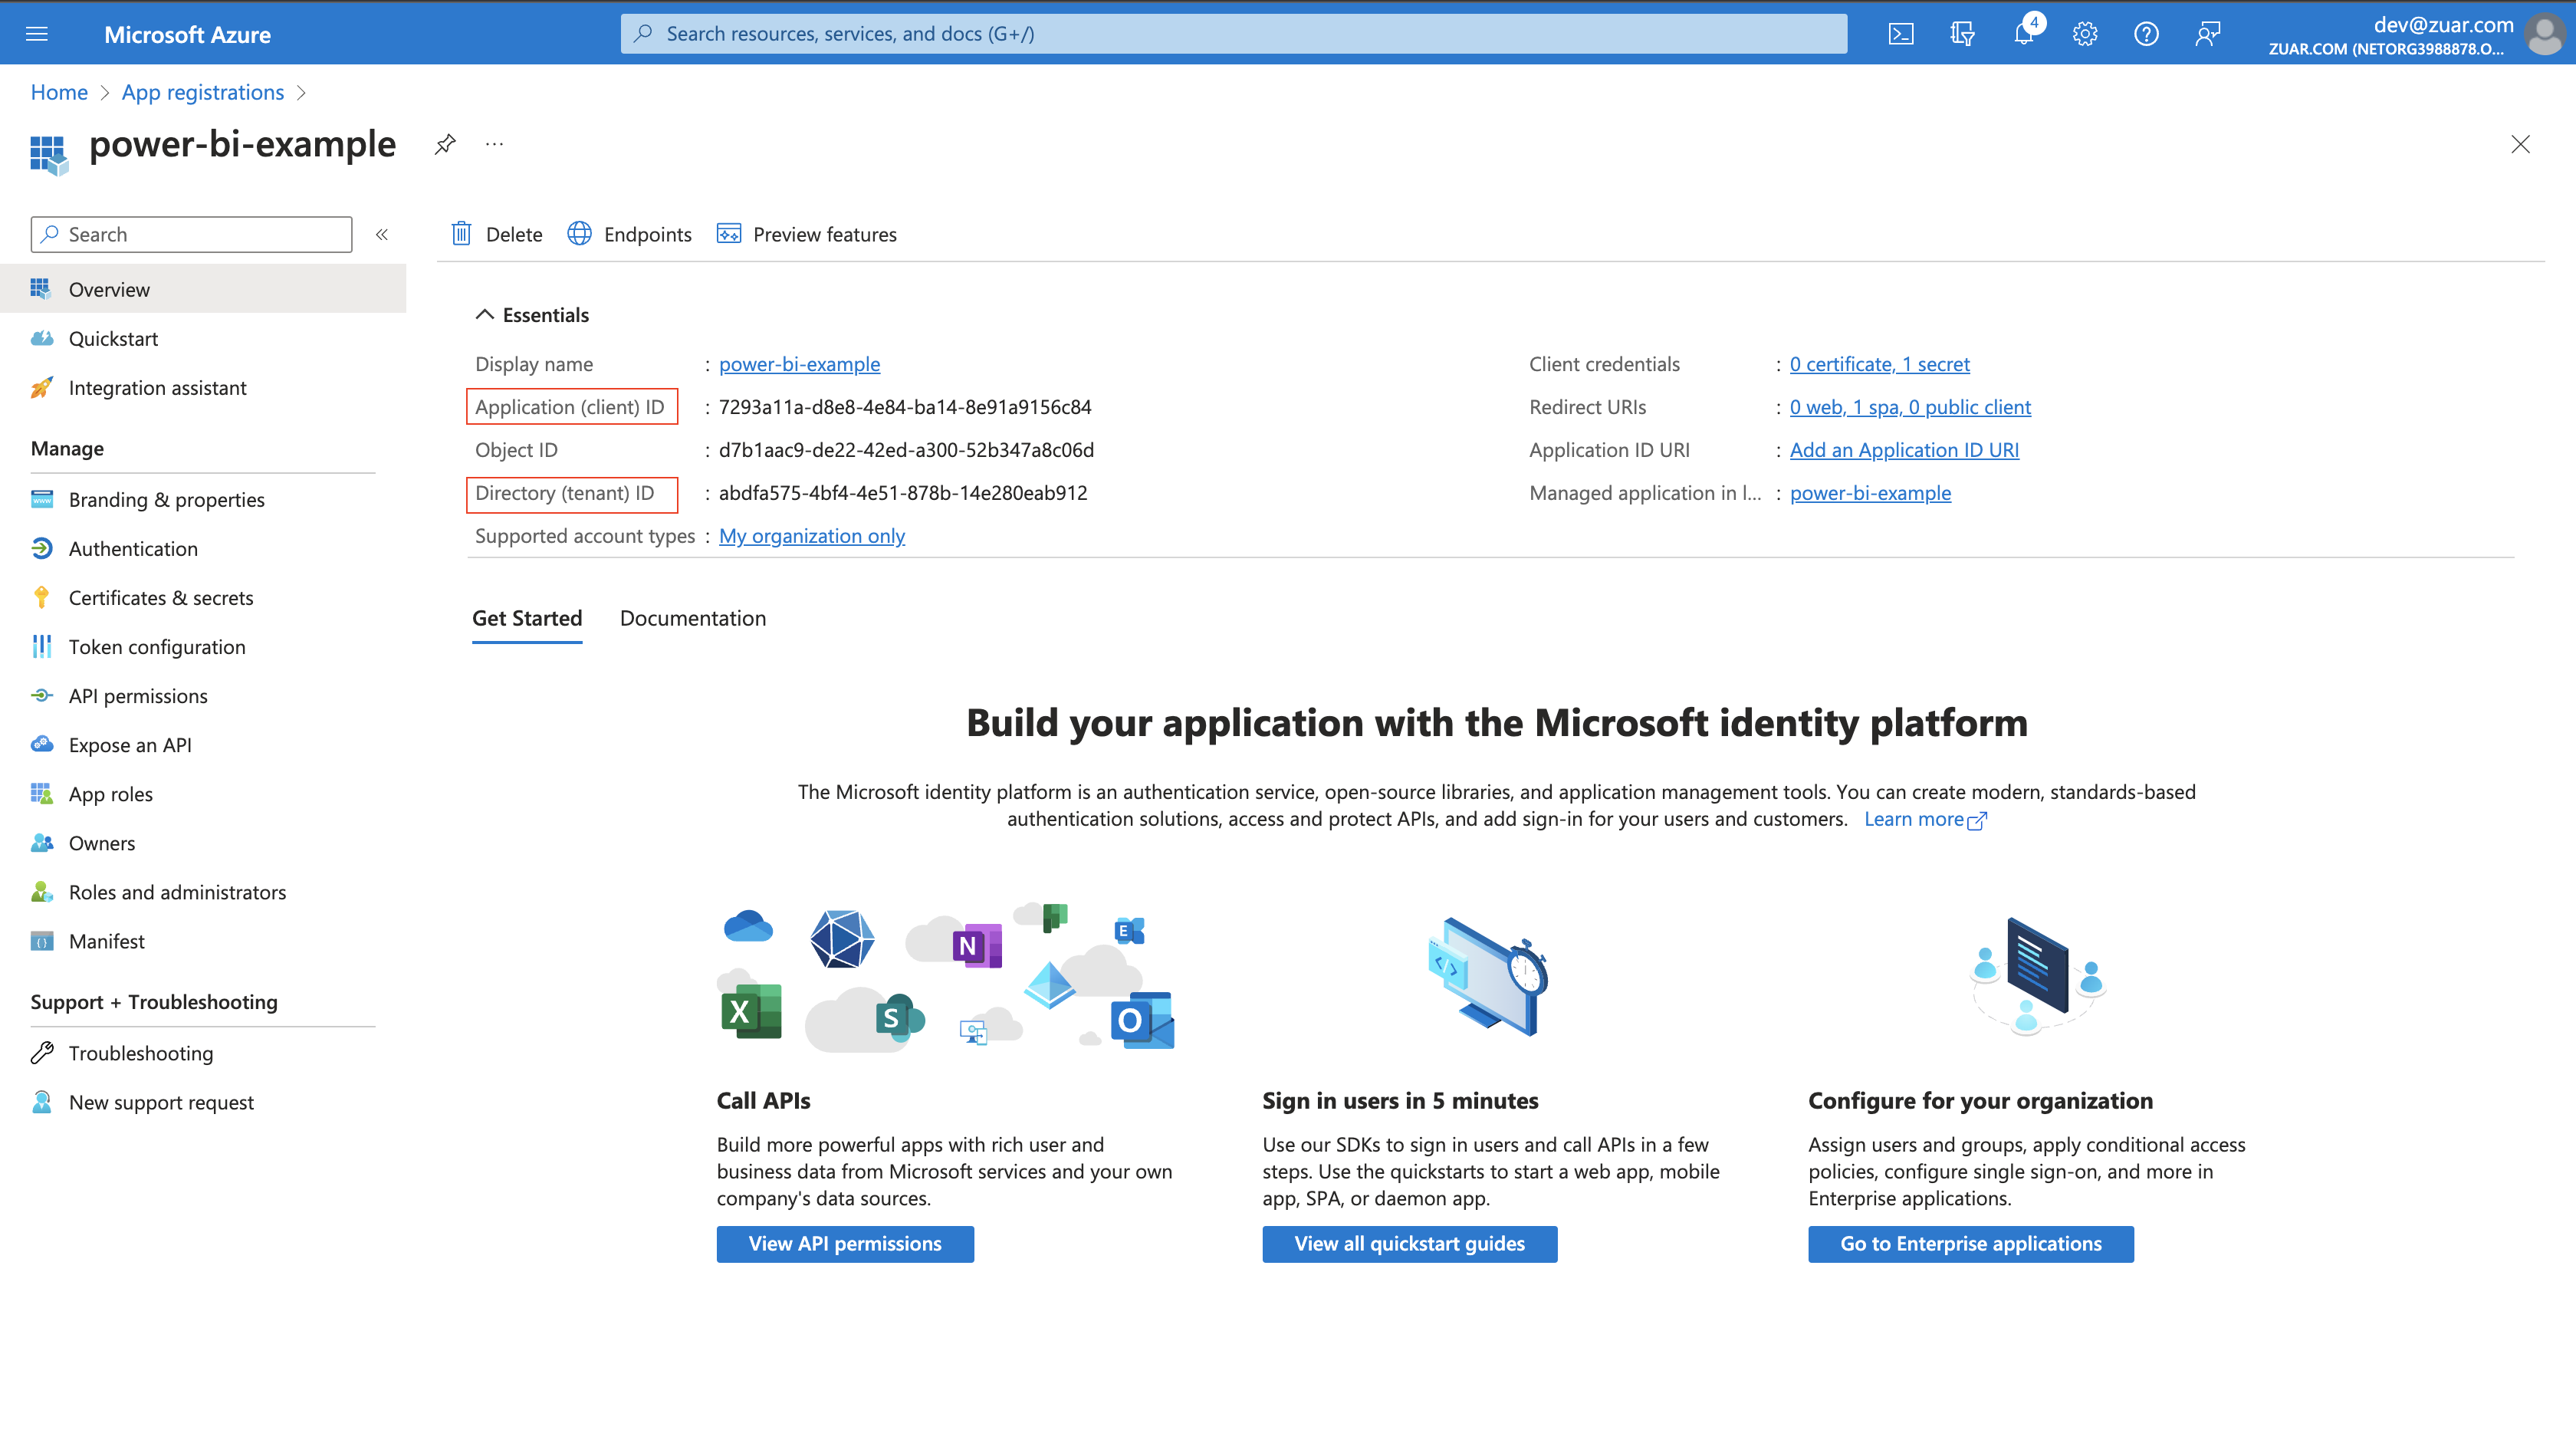
Grant permissions in Power BI
- Login to Power BI as an admin.
- Click the cog icon in upper-right corner and click
Admin portal.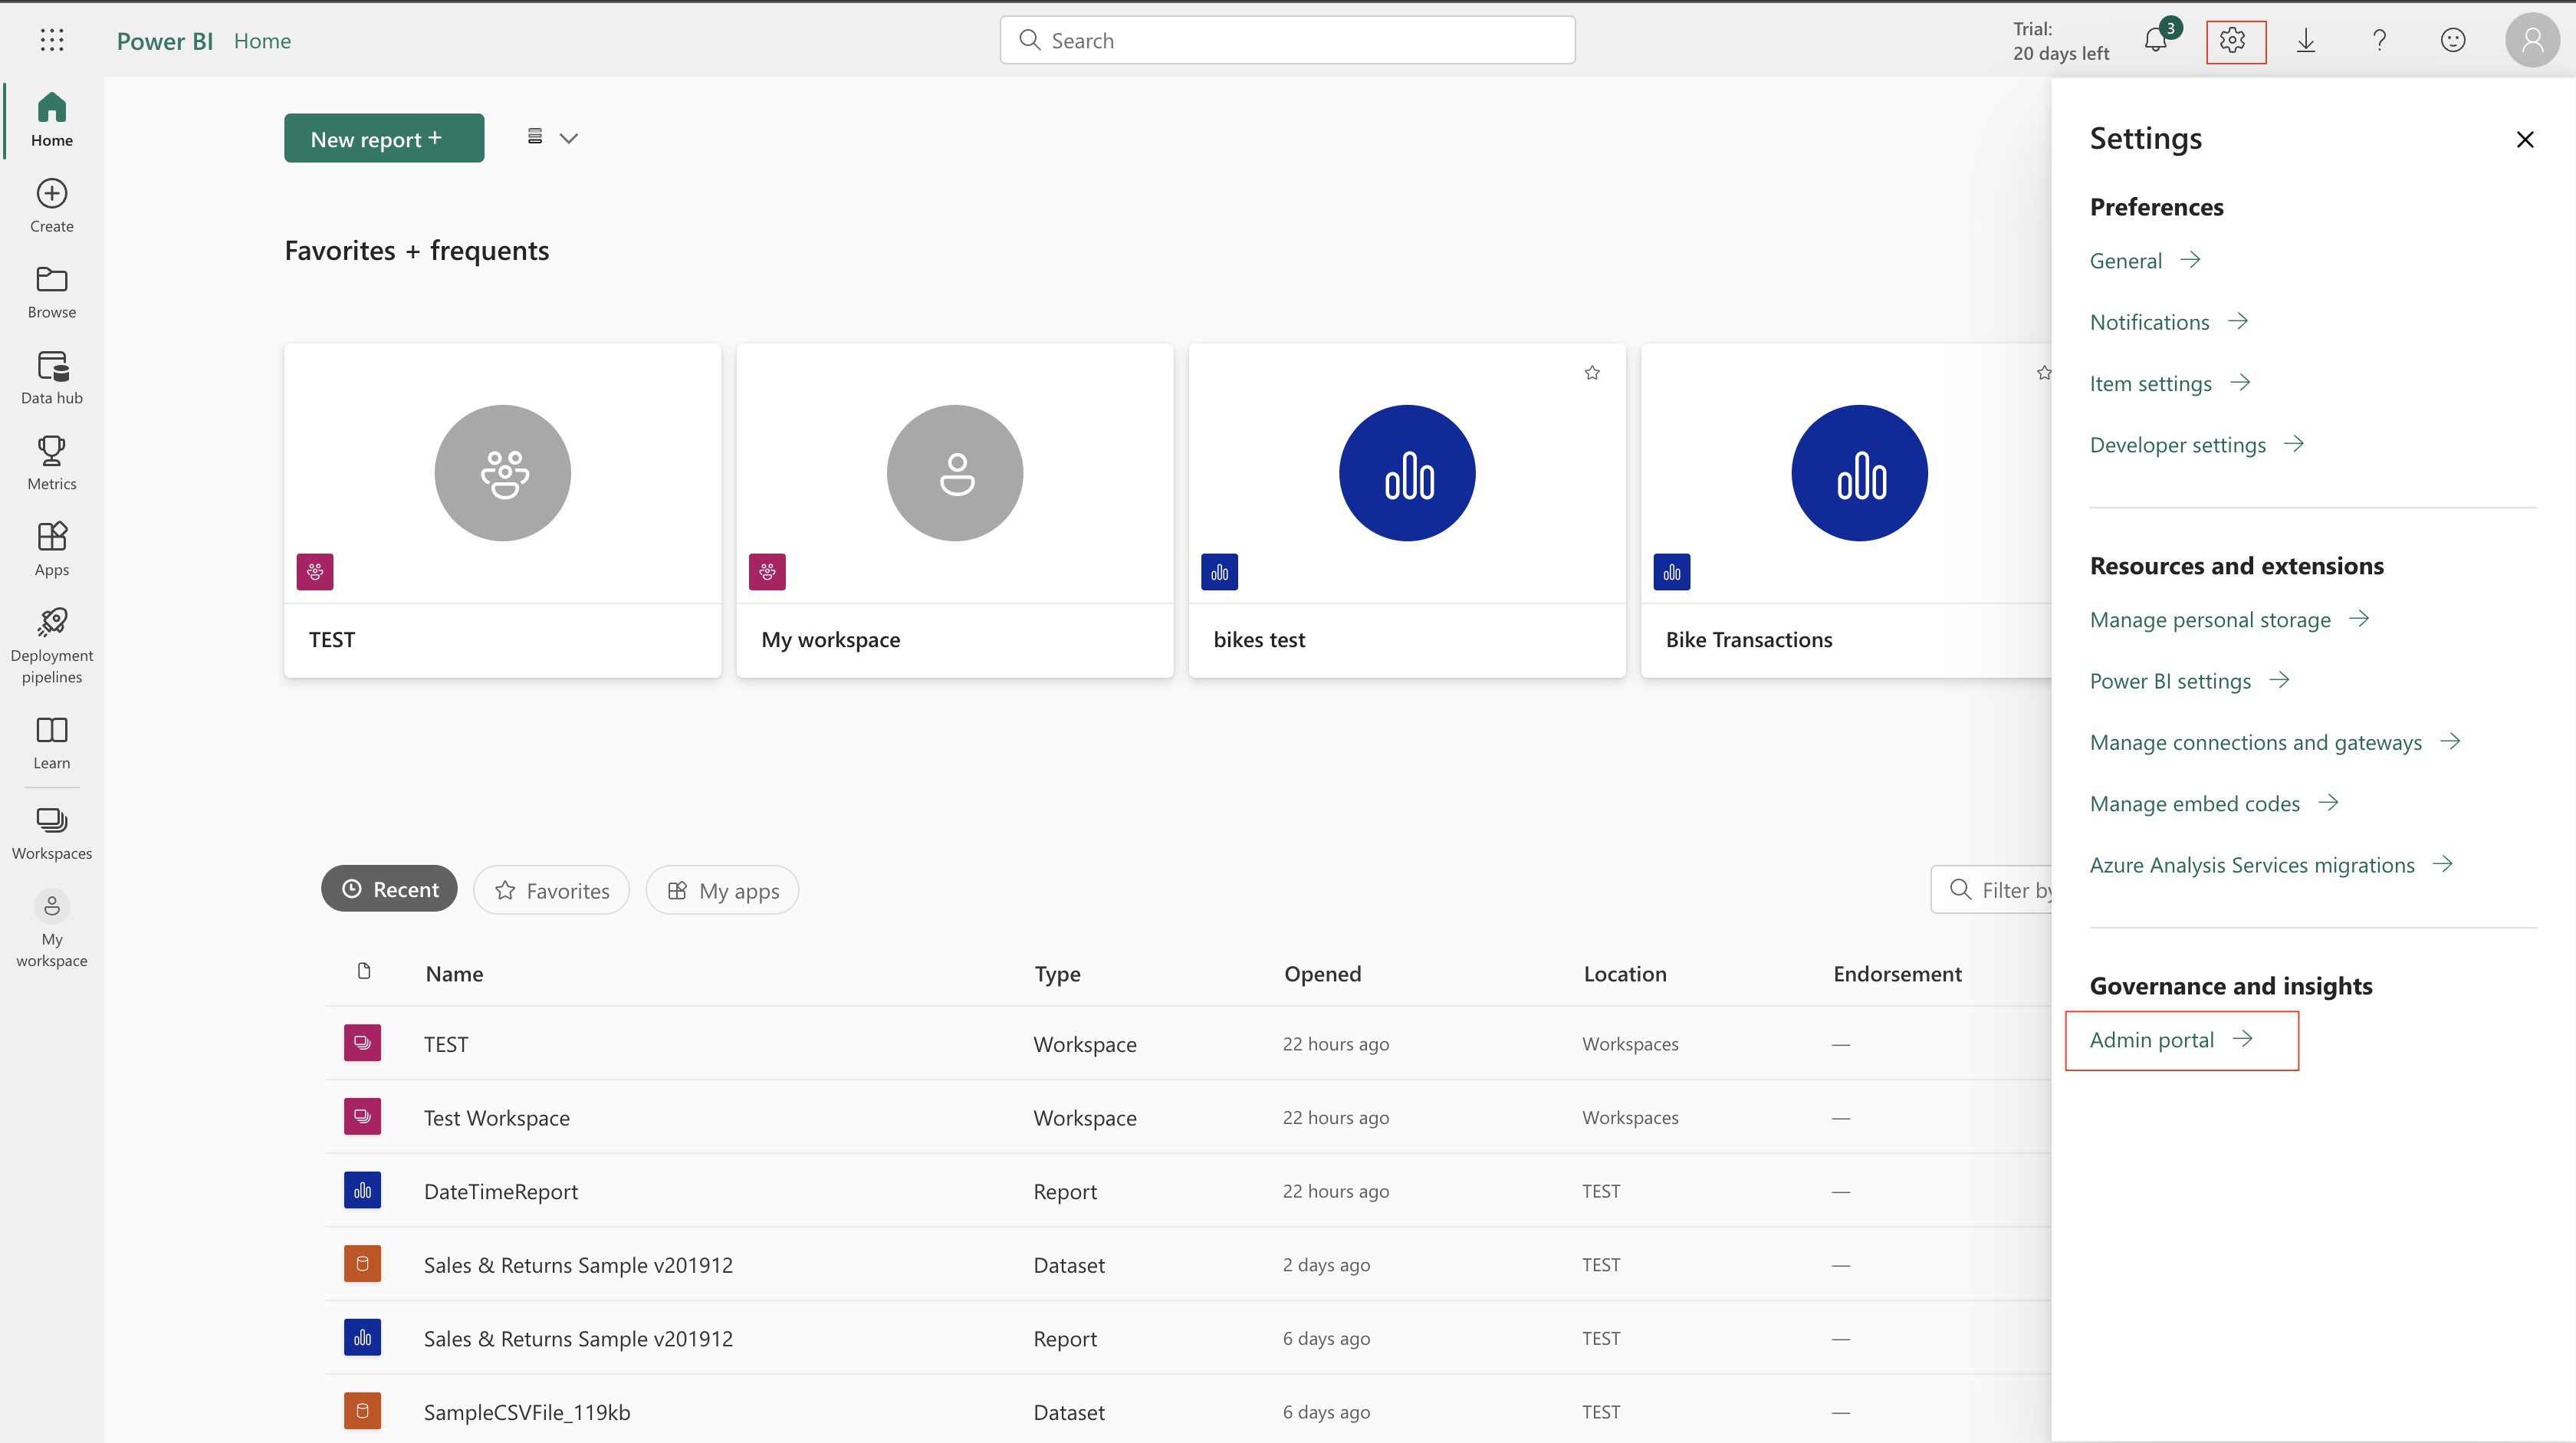
- Go to
Tenant settingson the left sidebar. Under theDeveloper settingssection, expandAllow service principals to use Power BI APIsand toggle this option to beEnabled. SetApply to:toThe entire organizationto allow all AAD Applications with proper permissions to access Power BI resources. If you want to allow only specific AAD Applications refer to How to grant permissions in Power BI for a specific security group.
- In order to allow the AAD Application access to Workspaces, add the application to the Workspace's access list. Click
Workspacesicon in left-most sidebar.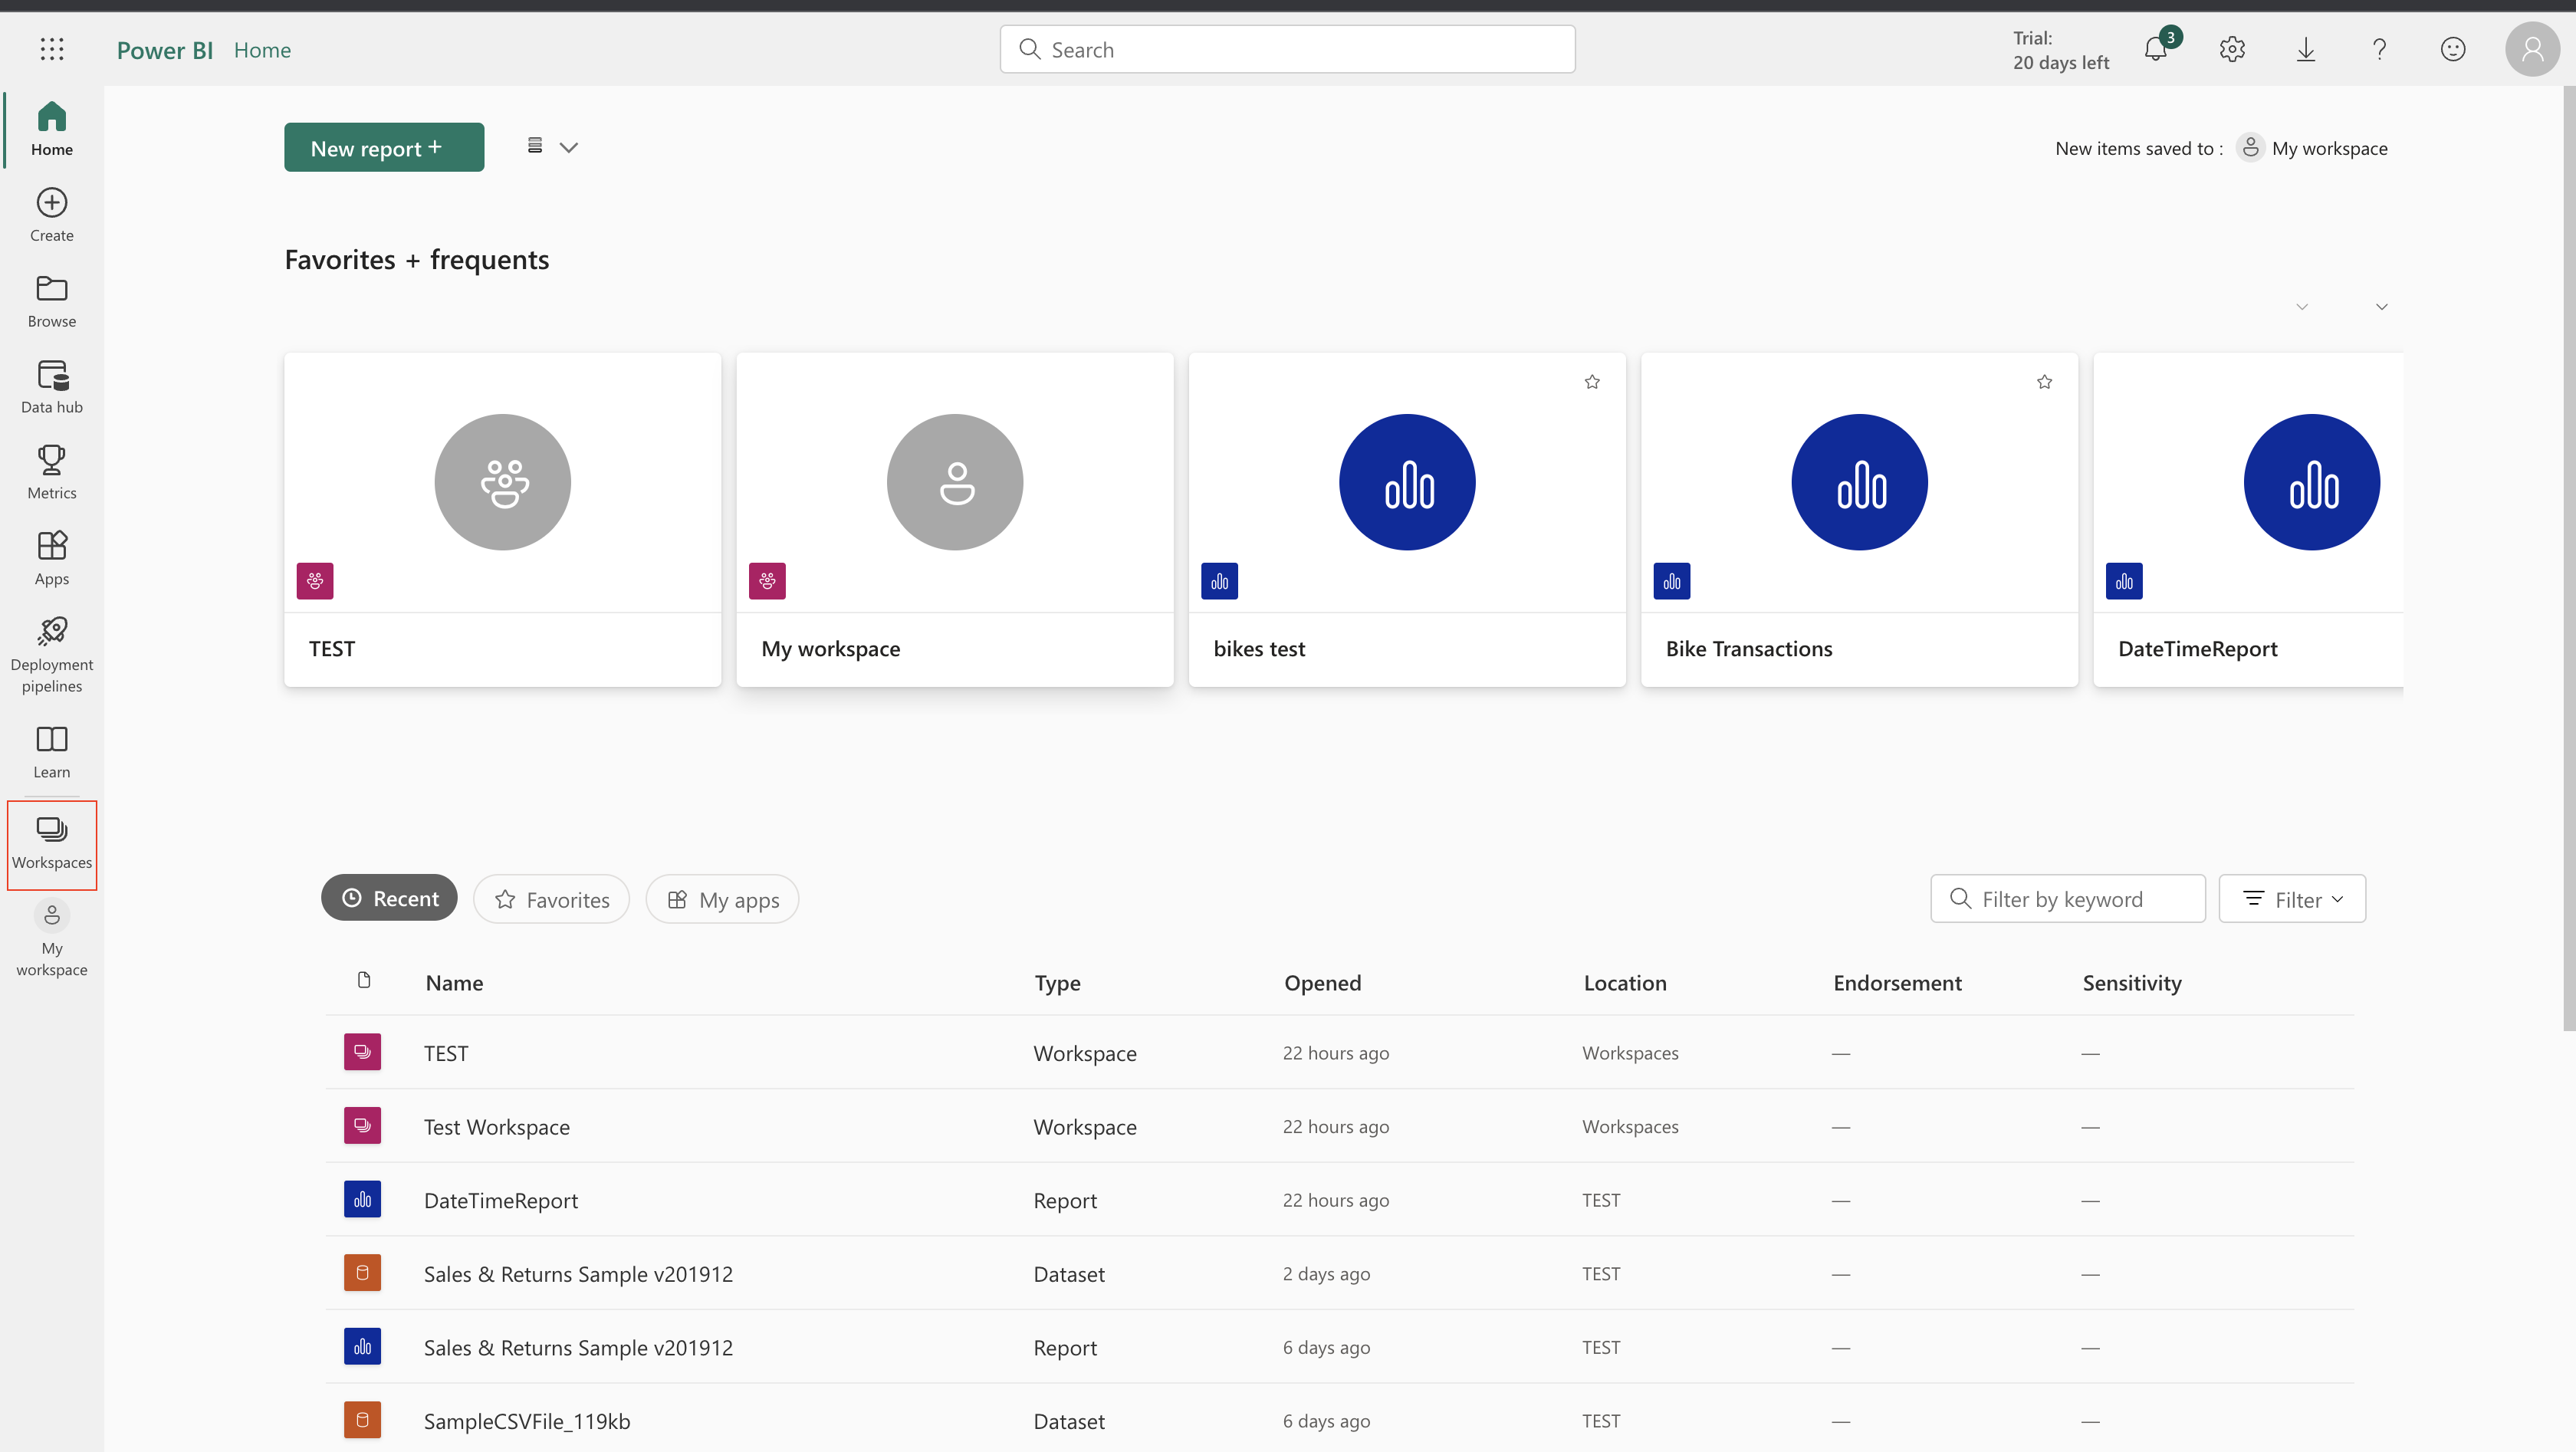
- Click three-dot icon next to the Workspace, and then click
Workspace access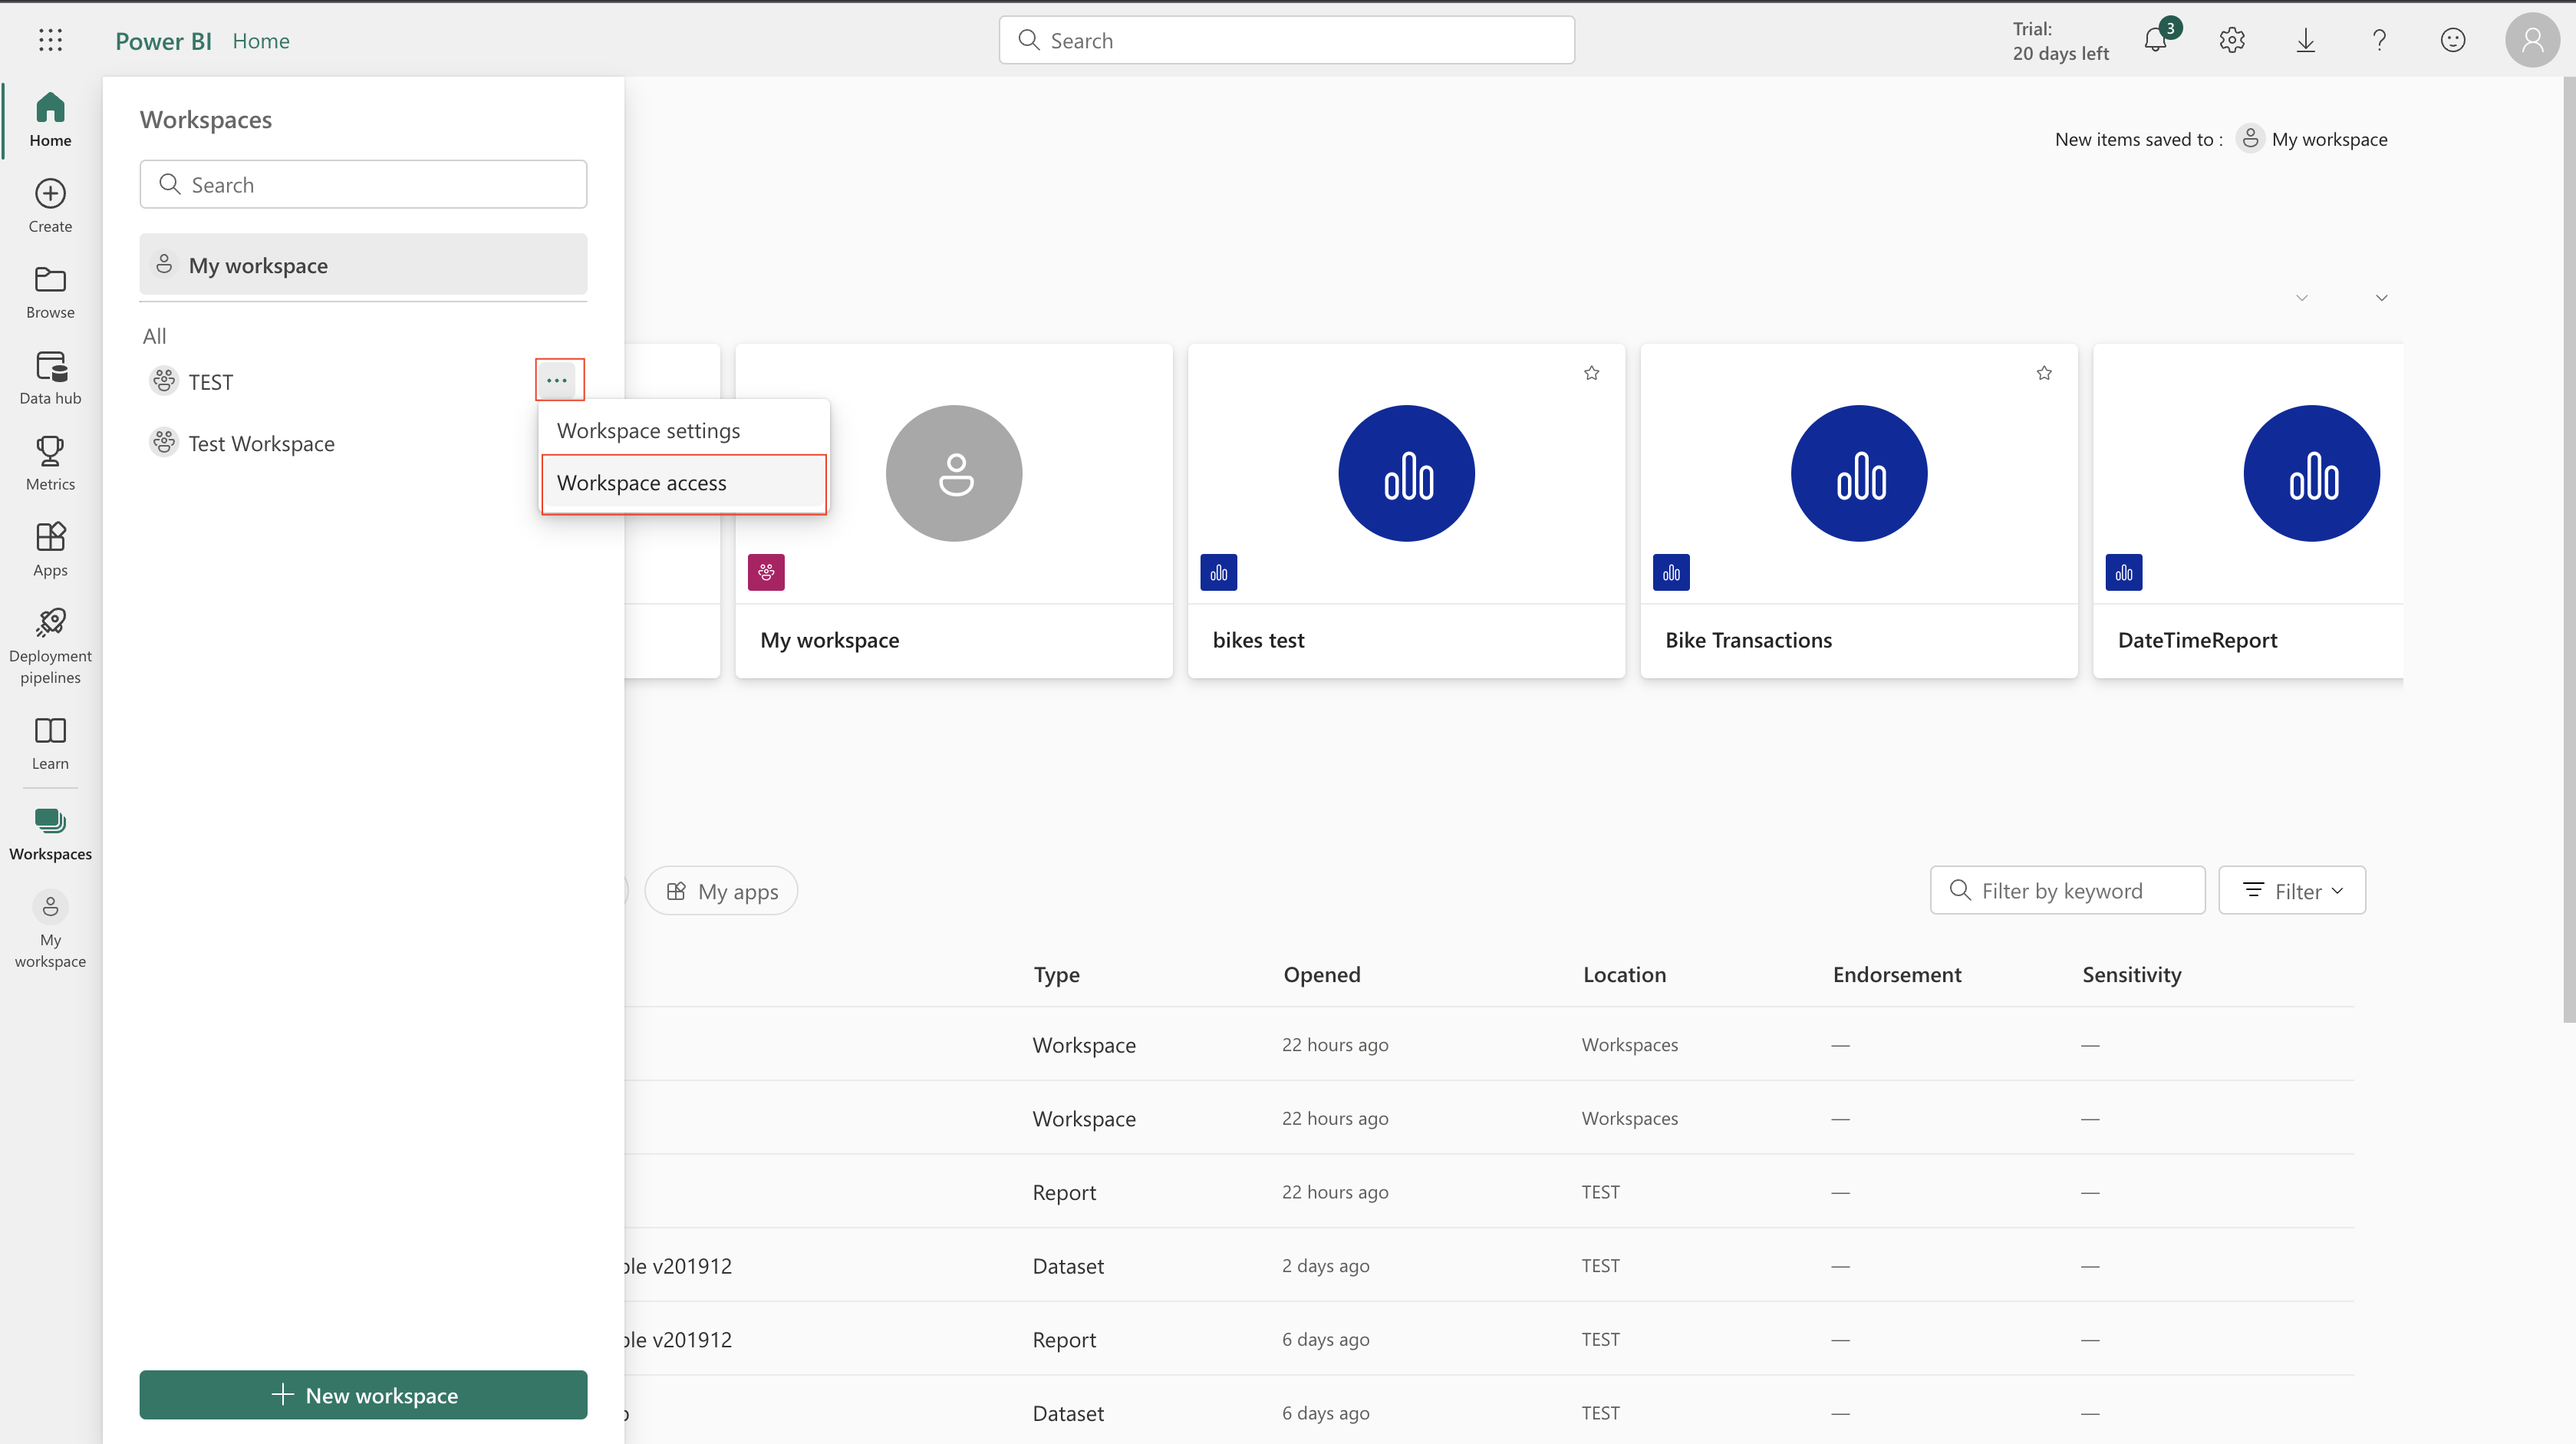
- Enter the exact name of the AAD Application and select it from dropdown. Ensure the user is added as a "Member" (or higher)
Permissionand clickAdd.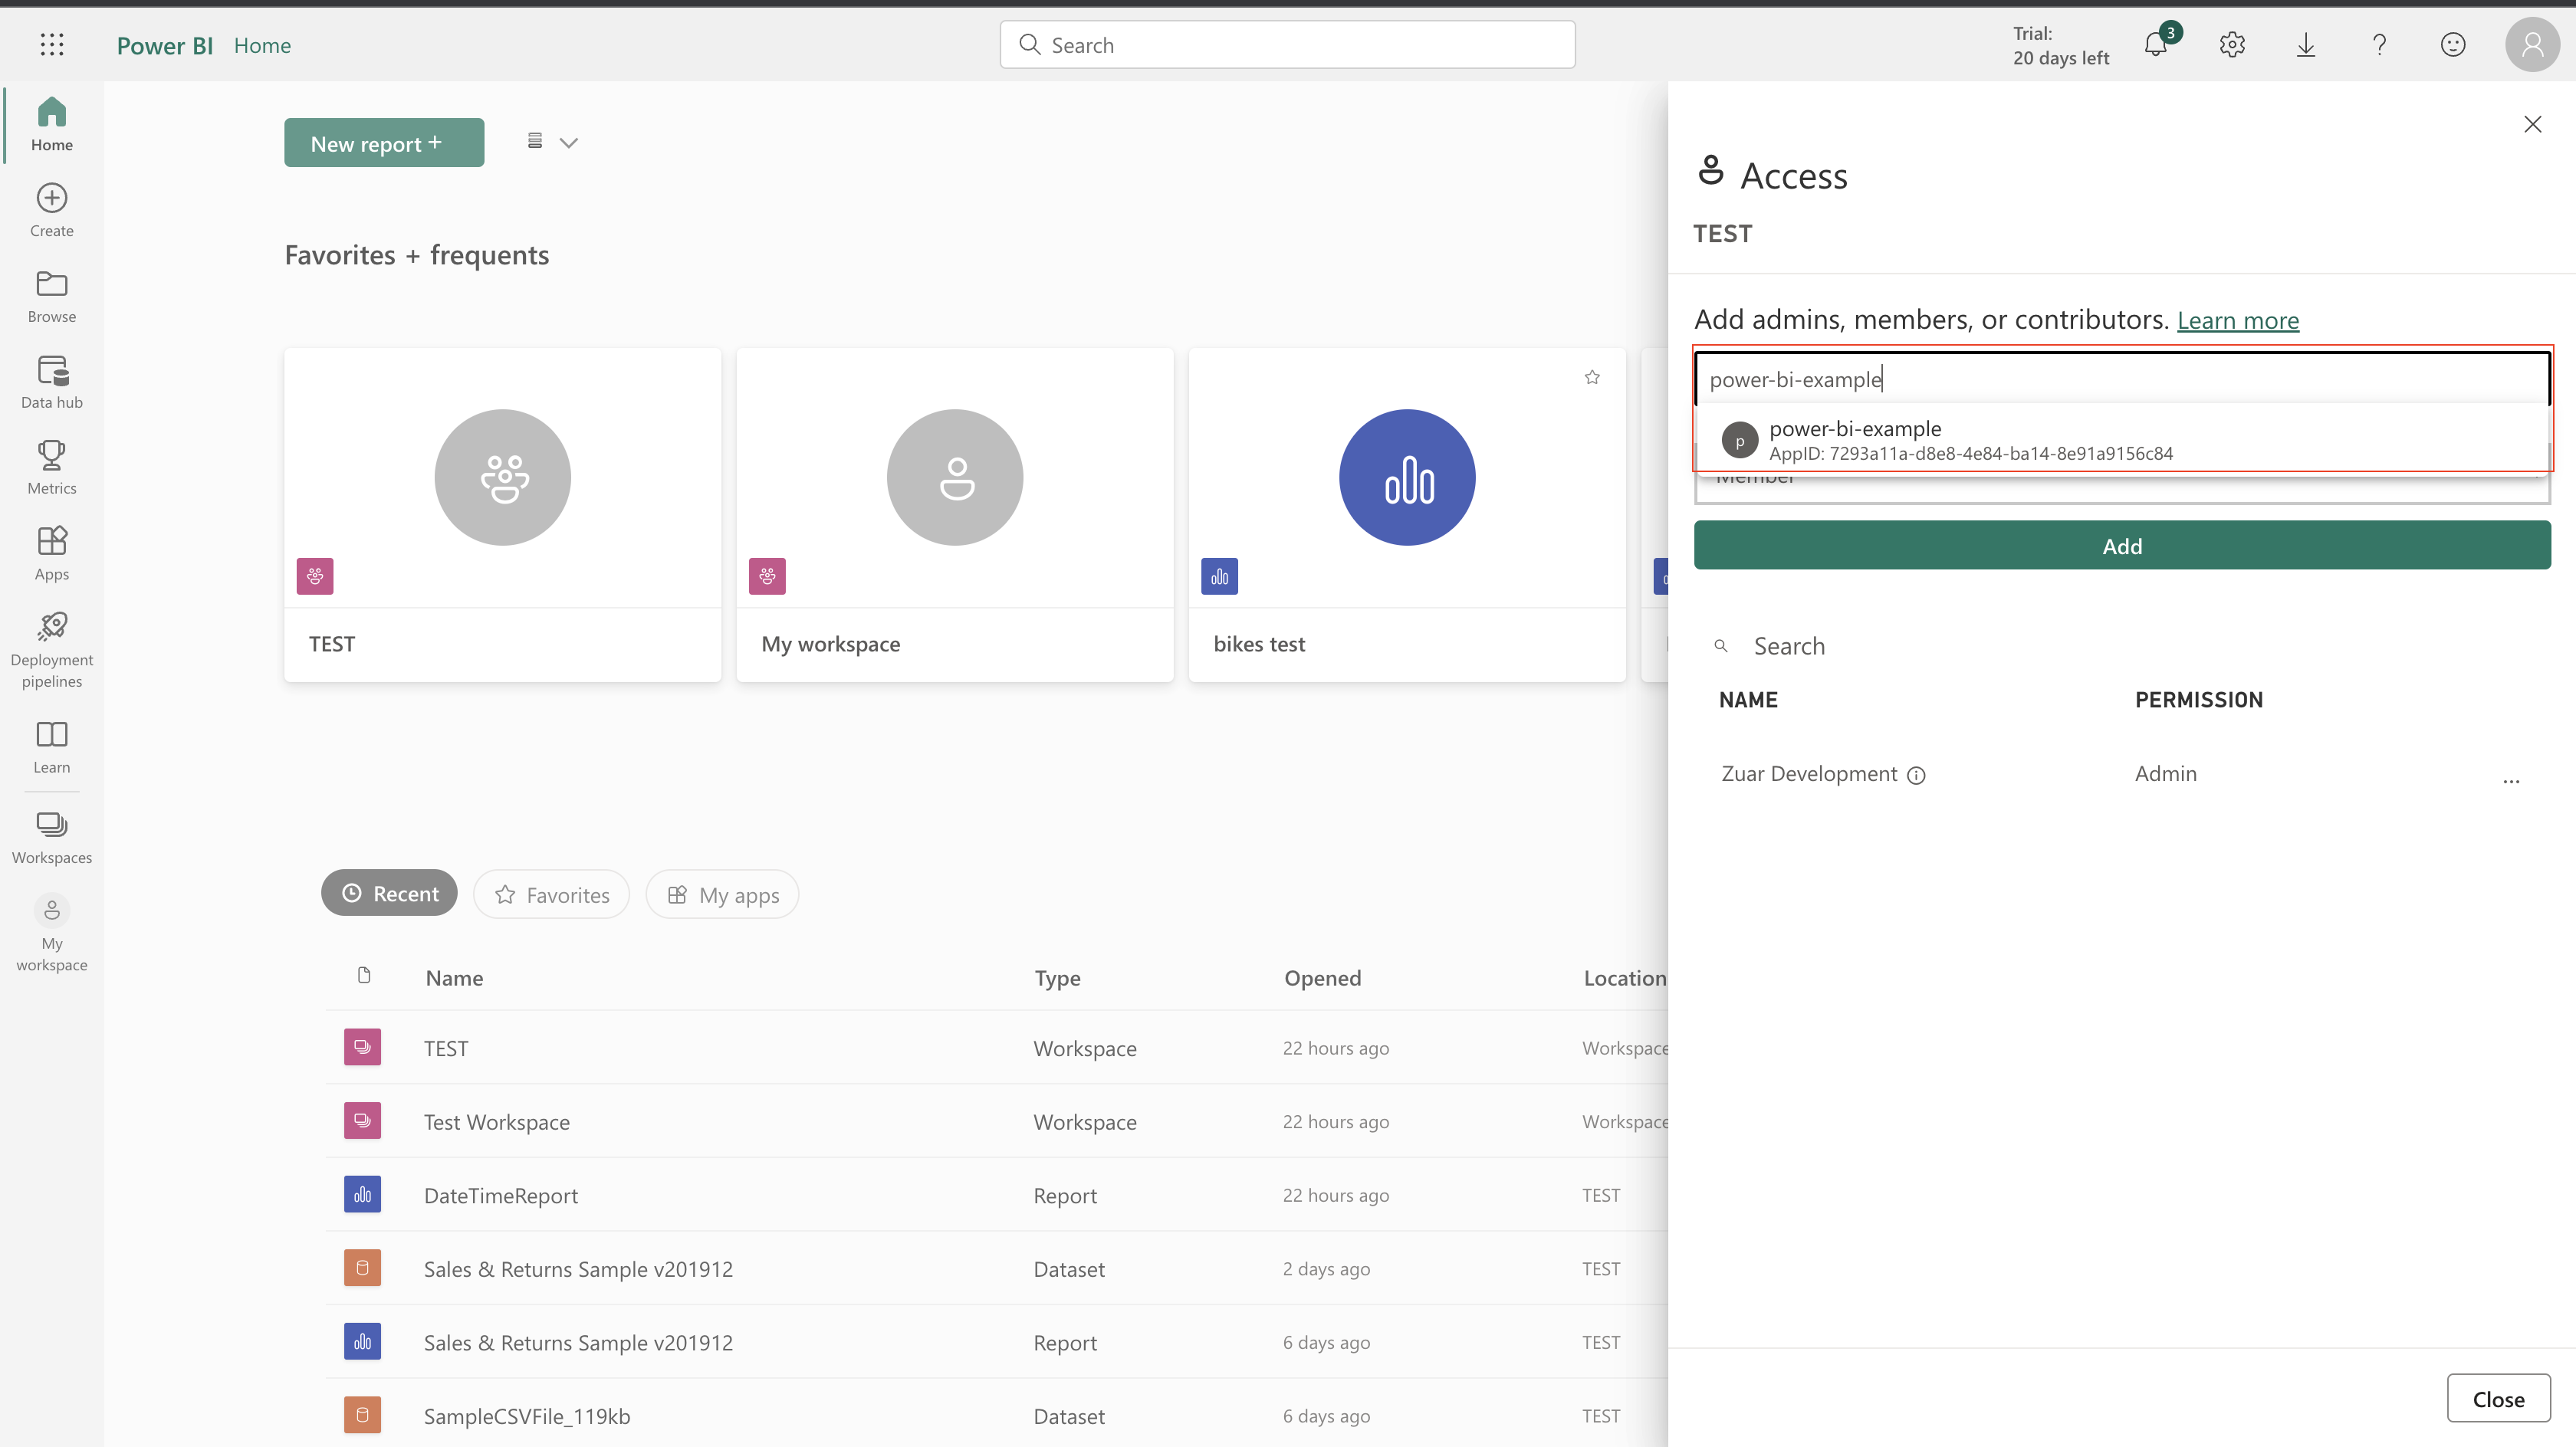
- Repeat these steps for any additional Workspaces that Zuar Portal should access.
Grant permissions in Power BI to a specific security group
We'll create an Azure Security Group and add our AAD Application to the group.
- Login to Azure.
- Search for
Groupsand select it from the results underServices.
- Click
New group. - Set
Group typetoSecurity, enterGroup name, and add the AAD Application asOwnerandMember. ClickCreate.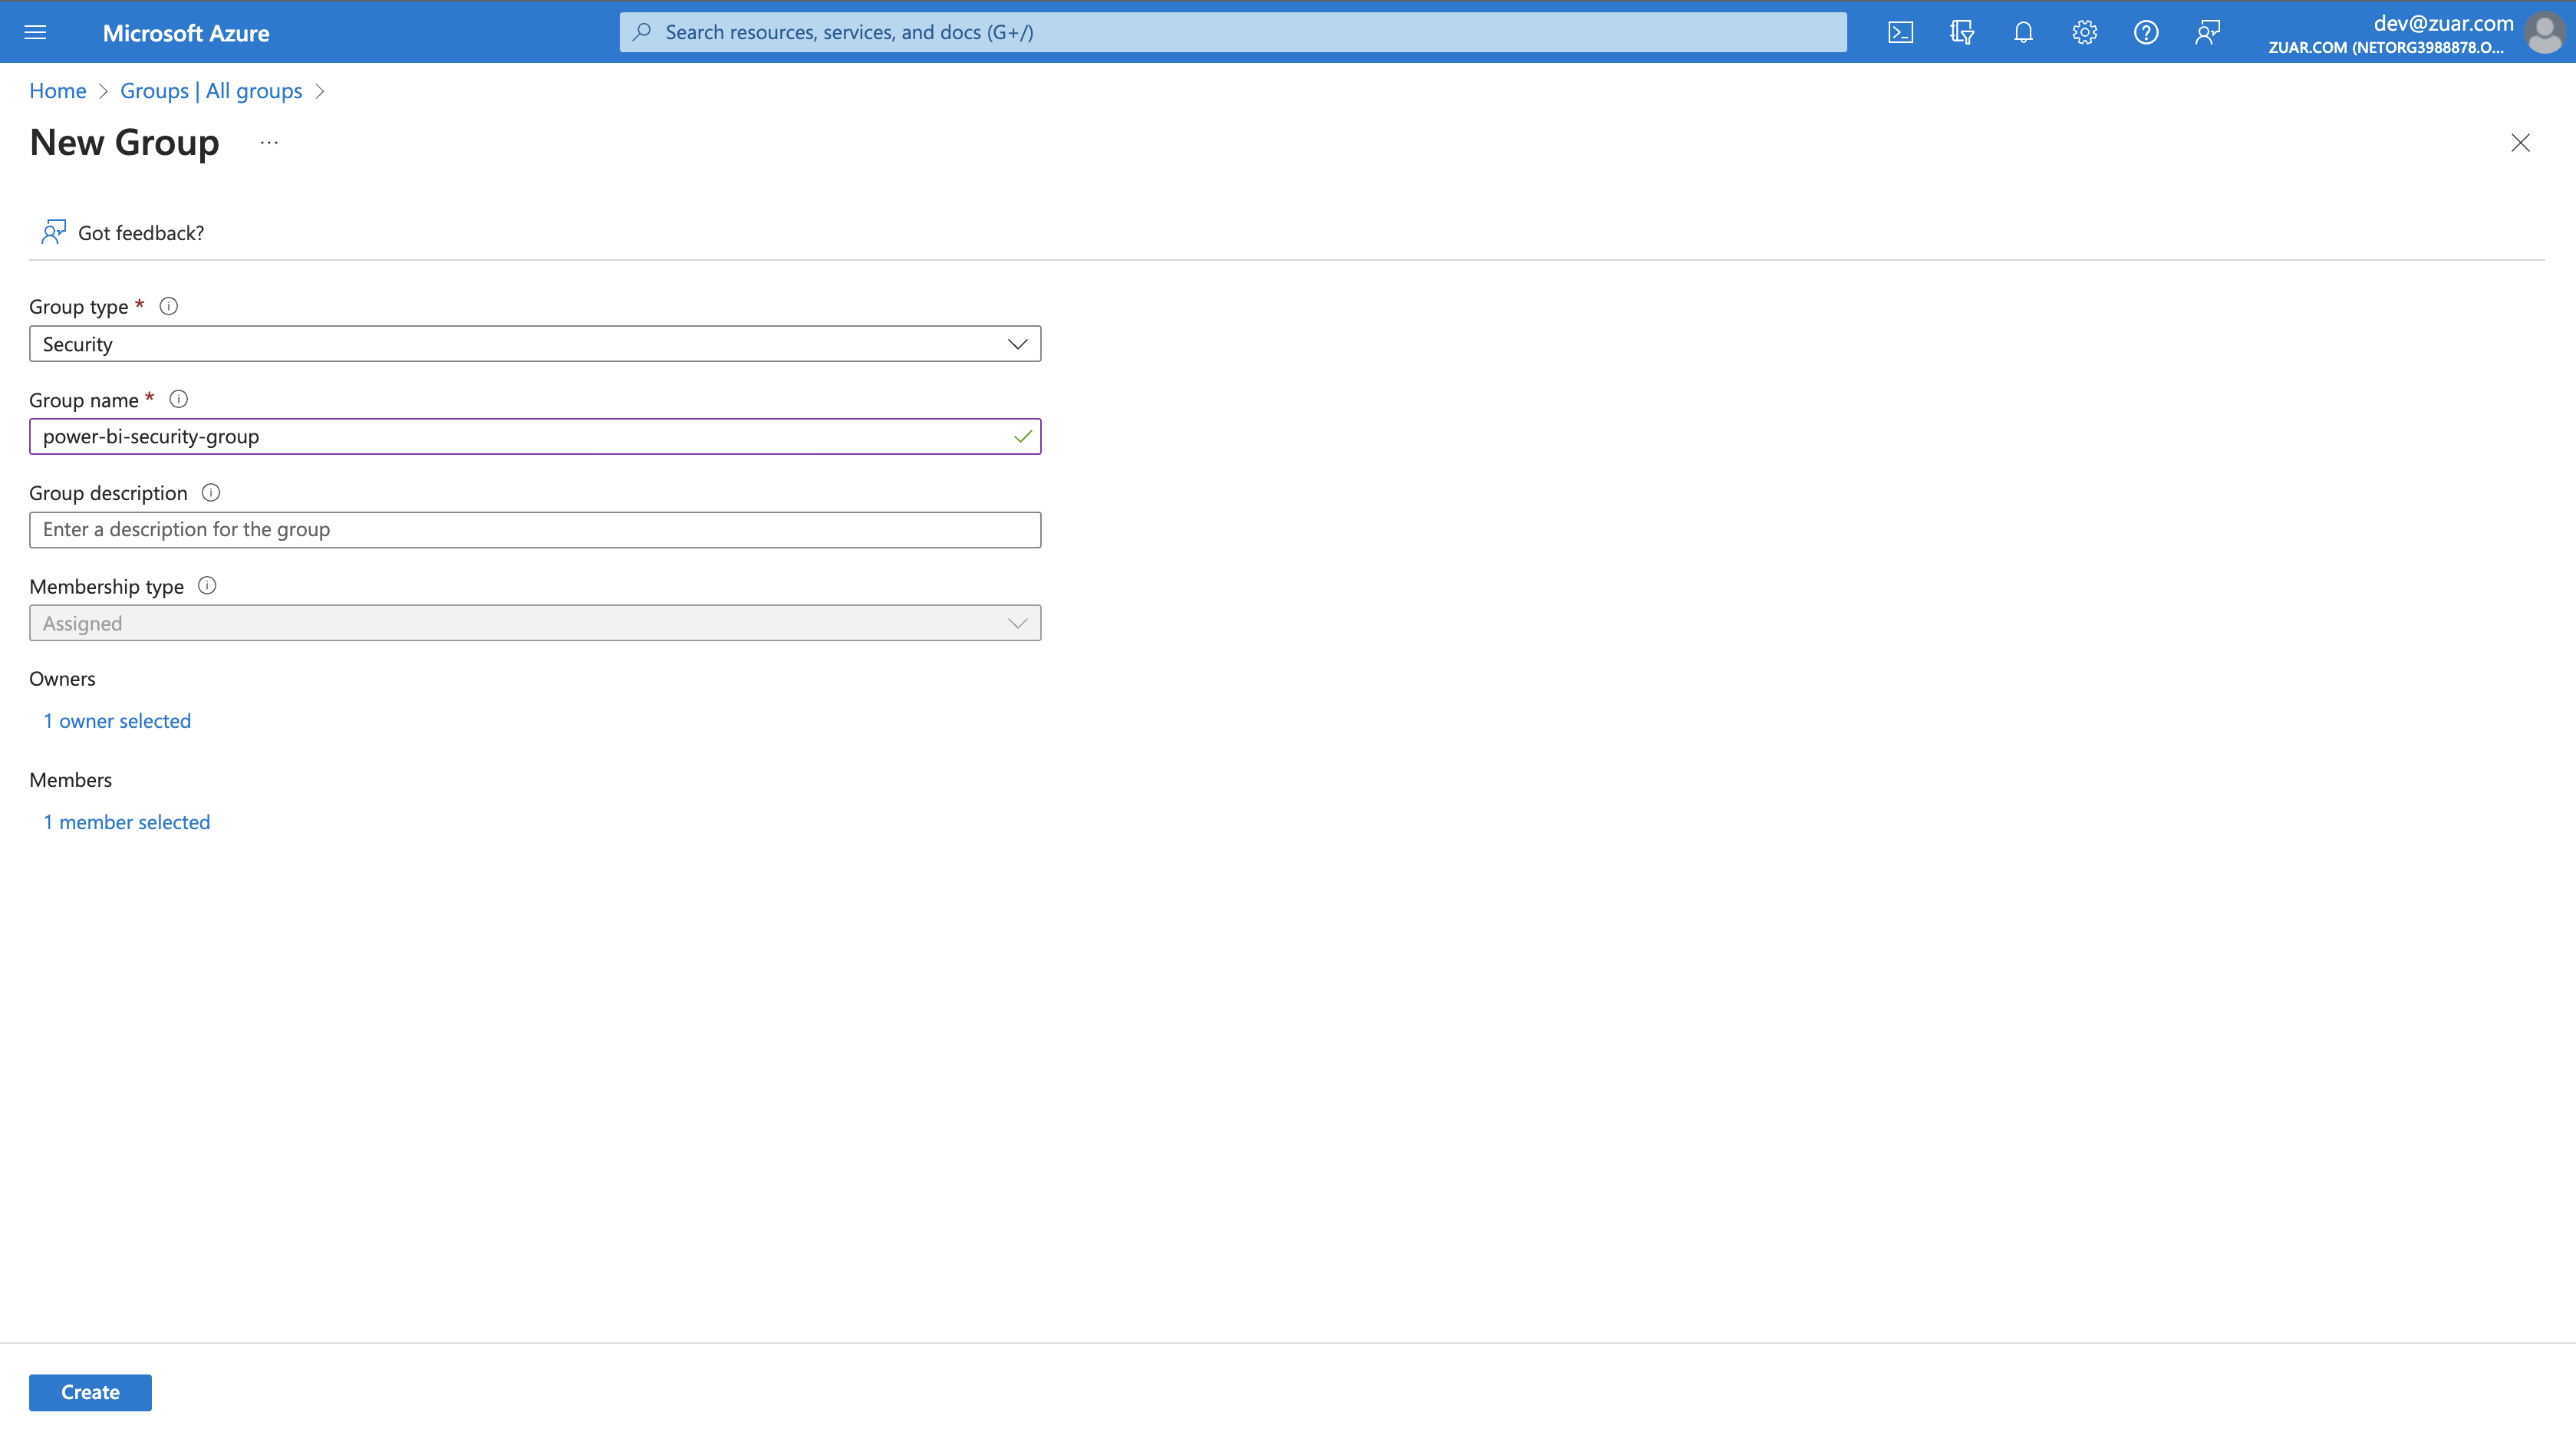
- In Power BI, search for
Developer settings, expandAllow service principals to use Power BI APIs, set toEnabled, and setApply to:toSpecific security groups, enter name of newly created security group. ClickApplychanges`.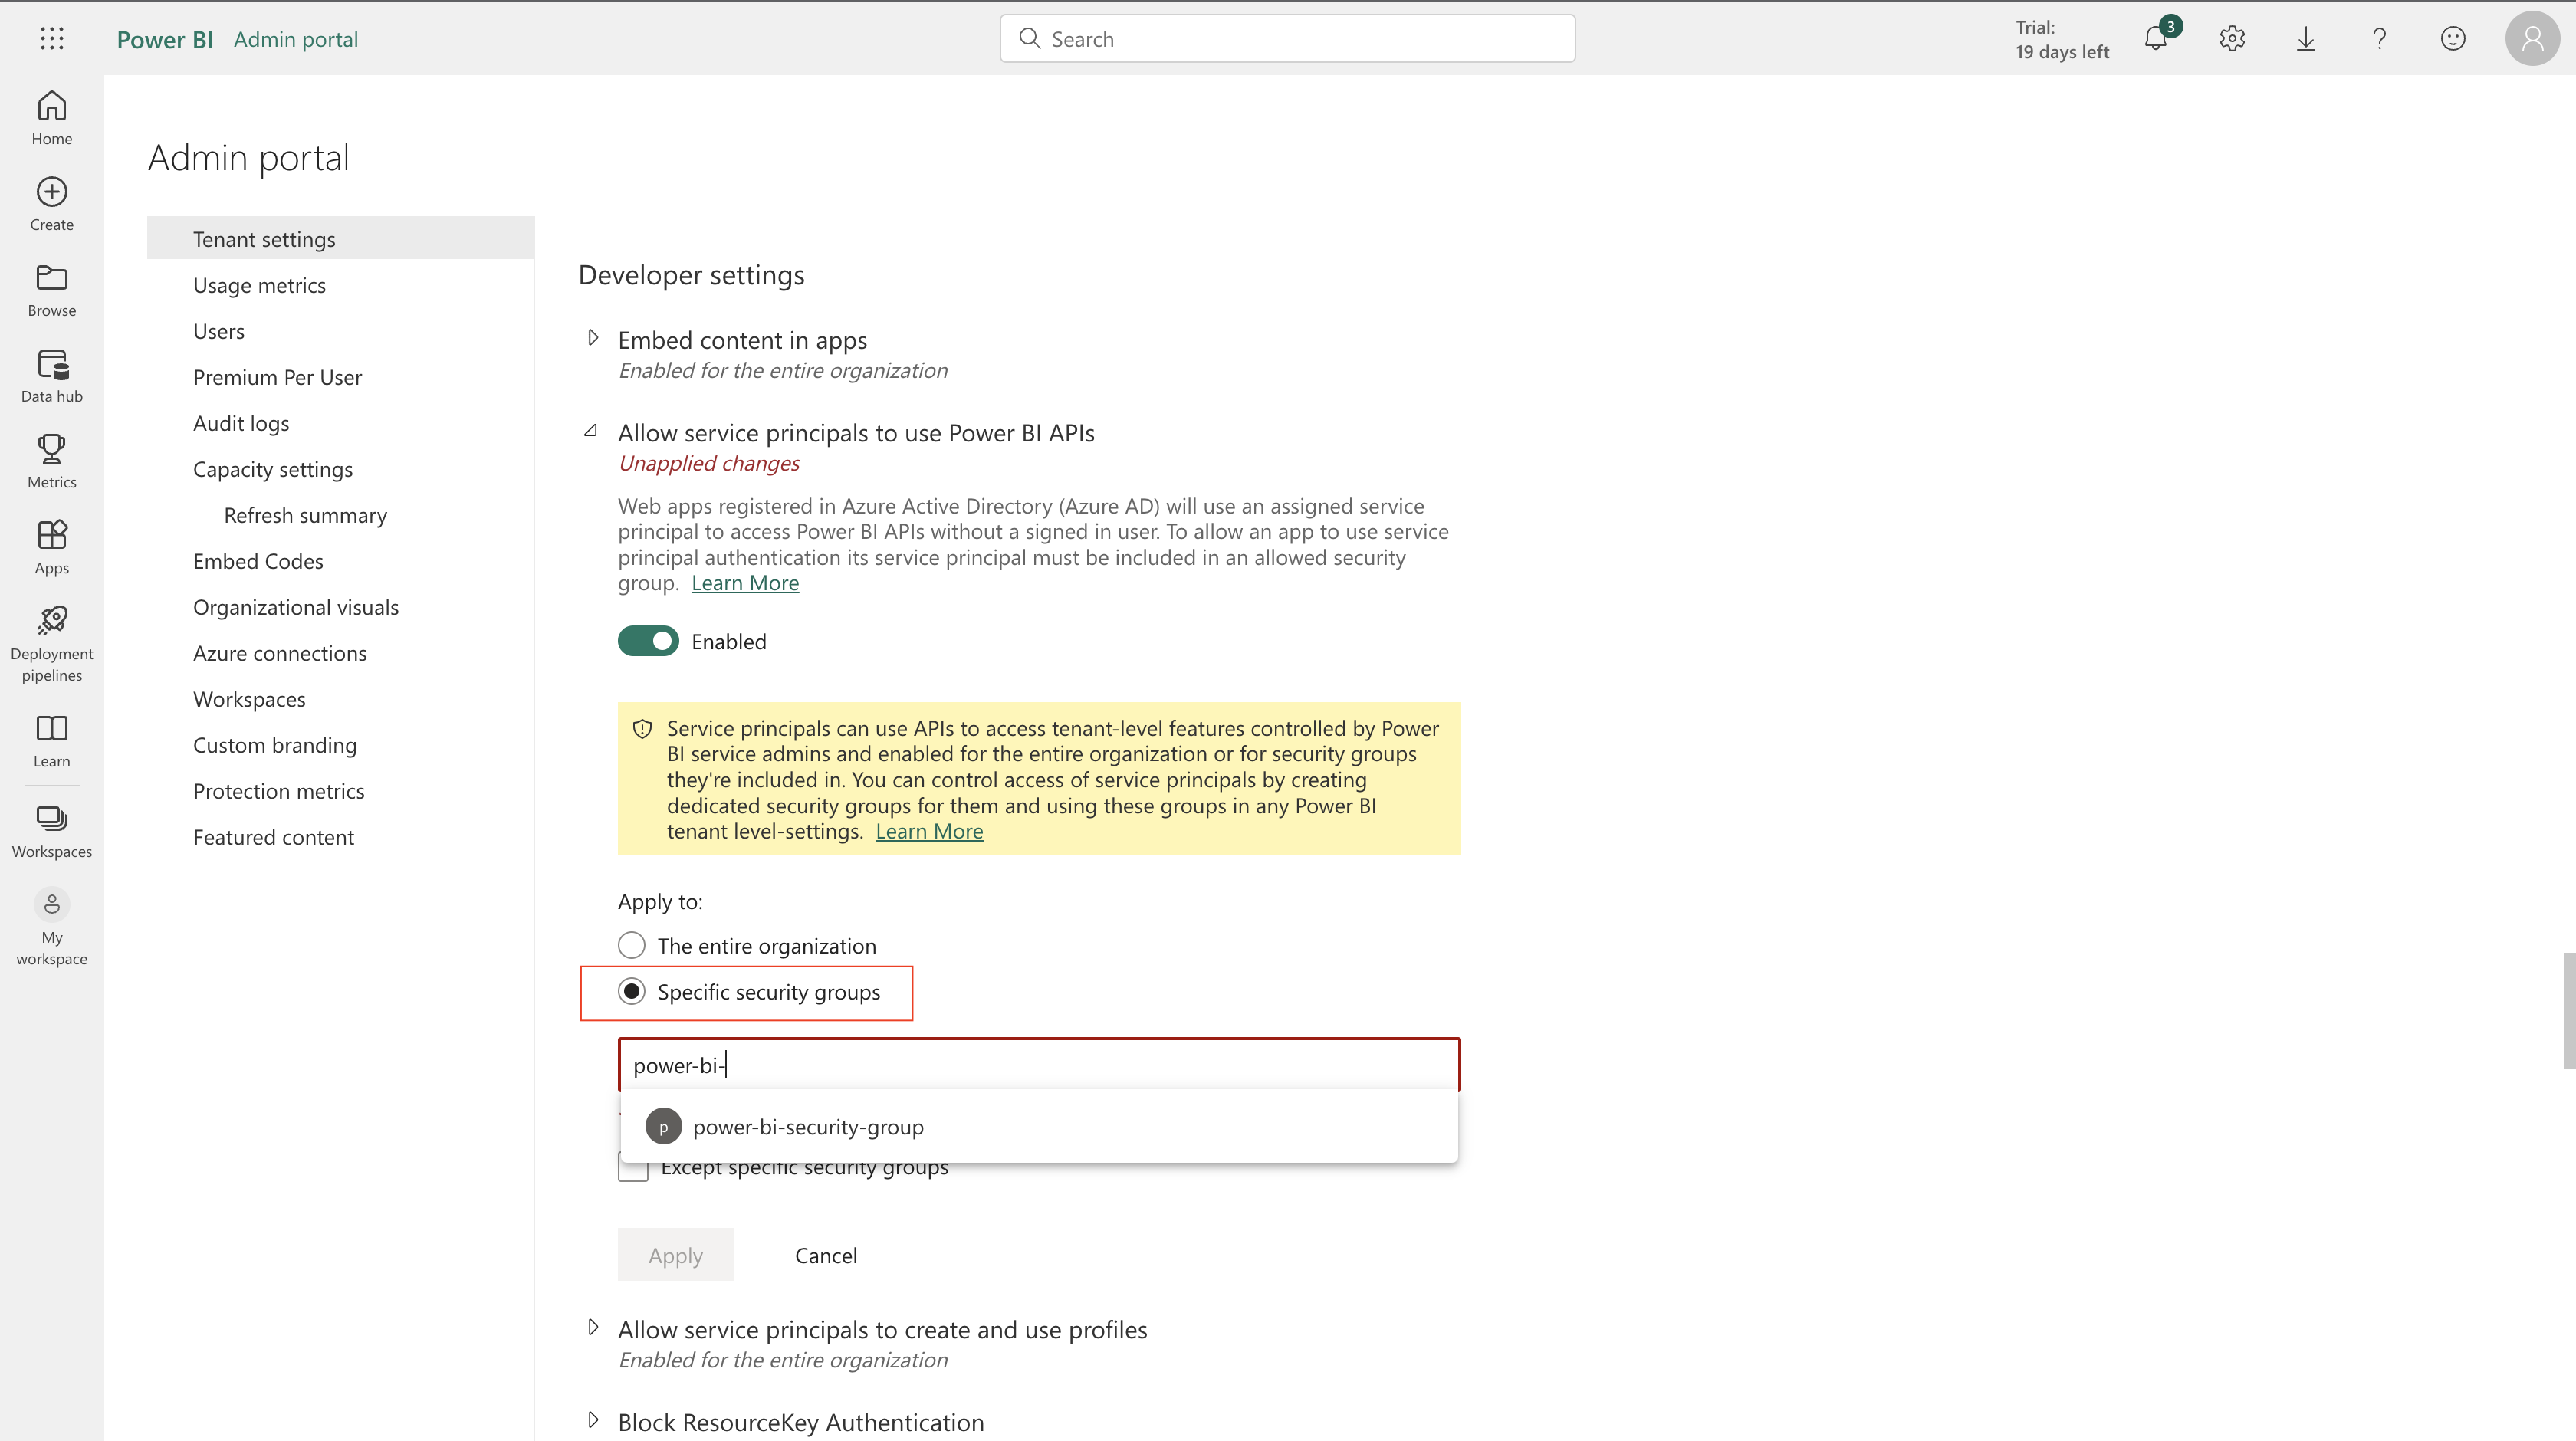
- Click
Workspacesicon in left sidebar. - Click three-dot icon next to your Workspace, then click
Workspace access - Enter security group name, select "Member", then click
Add.
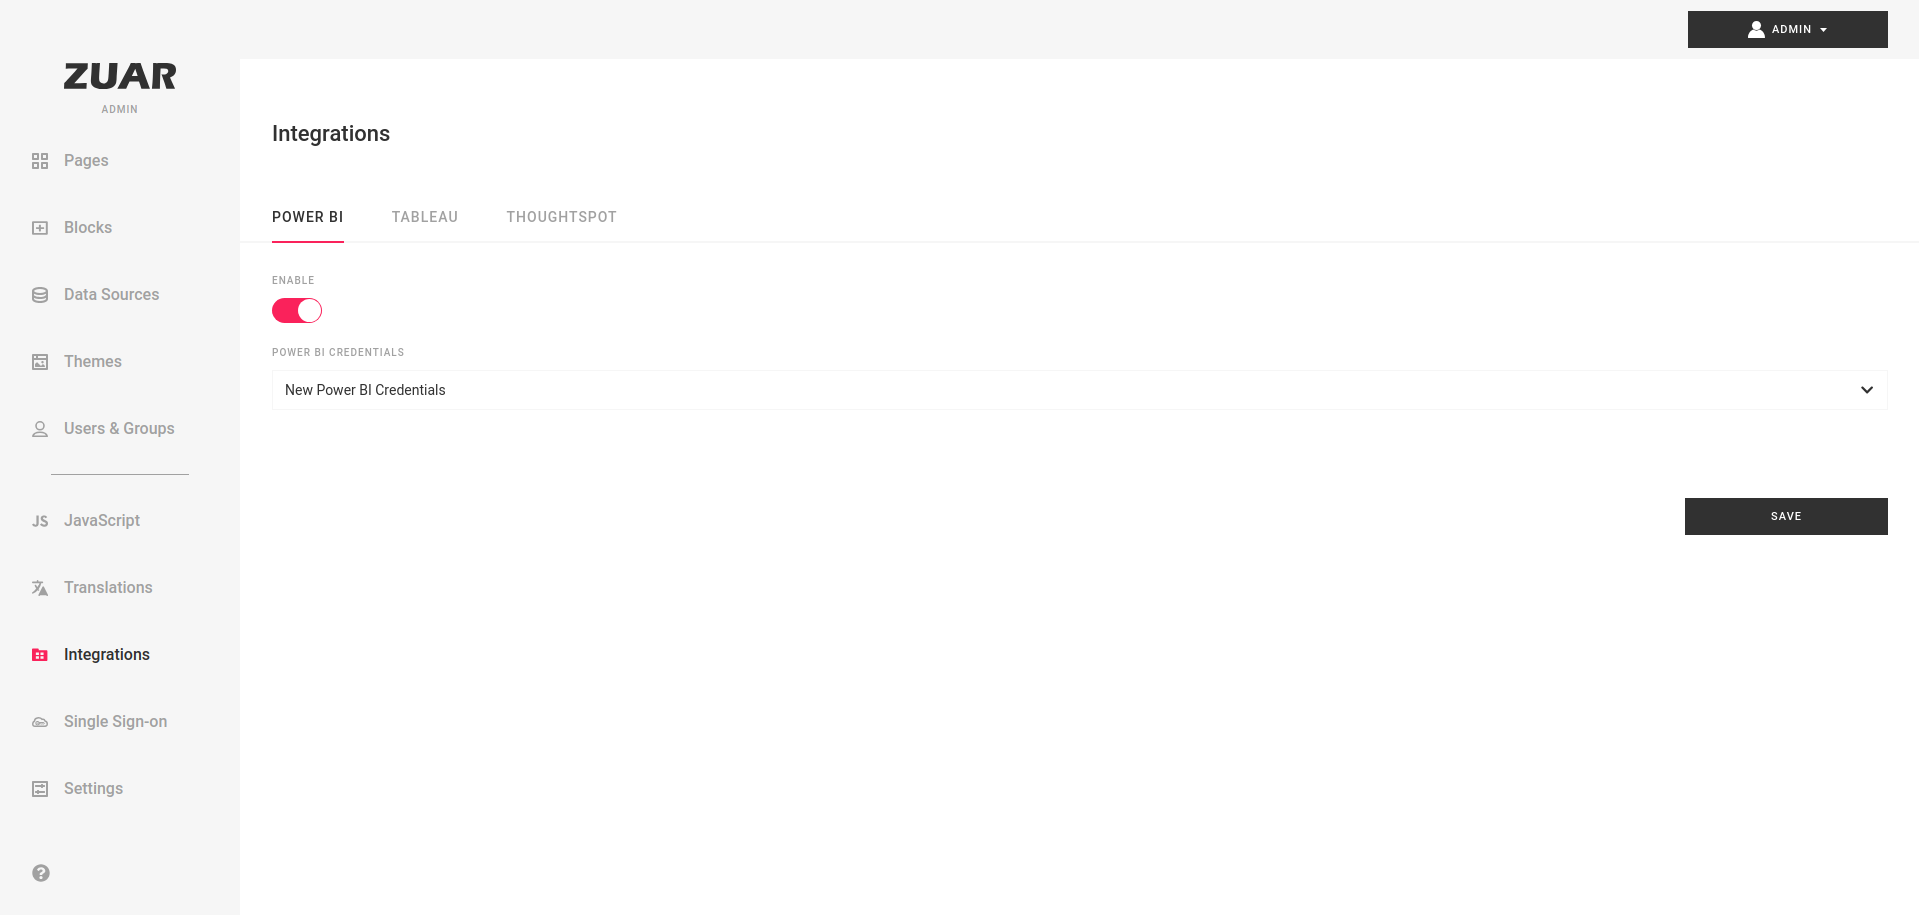
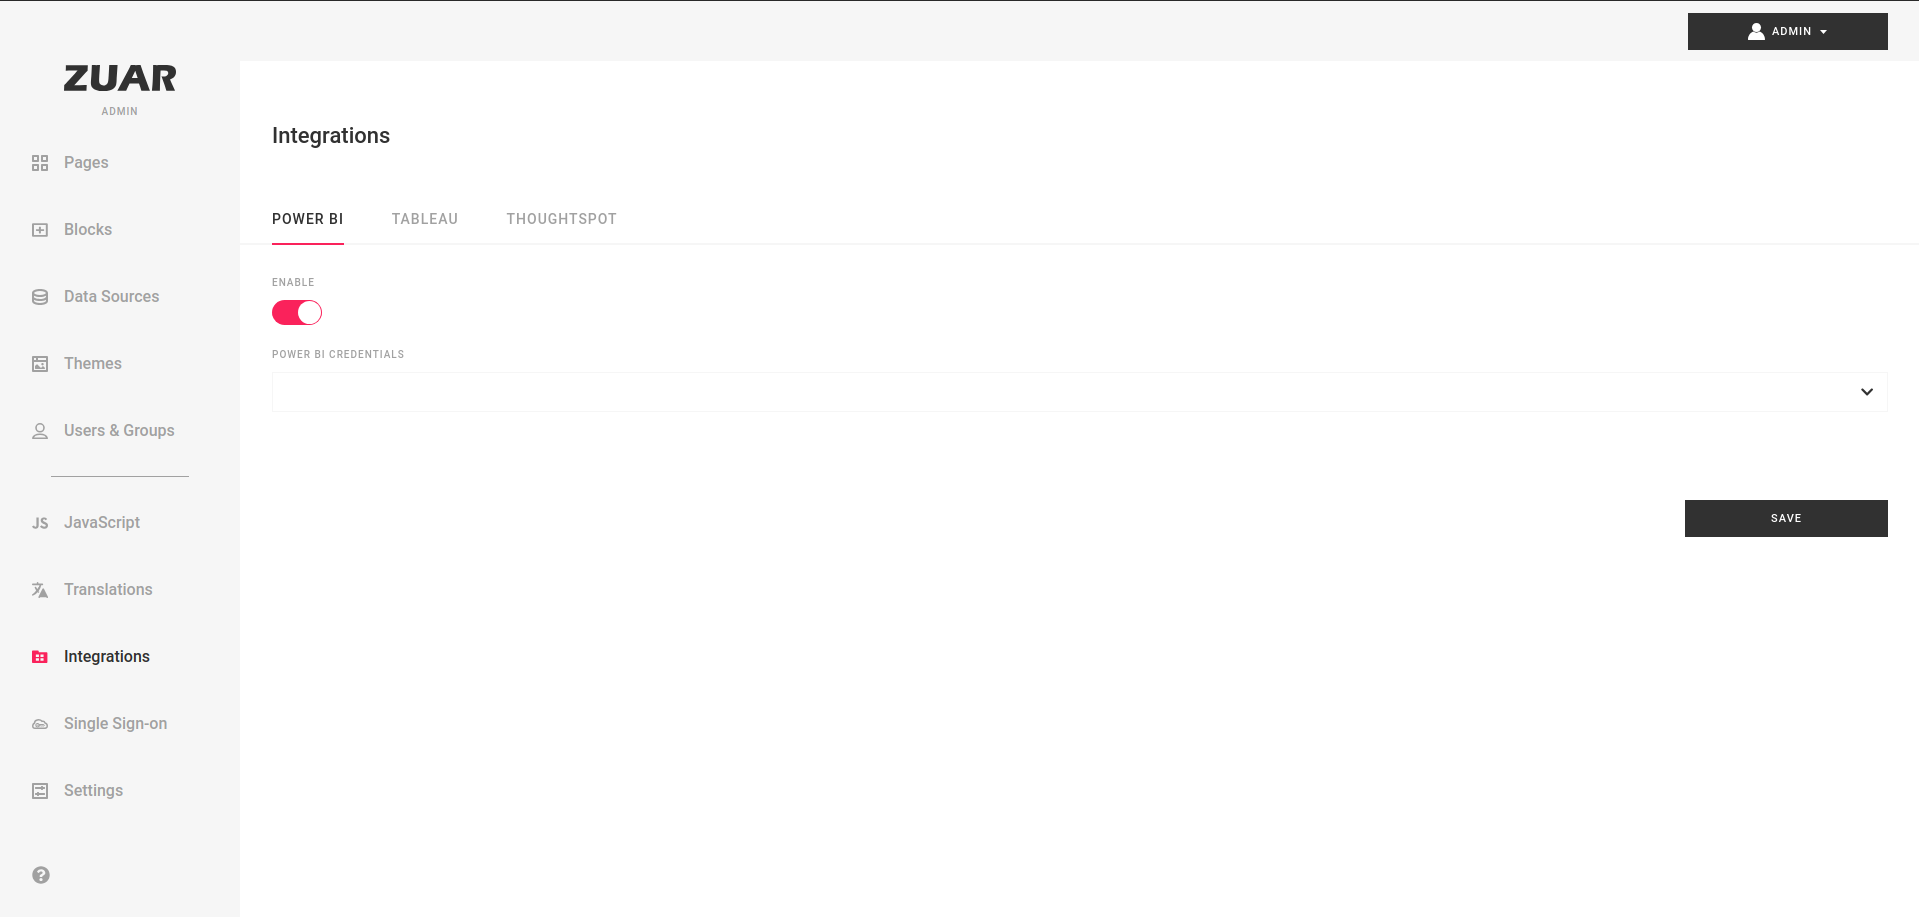
Portal Power BI Integration
To connect you Power BI instance to the Portal you can use Admin's Integrations section.
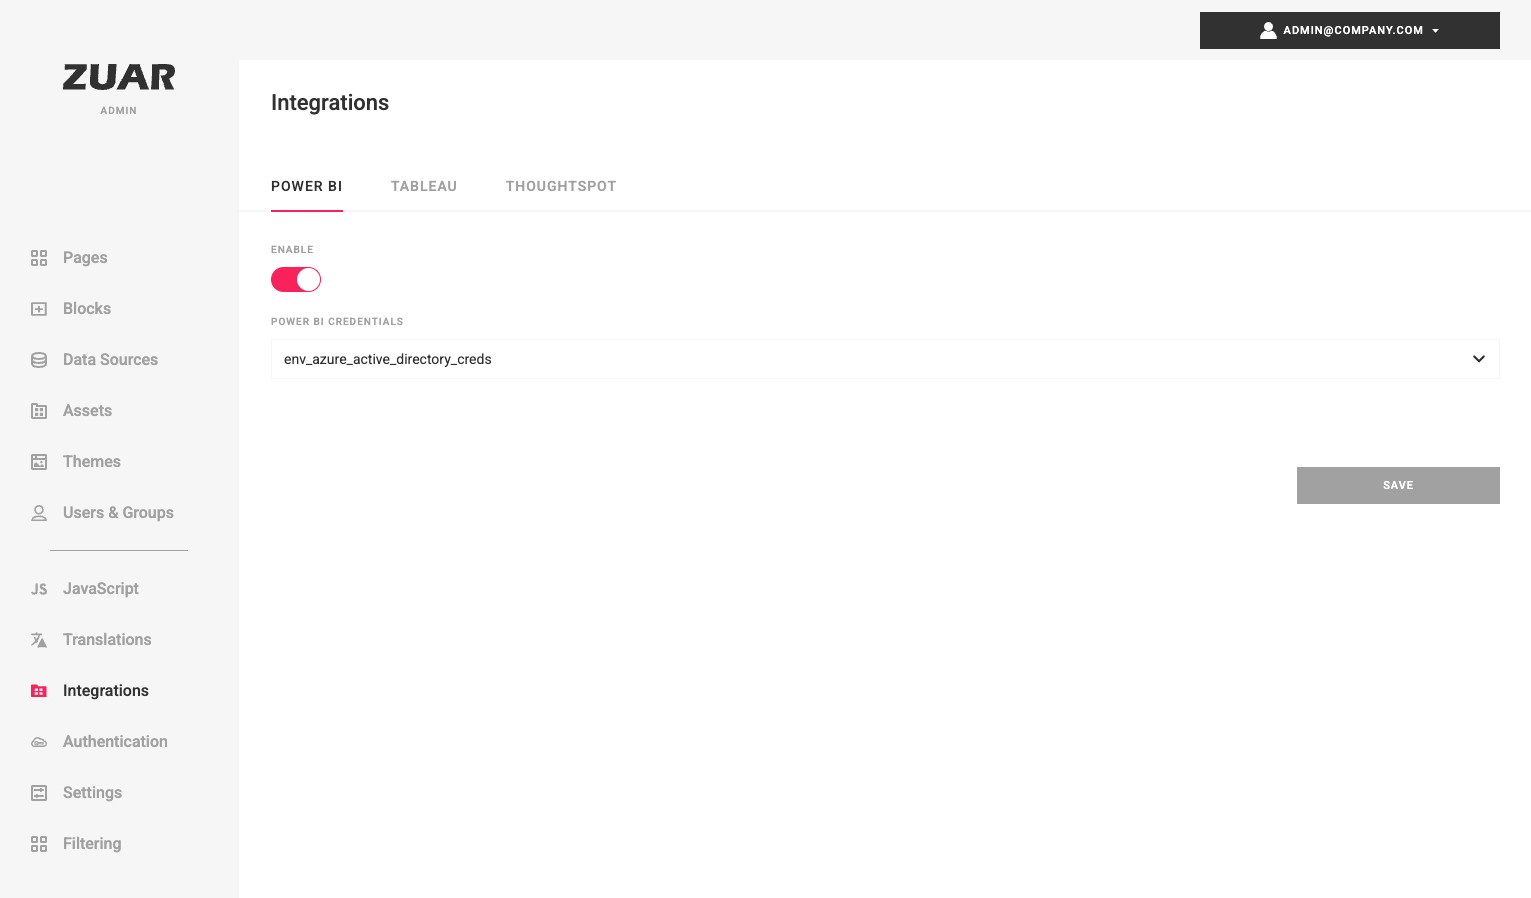
- Enable Power BI integration
- Click on
ThoughtSpot credentialsfield to open dropdown and click+ Create New Credentials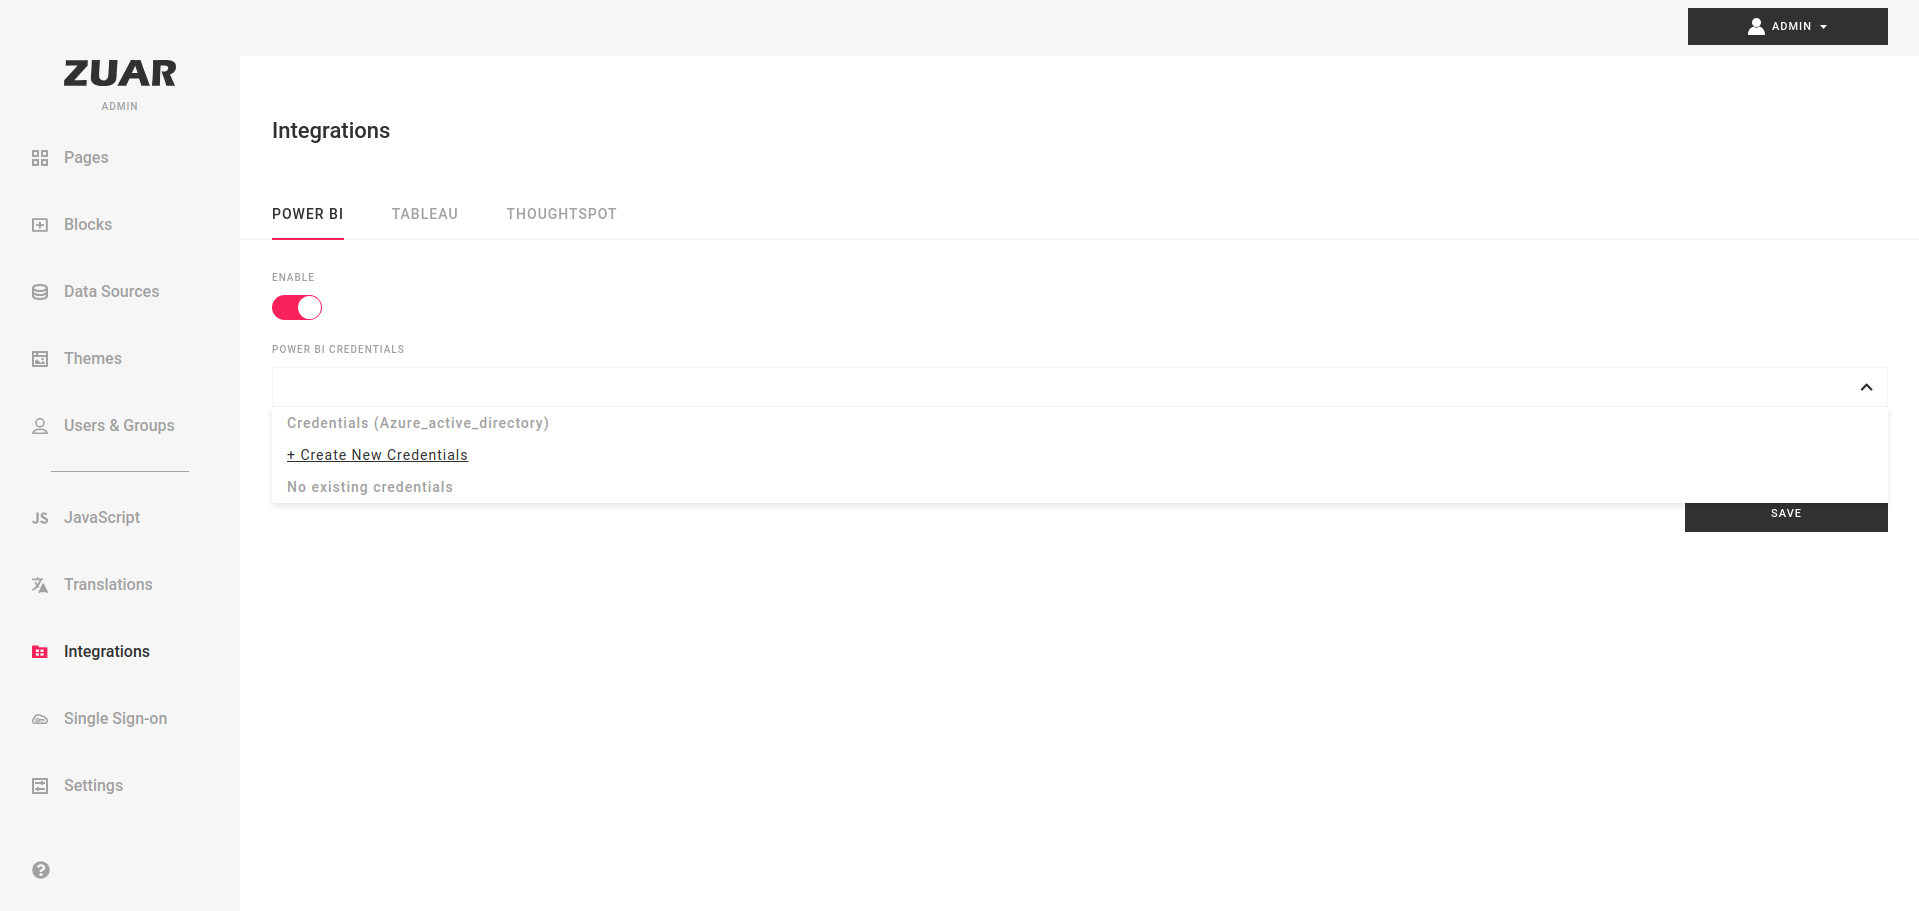
- In modal fill
Client ID,Client Secret,Tenant IDfields and clickSave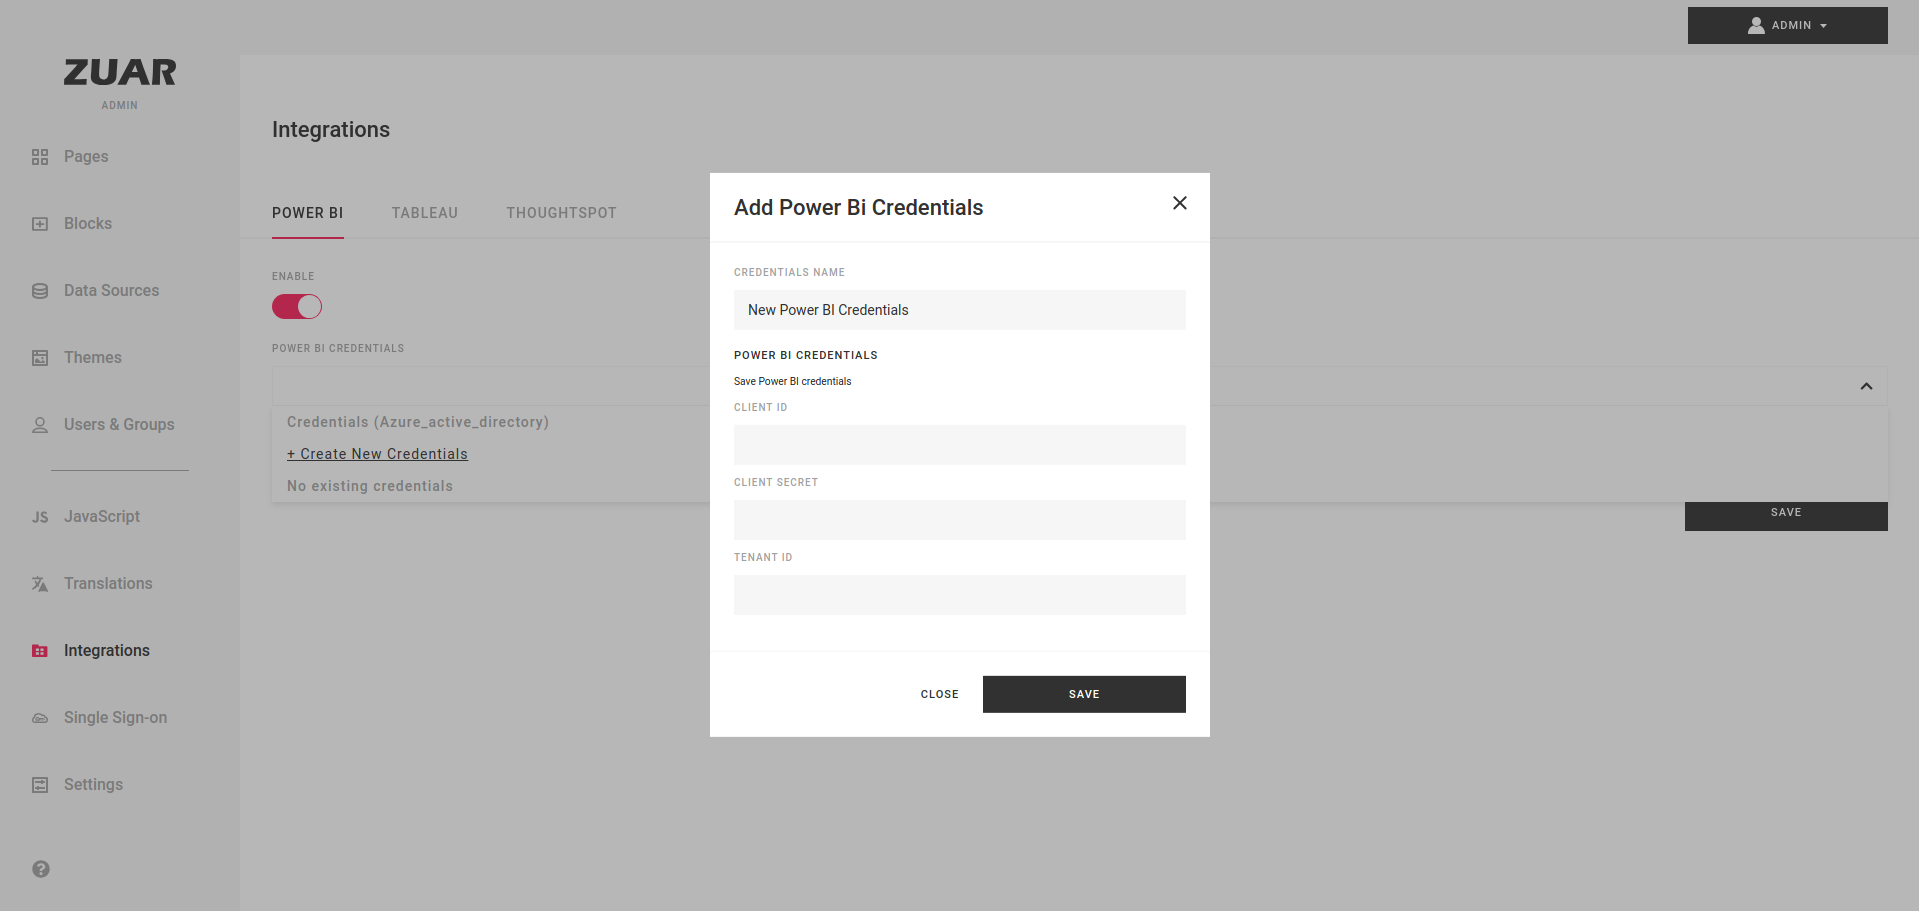
- This is it! Your Power BI integration is complete.